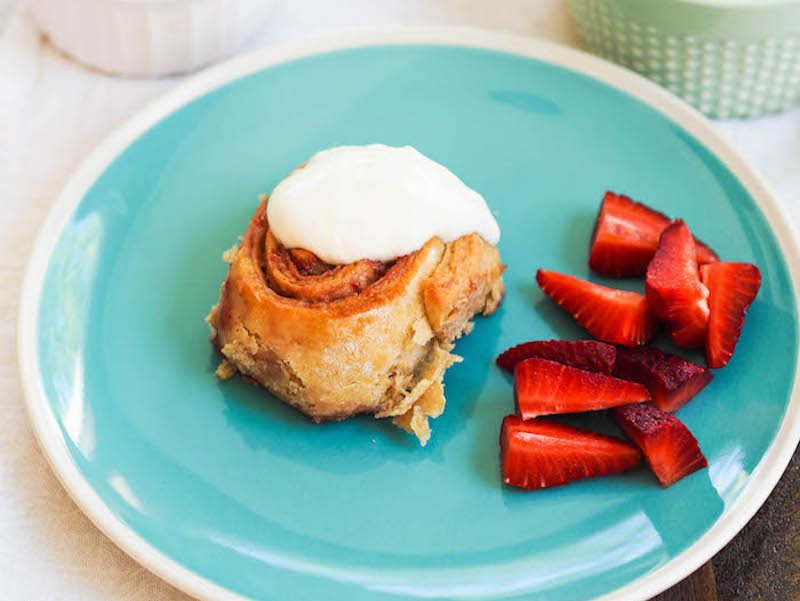
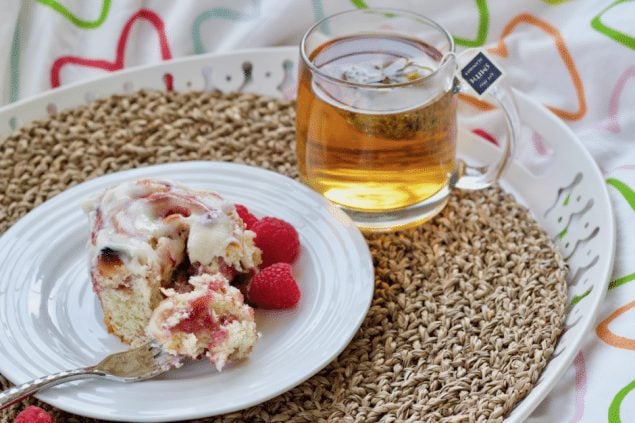
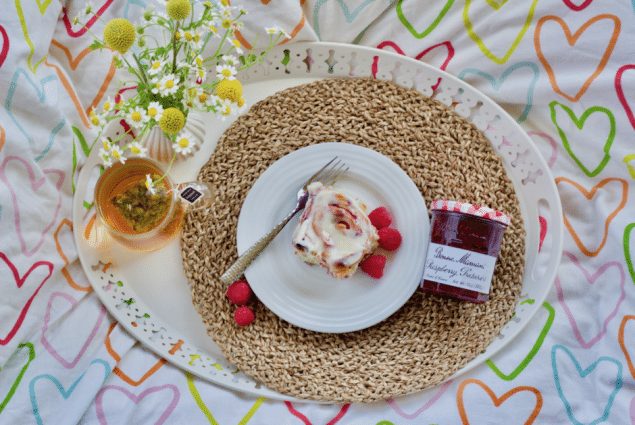
Swap out the usual cinnamon roll for these raspberry sweet rolls with bright lemon zest.
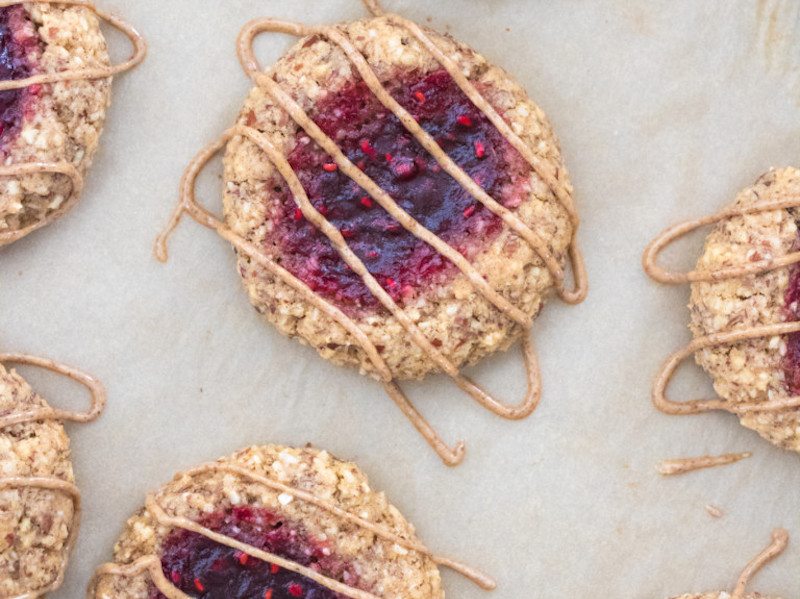
Fruit preserves are one of the most versatile items in a kitchen. They keep well, and can be added to any meal of the day–but my favorite use is, of course, adding preserves to breakfast dishes. Traditional, I know, but there’s something about having a variety of jellies to choose from for my scone, biscuit, or toast that I really love. So I thought recently–why couldn’t I extend this philosophy to more complex recipes I enjoy? Enter: Raspberry Sweet Rolls (think like cinnamon rolls, but with preserves!).
And so today I get to share with you my favorite recipe for sweet rolls featuring raspberry preserves. Good raspberry preserves align with my food preferences for no GMOs, no HFC (high-fructose corn syrup) or other additives, and while it doesn’t apply to this specific use, the preserves are gluten-free.

This recipe is much more straightforward than it may first appear, and I think even if you’ve never made sweet rolls or their very close cousin, cinnamon rolls, you can have a lot of success with this recipe in particular. Please do yourself a favor, however, and read through the entire recipe prior to signing on because it is an odd balance of active an inactive time totaling to about 4-4 1/2 hours. I have bolded the timing below to help it jump out more because I found myself referring back to books a lot when researching this process and timing is key.

Raspberry Sweet Rolls
- Yield: About 12 rolls
Description
Swap out the usual cinnamon roll for these raspberry sweet rolls with bright lemon zest.
Ingredients
Dough:
- 1 cup whole milk
- 1 1/2 tablespoons active dry yeast
- 2/3 cup sugar
- 1/2 cup (1 stick) unsalted butter, sliced
- 2 eggs
- 1/2 teaspoon salt
- 1 teaspoon fresh lemon zest, grated
- 4 1/4 cups all-purpose flour, plus more for dusting
- Nonstick spray or additional softened butter, for greasing
Filling:
- 1 1/3 jars (about 17 oz total) raspberry preserves
- Zest of 1 large lemon
Vanilla glaze:
- 3 tablespoons unsalted butter
- 1 1/2 tablespoons heavy whipping cream
- 3/4 cup powdered sugar
- 1 vanilla bean, scraped, or 1/4 teaspoon vanilla bean paste
Instructions
- Heat the milk in a small saucepan over low heat to 95°F (35°C), monitoring with a thermometer. Pour the warm milk into the bowl of a stand mixer fitted with the dough hook. Stir in the sugar, then the yeast. Let sit undisturbed for 5 minutes until foamy.
- With the mixer on medium-low, add the butter, then the lemon zest, then the flour 1 cup at a time, incorporating each addition to about 90% before adding the next. Scrape down the sides as needed. Once all the flour is added, increase the speed by one level and mix for 8–10 minutes, stopping once halfway to scrape the bowl. The dough should be soft and slightly tacky.
- Turn the dough out onto a lightly floured surface and knead 2–3 times. Transfer to a large buttered bowl, cover with plastic wrap, and let rise in a warm spot 1½–2 hours, until nearly doubled.
- On a large lightly floured surface, roll the dough with a floured rolling pin to roughly 10 by 24 inches, about 1/4 inch thick.
- Spread the raspberry preserves evenly across the dough, leaving a 1-inch border along the far long edge. Sprinkle the lemon zest evenly over the preserves.
- Prepare a 9×13-inch baking dish by greasing it and lining the bottom with parchment paper. Cut a 12-inch length of baking twine or unflavored dental floss and set it nearby.
- Starting from the long end closest to you, roll the dough up tightly and evenly away from you into one long log. Press the empty far border firmly to seal the seam.
- Using the baking twine, slide it under the roll and cross the ends over the top to cut cleanly through the dough (or use a very sharp knife). Cut into rolls about 1½–2 inches thick and arrange them in the prepared pan. Spoon any escaped preserves back into the creases.
- Cover loosely and let rise in a warm, undisturbed spot for 2 hours (90 minutes will do in a pinch) until the rolls fill the pan and look pillowy.
- Remove the rolls from the warm spot if stored there. Preheat the oven to 425°F (218°C). Bake 20–25 minutes until the tops are deep golden brown. Remove and cool in the pan for 30 minutes.
- While the rolls cool, make the glaze: melt the butter in a small saucepan over low heat, then remove from heat. Whisk in the heavy cream, then the vanilla bean seeds (or paste), then the powdered sugar a few tablespoons at a time until smooth and pourable.
- Drizzle the glaze over the warm rolls. Serve immediately.
Notes
These rolls benefit from full 2-hour proof times — the dough is enriched and needs the time to fully puff. To get ahead, assemble the rolls the night before, cover, and refrigerate overnight; let them come to room temperature for 45–60 minutes before baking. Using twine or unflavored dental floss to cut the rolls keeps them perfectly round without squashing.
- Category: Baking, Breakfast
Frequently Asked Questions
Can I use a different type of fruit preserves instead of raspberry?
Yes, you can substitute other fruit preserves like strawberry or blueberry, but keep in mind that the flavor profile will change.
Why is lemon zest included in the recipe?
Lemon zest adds a bright flavor that complements the sweetness of the raspberry preserves, enhancing the overall taste of the sweet rolls.
What type of dough is used for the raspberry sweet rolls?
The recipe uses a basic sweet roll dough similar to cinnamon roll dough, which is made with flour, sugar, yeast, and milk.