As with pie crusts, cakes have been the topic of hundreds of tips and tricks and anxiety-causing instructional manuals. And as with pie crusts, I’ll attempt to clear up some of it here (while admittedly adding to the fray).
This recipe is a classic butter cake, all of which generally follow the same process (once I realized this pattern, recipes became a lot easier to understand and I started seeing infinite possibilities for adapting and adding new flavors):
- Cream butter and sugar
- Add eggs and vanilla
- Alternate adding dry ingredients and liquid (usually milk or buttermilk)
Other cakes use oils, yogurt, sour cream, or other ingredients as fats or liquids, and it’s important to note that all of these various ingredients aren’t necessarily interchangeable – like with most baking, cakes are an intricate series of chemical reactions and well-balanced ingredients. (If you ever have questions about adapting cake recipes or how you might make a cake with a particular flavor, contact me!)
When I bake a cake or when I teach students about cake baking, here are things I keep in mind. No one of these items will cause your cake to be a disaster, but together they help make your cake the best it can be!
- Get your oven temperature right Even on the newest ovens, things can be a little off. One of the first things I tell my students to get for their kitchens is an oven thermometer! I know that my home oven is around 15-20 degrees cooler than it thinks it is, so I always heat my oven to a higher temperature (370 degrees for the cake recipe below). Most ovens also take much longer than they think to heat to the desired temperature – don’t believe the beep. Some ovens can take an extra 20 minutes longer than the beep to get to the right temperature – that’s half the baking time for this cake!
- Bring ingredients to room temperature Butter is most important here because it needs to be softened in order to cream it, but having your eggs, buttermilk, and other refrigerated ingredients at room temperature will help them integrate more fully into the batter and keep your butter from getting too cold. (Pro tip: in a pinch, cold butter can be mostly beaten into submission with a stand mixer or electric hand mixer.)
- Cream the butter and sugar the right way When a recipe says to “cream” butter and sugar until “light and fluffy,” this means something fairly specific – beat on as high a speed you can without it splattering all over the room, for upwards of 5 minutes. Yes, really that long. This is an integral step that will keep your cake tender, because all those grains of sugar are carving pockets of air in the butter that are integral in the cake batter rising as it bakes. The butter lightens as it’s creamed because of all those bajillions of miniscule air pockets.
- Measure flour correctly A cup of packed flour is very different than a cup of fluffy, aerated flour. Measuring by weight is always best, but I know it’s not always practical. Two options: fluff up the flour in your bag or container before dipping your measuring cup in, OR use a large spoon or smaller measuring cup to scoop flour into the measuring cup you’re using. Make sure to use a knife or other flat item to scootch excess flour off the top of the cup, and don’t pack the flour or tap it on the counter to settle it.
- Don’t overwork the batter Cream the heck out of the butter and sugar, but once the flour is incorporated into your batter, use a very light hand! I usually stop the mixer while there’s still a bit of dry ingredient left unincorporated, then finish those bits with a rubber spatula before scraping the batter into the pans. The more you mix something with flour, the more the gluten strands develop – lovely in bread (this is why you knead bread dough), but not so great in your tender, soft cake.
- Rotate pans during baking Even some of the best ovens can have hot spots or inconsistent temperature. Rotate the pans halfway through baking, especially if you have the pans on different oven racks.
- Don’t over-bake Over-baking is an easy way to turn a beautiful, tender cake into a dry one. When you take the cakes out of the oven, they and the pans they’re in are still piping hot, which means they continue to bake a bit after they emerge from the heat. If you take cakes out when they’re done, they may overbake while you assume they’re innocently cooling on the counter. I like to test cakes by lightly pressing a fingertip right in the center – if the depression mostly springs back after I press, I’ll take the cakes out.
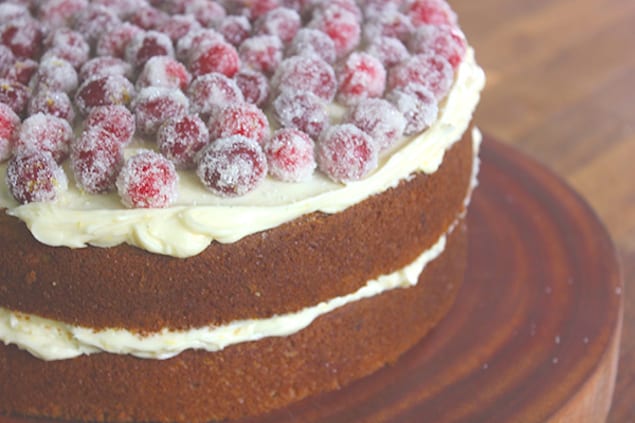
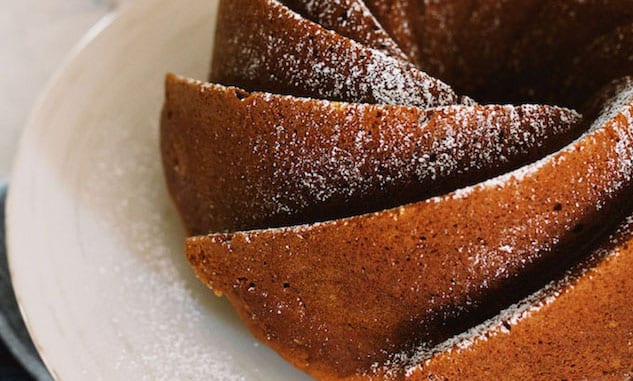
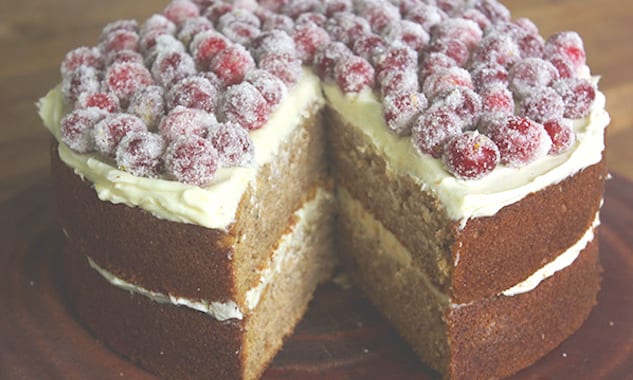
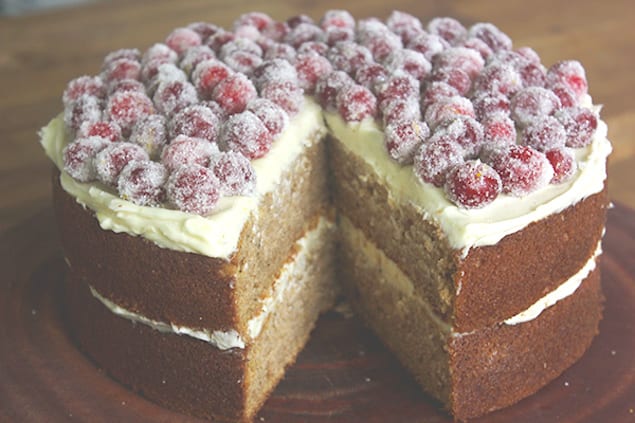
Spice Cake with Orange-Vanilla Frosting and Cranberries
- Yield: Makes enough frosting to moderately frost a double-layer cake (around 3 cups), Makes two 8-9? cake layers, and about 2 cups of cranberries
Description
This buttermilk spice cake is a beautiful holiday treat. Follow Bowen’s solid baking tips to learn how to create delicious cakes all season long.
Ingredients
Cake
- 2 cups (14 oz.) sugar
- 1 cup (2 sticks or 8 oz.) butter, room temperature
- 4 eggs
- 1 tsp. vanilla
- 3 cups (13 1/2 oz.) flour
- 2 tsp. baking soda
- 1/2 tsp. salt
- 1 tsp. cloves
- 1 Tbsp. cinnamon
- 1 Tbsp. nutmeg
- 2 cups (16 oz.) buttermilk
Frosting
- 8 oz. cold cream cheese
- 6 Tbsp. (3 oz.) butter, room temperature
- 3 cups powdered sugar, sifted
- 2 tsp. vanilla
- Zest of 1 orange
Orange-vanilla sugared cranberries
- 1 cup sugar, plus more for coating cranberries
- 1 cup water
- Zest of 1/2 orange
- 1/2 vanilla bean or 2 tsp. vanilla bean paste
- 2 cups fresh cranberries
Instructions
Cake
- Heat oven to 350F. Prepare two cake pans by greasing them, lining the bottom with a parchment circle, and greasing the parchment (I generally use softened butter or canola oil spray for greasing). (To make the parchment circle, trace the pan on a piece of parchment and cut the circle just slightly inside that border so that it will fit.)
- Combine dry ingredients Whisk together flour, baking soda, salt, cloves, cinnamon, and nutmeg in a medium bowl. Set aside.
- Cream butter and sugar in a stand mixer or using electric hand mixers, beating on medium-high for 3-5 minutes.
- Beat in eggs and vanilla, adding one egg at a time and waiting until incorporated before adding the next and then the vanilla.
- Add dry ingredients and buttermilk Reduce mixer speed to low and add dry ingredients and buttermilk in 5 alternating batches, starting and ending with dry (1/3 dry, 1/2 buttermilk, 1/3 dry, 1/2 buttermilk, 1/3 dry). Turn off the mixer just before the final dry ingredients are incorporated, then finish with a rubber spatula. Scrape the batter into the prepared pans and bake for 38-42 minutes, until a cake test or toothpick inserted into the center of the cake comes out clean or until the top springs back when lightly pressed. Rotate pans halfway through the baking time. Cool in the pans for at least 10 minutes, then run a sharp knife around the edges of the pan and invert onto a wire rack to continue cooling.
Frosting
- Combine cream cheese and butter in a food processor, stand mixer, or bowl with electric hand mixer, until well combined.
- Add sugar and flavoring and continue mixing until completely smooth. If frosting seems really thick, mix slightly longer. Don’t mix more than needed!
Orange-vanilla sugared cranberries
- Soak cranberries in syrup Combine sugar, water, orange zest, and vanilla in a small pot (if using 1/2 vanilla bean, split lengthwise and scrape seeds into the pot along with the pod). Heat over medium-high, stirring occasionally to dissolve the sugar. Turn off heat, add cranberries, toss to coat the berries, and let sit at least 8 hours.
- Drain and coat berries Drain the cranberries of their syrup and toss with more sugar. Spread on a baking sheet or other surface to dry for at least 1 hour (preferably 2) before using.
Notes
Cake Making ahead/storage: Cake layers will keep in the refrigerator for up to 72 hours, wrapped well in plastic wrap. If you need to store any longer than that, wrap in plastic wrap and foil and freeze – let sit in the refrigerator at least overnight before using. Cake layers will freeze well up to 1 month.
Frosting Storage/making ahead: Frosting can be made up to 5 days ahead, but will be difficult to spread any colder than room temperature – let stand out to soften.
Cranberries Storage/making ahead: Sugared cranberries will keep in a covered container in the refrigerator for at least a few days.
- Category: Dessert, Baking