
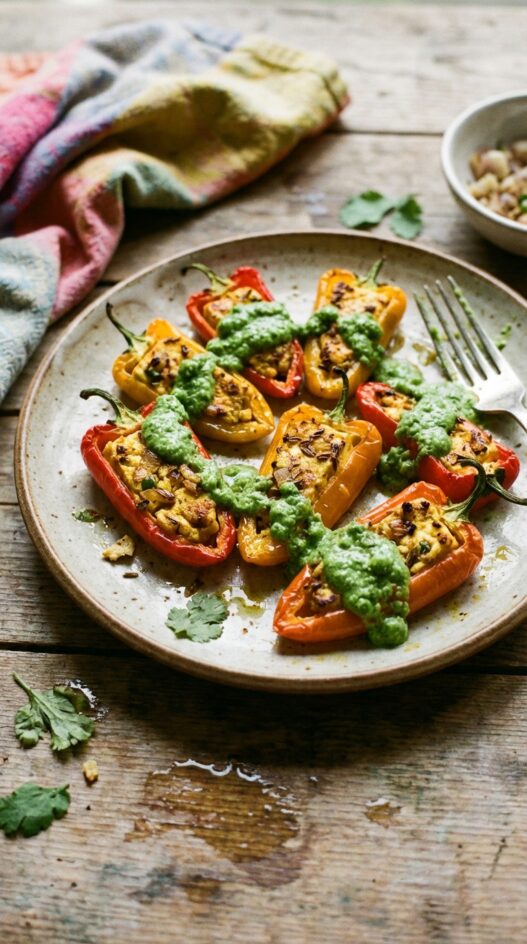
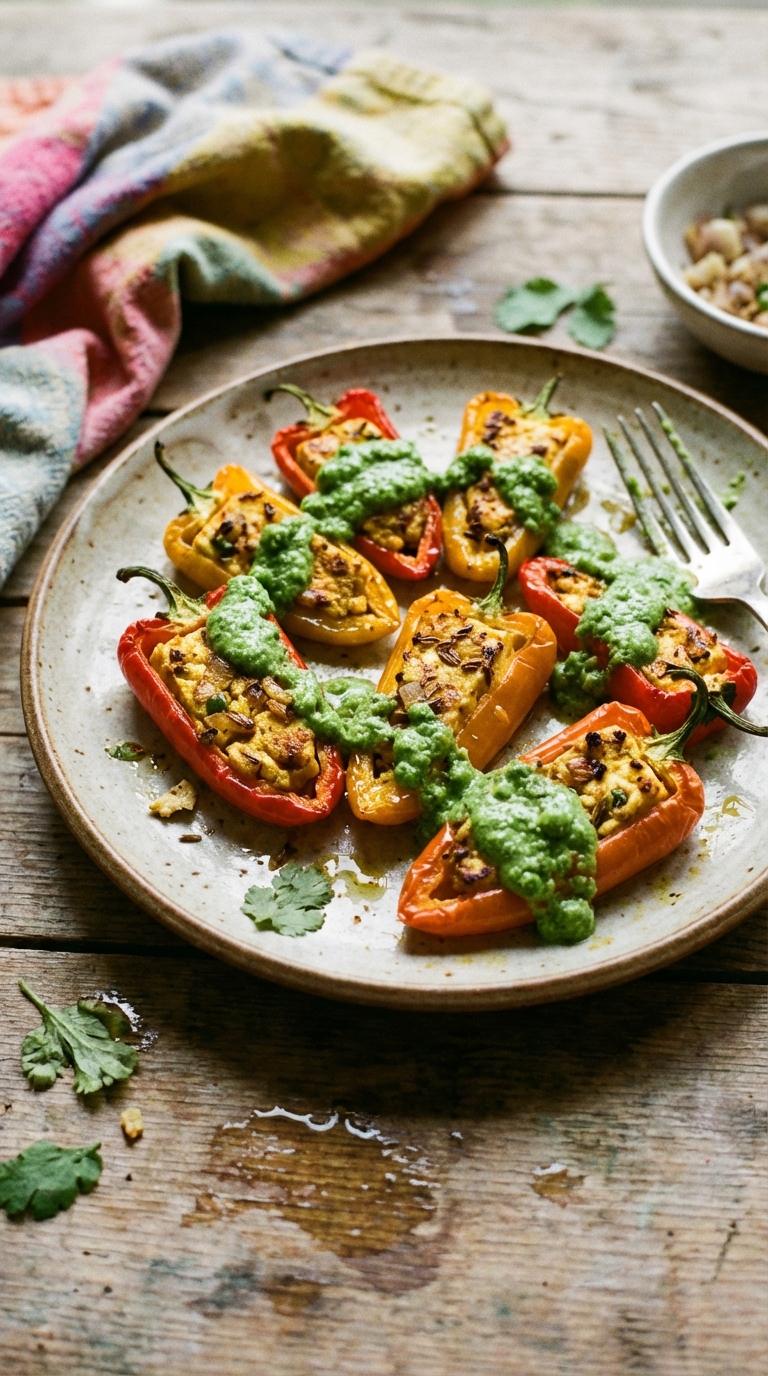
I wanted an Indian appetiser that was not a samosa or a pakora, something baked instead of fried, something I could make for twelve people without standing over a pot of oil. These peppers solved it. Mini sweet peppers halved and filled with spiced paneer, baked at 180C (350F) until the peppers go soft and the filling firms up. Fifteen minutes in the oven. No frying. No mess.
The pea chutney alongside them is what turns this from a side dish into a real appetiser. It is dead simple: blanched green peas, yogurt, cilantro, lemon juice, and salt, all blended together into a bright green sauce. Cold chutney, warm peppers. That contrast is why this is the appetizer we make first when people are coming over.
How to Make Paneer Stuffed Peppers
Build the Paneer Filling with a Proper Temper
Heat oil in a pan. When hot, add cumin seeds and let them brown. Add the chopped shallot and cook until translucent. Then garlic, green chili, and ginger for 30 seconds until fragrant.
Add coriander powder, turmeric, and garam masala. Stir for a few seconds so the spices bloom in the oil. Add the crumbled paneer, mix everything together, and season with salt. Cook for 2-3 minutes. The filling should be dry, not wet. Let it cool slightly before stuffing the peppers.
Stuff and Bake, Then Blend the Chutney
Halve the mini sweet peppers lengthwise. Lay them on a greased baking sheet, cut side up. Spoon the paneer filling into each half. Do not overfill or the filling falls out as the peppers soften.
Bake for 15 minutes at 180C (350F). The peppers should be soft but still hold their shape.
While the peppers bake, blend the chutney: peas, cilantro, yogurt, lemon juice, and salt. It should be smooth and pourable. Drizzle it over the baked peppers just before serving.

Paneer Stuffed Peppers with Pea Chutney
- Total Time: 40 minutes
- Yield: Serves 4
- Diet: Vegetarian
Description
Mini sweet peppers filled with a flavorful paneer stir-fry and topped with a vibrant pea chutney. A delightful two-bite appetizer, perfect for warm gatherings.
Ingredients
- 1/2 pounds (227 g) mini sweet peppers
- 4 oz (113 g) paneer cheese
- 1 tablespoon oil
- 1 small shallot
- 1 inch ginger piece
- 3 garlic cloves
- 2 Indian green chills
- 1/2 teaspoon cumin seeds
- 1 teaspoon coriander powder
- 1/3 teaspoon turmeric powder
- 1/4 teaspoon garam masala
- Salt
- 1/3 cups (79 ml) blanched green peas
- 3 tablespoons yogurt
- 3 tablespoons cilantro leaves
- squeeze of lemon
Instructions
- Preheat oven to 350°F (177°C). Lightly grease a cookie sheet pan.
- In a pan under medium-high heat, place 1 tablespoon of oil. When hot, add cumin seeds. When seeds start to brown, add shallot. Turn heat to medium and cook until translucent. Add garlic, green chili, and ginger. Fry for 30 seconds, mixing until fragrant. Add coriander powder, turmeric, and garam masala; mix well. Fry for a few seconds. Add a few drops of water if needed. Add paneer cheese and mix well. Sauté paneer for a few minutes. Add salt to taste and turn off heat.
- Layer halved sweet mini peppers on the greased cookie sheet pan. Fill pepper halves with paneer stir-fry using a teaspoon. Bake in the preheated oven for 15 minutes, until peppers are soft and slightly dried on top.
- Meanwhile, in a food processor or blender, combine peas, cilantro, and yogurt. Puree and transfer to a bowl. Add lemon juice and salt to taste.
- Line a plate with the baked peppers and drizzle with the green peas chutney. Serve immediately.
Notes
- For optimal flavor, use fresh paneer cheese. If using pre-packaged, ensure it’s not overly dry.
- To prevent the peppers from becoming soggy, ensure they’re patted dry before filling.
- Leftovers can be stored in an airtight container in the refrigerator for up to 2 days; reheat gently before serving.
- Prep Time: 15 minutes
- Cook Time: 25 minutes
- Category: Appetizer
- Method: Roasting
- Cuisine: Indian
Nutrition
- Serving Size: 1 stuffed pepper
- Calories: 200
- Sugar: 5
- Sodium: 300
- Fat: 12
- Saturated Fat: 7
- Unsaturated Fat: 4
- Carbohydrates: 20
- Fiber: 4
- Protein: 10
- Cholesterol: 20
Frequently Asked Questions
What is paneer?
A fresh Indian cheese that does not melt when cooked. It crumbles into firm pieces that hold their shape in the filling. If you cannot find it, extra-firm tofu pressed dry is the closest substitute in texture.
Can I use frozen peas for the chutney?
Yes. Frozen peas work well without thawing. The blender breaks them down either way. Blanched fresh peas give a brighter color but frozen are exactly fine.
Can I make these ahead?
Stuff the peppers and refrigerate for up to 6 hours before baking. Add 3-4 minutes to the bake time since they will be cold. Make the chutney fresh or up to a day ahead. It keeps well in the fridge.
If You Liked This Recipe, You’ll Love These
- Herb Pork Chops with Apple Chutney
- Aged Havarti, Pear Chutney, and Walnut Puff Triangles
- Cran-Apple Chutney Crisps with Aged Havarti
- Ploughman’s Grilled Cheese with Apple Chile Chutney




Hi Chitra, can these be filled the day before and baked when guests arrive? Made them once already and they were great, doing them for a birthday next.
Yes, fill them the day before and keep them covered in the fridge. Bake straight from cold and give them an extra couple of minutes at 350.
Hi,
Thanks for awesome recipe. Easy, quick and healthy.