This article has been posted with permission and originally appeared as How to Make Puff Pastry at Home on Relish
Romulo Yanes
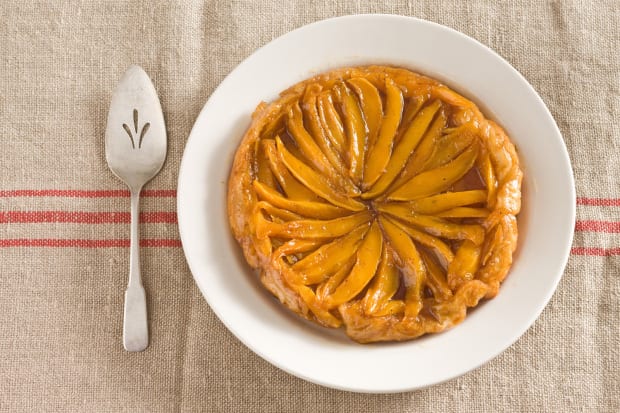
Tarts. Cream puffs. Napoleons. Many mouth-watering bakery treats rely on puff pastry—but have you ever thought to recreate the flaky goodness for yourself? Sure, making puff pastry can be a seriously intimidating endeavor for novice and advanced pastry chefs alike, however, with attention to detail, some practice, and a little help from an expert, even individuals with zero experience can master delicate, flaky puff pastry—successfully overcoming what many consider one of the most challenging culinary feats. 
To help you reach this goal, we’ve enlisted the expertise of top pastry chef Nick Malgieri. His cookbook Nick Malgieri’s Pastry: Foolproof Recipes for the Home Cook (Kyle Books, 2015) details clear, step-by-step instructions for every type of pastry dough you can imagine. Here, we’ve provided Nick’s instructions on how you can successfully create that ever-elusive perfect puff pastry. Give it a try and be sure to check out the rest of the amazing recipes in Nick’s book.

Images by Romulo Yanes

How to Make to Homemade Puff Pastry
- Total Time: 2 hours 30 minutes
- Yield: 1 batch puff pastry 1x
Description
Many mouth-watering bakery treats rely on puff pastry, but have you ever to recreated it yourself? With a tips and practice, master the flaky pastry.
Ingredients
- 2 1/3 cups (560 ml) unbleached all-purpose flour
- 6 tbsp (90 ml) unsalted butter, softened
- 2/3 cup (160 ml) cold water, plus about 1 tbsp more if necessary
- 1 tbsp (15 ml) fine sea salt
Butter Block:
- 1/4 cup (60 ml) unbleached all-purpose flour
- 2 1/4 sticks unsalted butter, cold
Instructions
- For the dough, combine the flour and butter in a bowl and rub in the butter so that no visible pieces remain. Don’t mix so much that it starts to become pasty. Stir the water and salt together and sprinkle all over the flour. Use a rubber spatula to dig to the bottom of the bowl and bring up the un-moistened flour, turning the bowl as you go. Don’t exert pressure on the dough, just bring the spatula up from the bottom of the bowl. After 10 or 12 strokes, if there are any dry bits of flour remaining, sprinkle a few drops of water until they adhere to the main mass of dough.
- Scrape the dough from the bowl to a lightly floured surface and dust the top with flour. Use your hands, the straight side of a bench scraper, and a ruler to shape the dough into an 8-inch square. Wrap the dough in plastic and chill for 1 hour.
- Shortly before the hour is up, prepare the butter block: Scatter half the flour on the work surface and cut the butter into 5 or 6 pieces. Turn the pieces in the flour to coat them and use a rolling pin to gently lb each piece of butter to soften it. Once all the butter has been pounded, scatter on some of the remaining flour, dusting the work surface again if necessary; stack one piece of butter on another and use the rolling pin to hammer them together. Repeat, adding the remaining pieces of butter to the stack. Scatter on the last of the flour, then quickly knead the butter into a solid mass and use your hands, the straight side of a bench scraper, and a ruler to shape the butter into an 8-inch square.
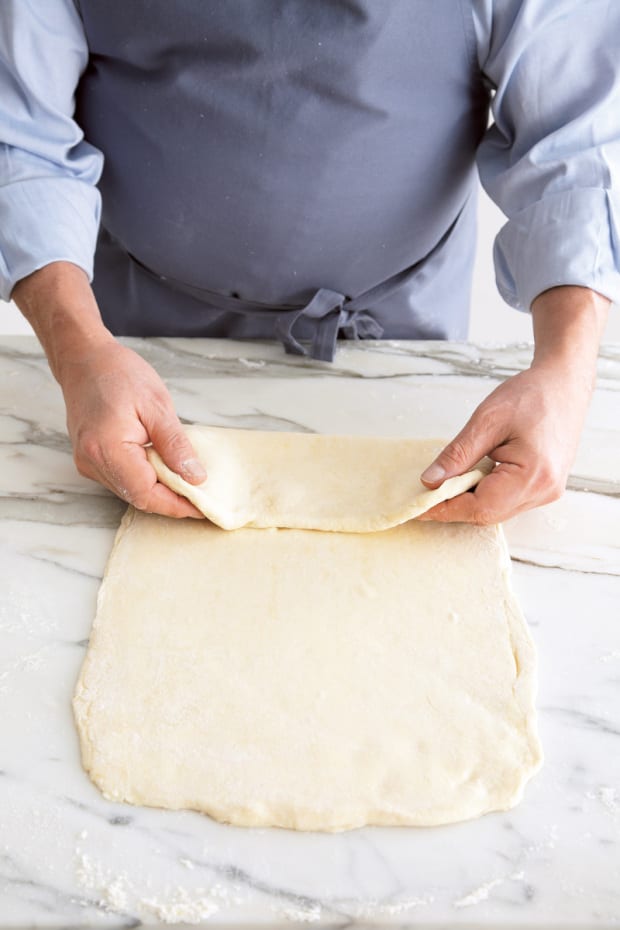
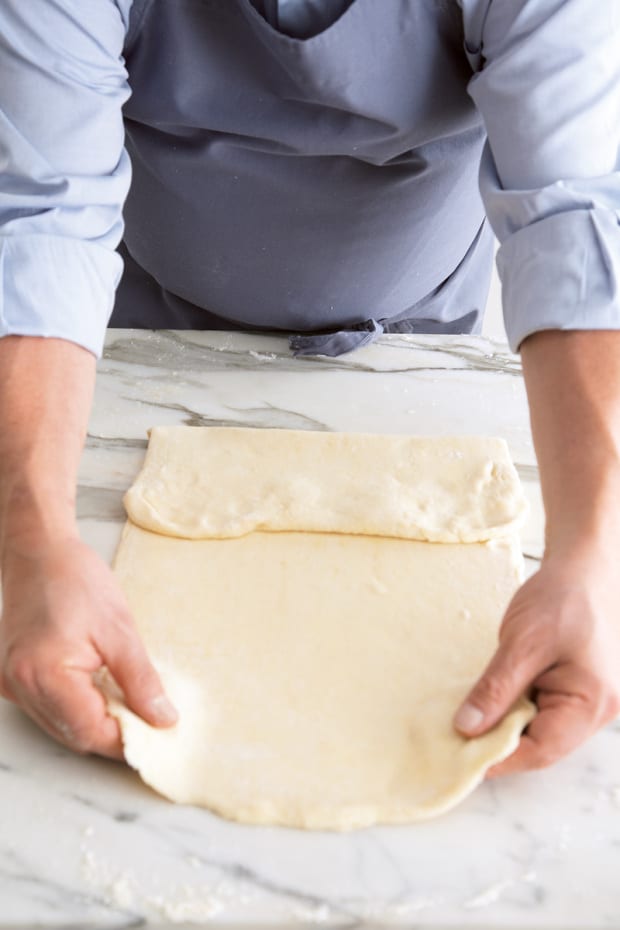
- Set the butter aside for a moment, scrape the surface free of any sticky bits of butter, and flour it. Unwrap the dough and place it on the work surface; flour the dough and roll it evenly to an 8 x 16-inch rectangle, with a short edge near you.
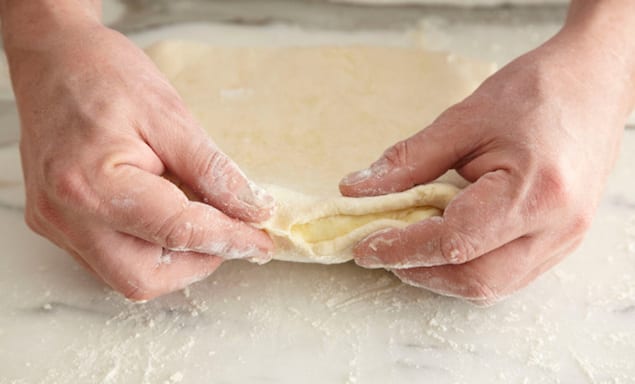
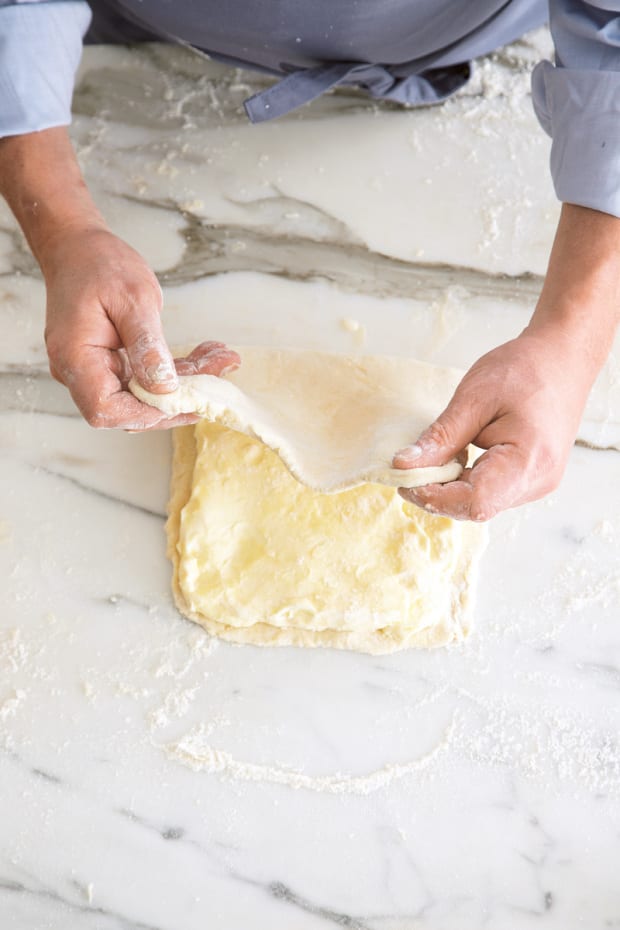
- Brush away any excess flour on the dough’s surface and place the butter on the end closest to you. Fold the dough down to enclose the butter and pinch the edges of the dough together. (see images above)
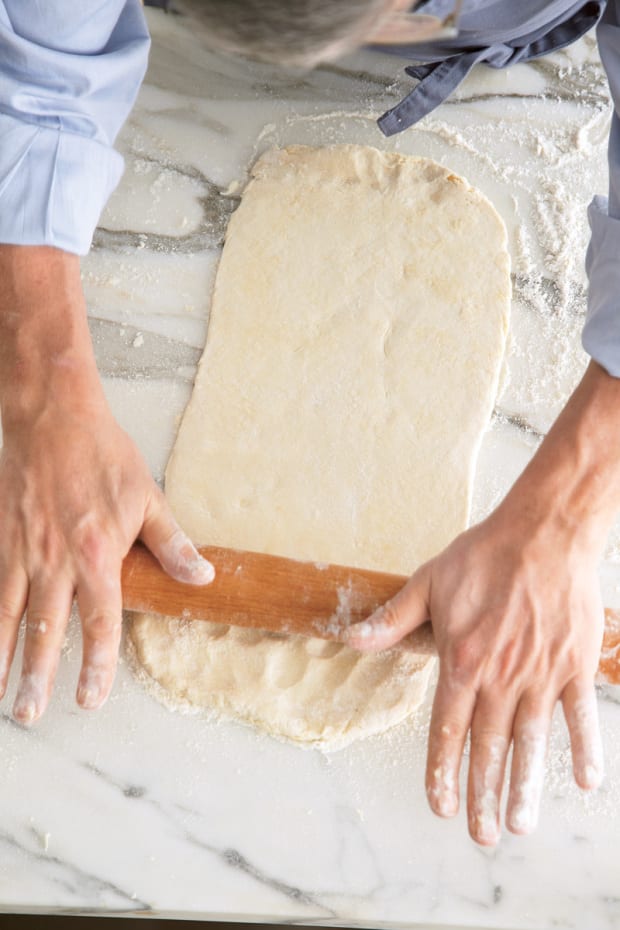
- Flour under and on top of the dough and use the rolling pin to start pressing the package of dough and butter in a succession of gentle and even strokes, moving from the closest edge to the farthest edge. Gently roll the dough in one direction, starting at the end nearest to you and without going over the opposite edge. Repeat, rolling from the far end back toward yourself. Repeat the rolling once more and make the dough an 8 x 16-inch rectangle.
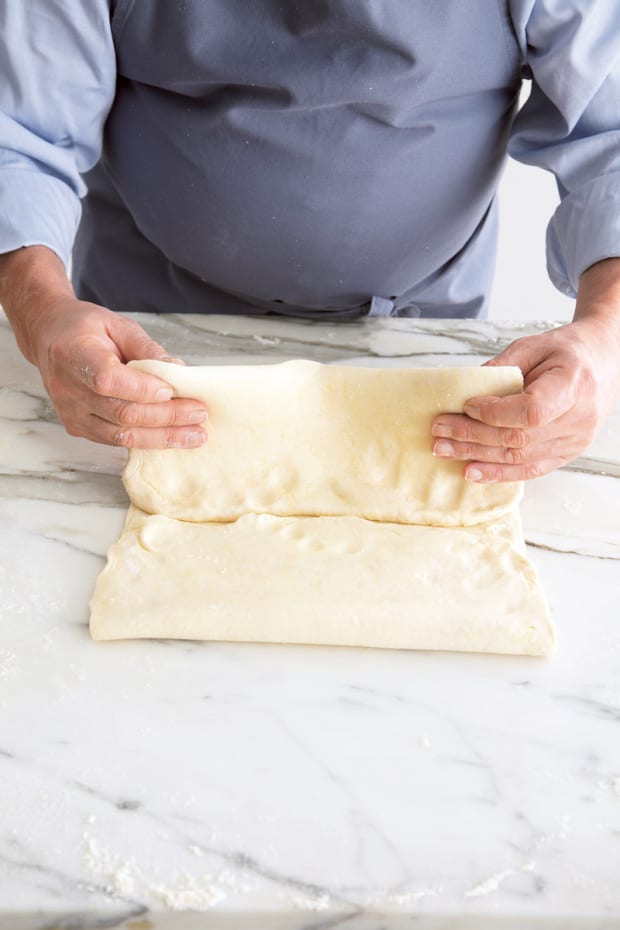
- Brush excess flour from the dough, then fold both narrow ends toward the middle, leaving about a 1/2-inch space between them.
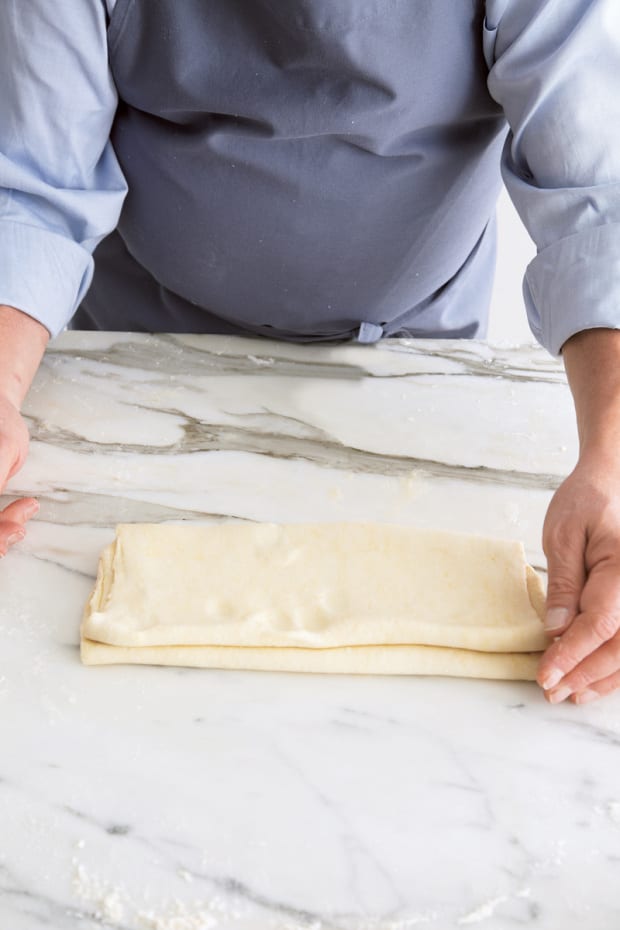
- Fold the dough in half along that center line to make 4 layers.
- Position the folded package of dough so that the closed fold, resembling the spine of a book, is on your left. Repeat step 5, this time rolling across as well as lengthwise, until the dough is as close to 8 x 16 inches as possible. Repeat step 6.
- Wrap and chill the dough for an hour or so. If you wait longer, you will need to let the dough soften slightly at room temperature before completing the rolling and folding process.
- When ready to resume rolling, repeat step 7 twice more.
- You’ve now rolled and folded the dough 4 times, giving it 4 “turns.” Wrap and chill the dough for at least half a day. After this, it’s ready to be used in any recipe that calls for it.
- Prep Time: 1 hours 30 minutes
- Cook Time: 0 minutes
- Category: Baking, Dough
- Cuisine: French
Nutrition
- Serving Size: 1 serving
- Calories: 280
Find it online: https://honestcooking.com/make-homemade-puff-pastry/
Recipes to Try with Your Puff Pastry:
 Mark Boughton Photography / styling: Teresa Blackburn
If You Liked This Recipe, You’ll Love These
- Artichokes, Pancetta, and Cheese Cups
- How to Make Homemade Teriyaki Salmon
- 14 Cinnamon Facts: History, Varieties, and Uses Around the World
- Homemade Tortilla Chips
Frequently Asked Questions
What are “turns” in puff pastry and how many does this recipe require?
A “turn” refers to rolling the dough out and folding it — a process that creates hundreds of thin layers of dough and butter. This recipe, from pastry chef Nick Malgieri, requires 4 turns total, done in two sessions separated by a 1-hour chill, followed by a final rest of at least half a day before the pastry is ready to use.
Why is the butter block made separately and then enclosed in the dough?
The butter is shaped into an 8-inch square separately — pounded and folded with ¼ cup of flour — so that it has the same pliability as the rested dough. Enclosing a uniform butter block in the dough ensures it rolls evenly without breaking through, which is what creates the distinct flaky layers when baked.
Why does the dough need to rest in the fridge between turns?
Chilling the dough for about an hour between sets of turns firms the butter back up (it softens during rolling) and relaxes the gluten in the flour, making the dough easier to roll without springing back. The instructions note that if you chill it longer, you’ll need to let it soften slightly at room temperature before resuming.


I just came across your site and I love it!!!
So many wonderful recipes!!
Do I put the butter in twice? It v says repeat step 5. But the recipe sends to only make 1 butter block.
Puff Pastry so simply executed.
Superb demo….