Heirloom tomatoes look to be at the peak of their season around my neck of the woods and I’m not ready to say good-bye to Summer, not yet! I’ve been craving tomato pie for about a year and a half…so I figured there is no time like the present to indulge myself, husband and neighbors in this delicacy, if I don’t say so myself. I have a tomato pie board on Pinterest but the pie that really caught my eye was from a ripped out magazine page in a recipe file. I said it before and I guess it’s worth repeating – I’m not ready to give up paper, not yet!
Just like I’m not ready to give up paper, I’m still holding on to Summer and it’s still holding on to me, with temperatures in the 80s today and a forecast for almost 100 this weekend. I guess it will cool off soon enough but I’m in no hurry. And since I’m not a department store ready to put up my Christmas decorations before Halloween, I’m sticking with my tomatoes until the bitter end. That would be when the nights get cooler and the tomato skins start getting tough. We are not there yet. I know, I have a rich fantasy life when it comes to my garden and the limits of what it will produce in one too short of a season.
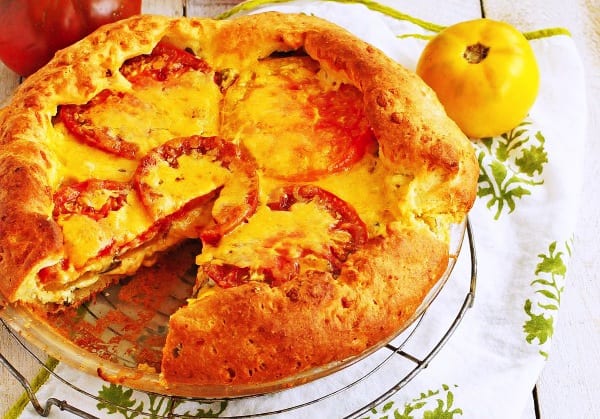
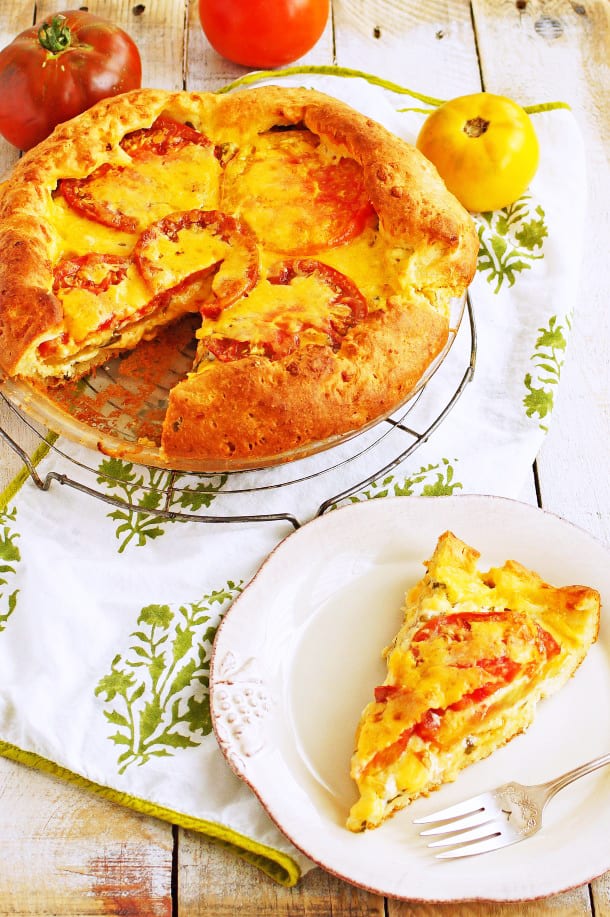
I’m glad I finally made my tomato pie, I’m pleased with this recipe and the buttermilk crust that gets wrapped up and over the top of the tomatoes layered on top with even more cheddar cheese. This tomato pie is fairly rich so I would serve it with a green salad on the side or maybe green beans. Definitely something green. 

Heirloom Tomato and Cheddar Pie with Buttermilk Crust
- Total Time: 1 hour 40 mins
- Yield: 4-6 1x
Description
Labor Day may have come and gone but tomatoes are still ripe. Take advantage of the final weeks of summer with this rustic savory pie.
Ingredients
for the crust
- 2 cups (480 ml) all purpose flour
- 1 & 1/2 tsp baking powder
- 1/2 tsp baking soda
- 1/2 tsp sea salt
- 6 tbsp unsalted butter, chilled and cut into small 1/2″ cubes
- 1 cup (240 ml) buttermilk
for the heirloom tomato filling
- 2 lbs (900 g) large ripe heirloom tomatoes, cut into 1/4″ slices
- 2 & 1/2 cups (600 ml) coarsely grated extra-sharp cheddar(8-9 oz), I used Tillamook brand
- 1 scallion, trimmed and minced
- 1/2 cup (120 ml) mayonnaise
- 2 tbsp chopped fresh sweet basil
- 1 tbsp apple cider vinegar
- 2 tsp sugar
- 3/4 tsp sea salt
- 1/4 tsp freshly ground black pepper
- 1 & 1/2 tbsp cornmeal
Instructions
- use a 9″ standard Pyrex glass pie plate
for the crust
- Place the first 4 ingredients in a medium bowl and whisk together.
- Rub in the chilled butter cubes with your fingertips, until a few small lumps remain.
- Stir in the buttermilk and knead gently until mixture forms into a dough, remove from bowl and wrap in plastic, chill for 1 hour.
for the heirloom tomato filling
- Place tomato slices on a baking sheet lined with paper towels. Place another layer of paper towels on top of tomato slices.
- Let stand for 30 minutes to remove some moisture.
- Preheat the oven to 425F.
- Roll out the dough between 2 layers of plastic wrap to a 11″ circle.
- Remove the top layer of plastic wrap and gently flip dough over to place in the pie plate, carefully peel off the remaining plastic wrap.
- Whisk the scallion, mayonnaise, basil, vinegar, sugar, salt and pepper in a small bowl.
- Sprinkle the cornmeal evenly over the bottom of the crust.
- Top with 1/2 cup of grated cheese.
- Arrange 1/3 of tomato slices over cheese, slightly overlapping if needed.
- Spread half of mayo mixture over the tomatoes.
- Sprinkle with 3/4 cup of cheese, 1/2 of remaining tomatoes and remaining mayo mixture.
- Sprinkle 3/4 cup of cheese over mayo mixture, then remaining tomato slices.
- Sprinkle remaining cheese (about 1/2 cup) on top.
- Fold the overhanging crust up and over the edges of the tomatoes.
- Bake until pie crust is deep golden brown, about 35-40 minutes.
- Tent pie with foil half way through baking time if the crust looks like it’s getting too dark.
- Let pie cool on a metal rack for at least 1 hour before serving.
- Prep Time: 1 hour
- Cook Time: 40 mins
- Category: Main Course
- Cuisine: American
Nutrition
- Serving Size: 1 slice
- Calories: 430
If You Liked This Recipe, You’ll Love These
- Middle Eastern Herb Pie
- Tomato and Asiago Cheese Stuffed Meatballs
- Huevos Rancheros with Spicy Tomato Jam
- Pappa al Pomodoro – Rustic Tuscan Tomato and Bread Soup
Frequently Asked Questions
Why do the tomato slices need to rest on paper towels before assembling?
Heirloom tomatoes are very juicy, and the recipe places the 1/4-inch slices between two layers of paper towels for 30 minutes. This draws out excess moisture so the bottom crust doesn’t turn soggy during baking.
What does the cornmeal do in the bottom of the crust?
The recipe calls for sprinkling cornmeal evenly over the raw crust before adding cheese and tomatoes. The cornmeal creates a barrier that absorbs extra tomato juices during the 35-40 minute bake at 425°F, keeping the bottom crust crisp.
Why does the crust need to chill for a full hour before rolling?
The recipe works 6 tbsp of chilled, cubed butter into the flour by hand, then stirs in 1 cup of buttermilk. Chilling the dough for an hour allows the butter to re-firm, creating the flaky layers — skipping this step produces a tough crust.
How long should the pie rest before slicing?
The instructions specify cooling on a metal rack for at least 1 hour before serving. Cutting it hot causes the layers to slide and the juices to run out before the filling has set.