Description
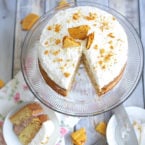
A wonderfully soft vanilla honey cake, filled with blackberry jam frosting and topped with sweet, crispy honeycomb brittle.
Ingredients
Units
For the Cake:
- 1 cup (2 sticks) unsalted butter, softened to room temperature (225g)
- 1 cup honey (340g)
- 2 teaspoons vanilla extract
- 3 large eggs, room temperature
- 2 large egg yolks, room temperature
- 1 1/2 teaspoons baking powder
- 3/4 teaspoon baking soda
- 1/2 teaspoon salt
- 2 1/4 cups cake flour (or 1 3/4 cups + 2 tbsp all-purpose flour sifted with 1/4 cup + 2 tbsp cornstarch) (280g)
- 1/4 cup milk (2% or higher) (60ml)
- 1/2 cup Greek yogurt, plain or vanilla (120g)
- Zest of 1 small orange
- 1 1/2 cups heavy whipping cream (360ml)
- 8 ounces mascarpone (225g)
- 2 tablespoons elderflower liqueur (such as St. Germain, or use vanilla extract) (30ml)
- 3 tablespoons blackberry jam (45g)
- Vegetable oil, cooking spray
- 1 1/2 cups sugar (300g)
- 1/4 cup honey (85g)
- 1/4 cup water (60ml)
- 1 tablespoon baking soda
Instructions
1. Preheat the Oven:
- Preheat your oven to 325°F (160°C). Grease and flour two 8-inch (20cm) round cake pans and set them aside.
2. Prepare the Wet Ingredients:
- In a small bowl, whisk together the milk and Greek yogurt, then set aside.
- In the bowl of a stand mixer, cream the softened butter on medium speed until it becomes silky and smooth, about 4-5 minutes.
- Add the honey and continue to beat for another 1-2 minutes, or until the mixture is light and fluffy. Add the vanilla extract and orange zest, beating just until combined.
3. Incorporate the Eggs:
- Scrape down the sides of the bowl, then add the eggs and egg yolks one at a time, ensuring each is fully incorporated before adding the next. Stop to scrape down the bowl after each addition.
4. Combine Dry Ingredients:
- In a separate bowl, sift together the cake flour, baking powder, baking soda, and salt.
5. Mix the Batter:
- Remove the bowl from the stand mixer. Alternating in thirds, fold the milk mixture and the dry ingredients into the butter mixture using a spatula. Be careful not to overmix—fold just until combined.
6. Bake the Cakes:
- Divide the batter evenly between the two prepared cake pans. Run a knife through the batter to remove any air bubbles, then drop the pans from a few inches above the counter to further eliminate bubbles.
- Bake for 20-25 minutes, or until a toothpick inserted in the center comes out clean. Watch closely toward the end of baking as the honey can cause the cakes to brown quickly.
7. Cool the Cakes:
- Let the cakes cool in the pans for 5-10 minutes. Run a knife gently around the edges, then invert the cakes onto a wire rack to cool completely.
8. Prepare the Frosting:
- In the bowl of a stand mixer, beat the heavy whipping cream until soft peaks form. Add the elderflower liqueur and beat for an additional 30 seconds.
- In a separate bowl, beat the mascarpone until soft and fluffy, about 2 minutes. Fold the mascarpone into the whipped cream mixture until fully combined.
- In a small bowl, mix 1 1/2 cups of the cream mixture with the blackberry jam and set aside.
9. Assemble the Cake:
- Place one cake layer on a serving plate or cake stand. Spread the blackberry mixture on top, leaving about 1/2 inch (1.3cm) between the filling and the edge to prevent it from oozing out.
- Place the second cake layer on top and spread the remaining mascarpone frosting over the top.
10. Prepare the Honeycomb Brittle:
- Coat a baking sheet with vegetable oil spray. In a medium saucepan, combine the sugar, honey, and water, and bring to a boil over medium-high heat without stirring until the mixture reaches 300°F (150°C) on a candy thermometer.
- Remove from heat and quickly stir in the baking soda with a whisk. Pour the mixture onto the prepared baking sheet and let it cool completely before breaking into pieces.
11. Garnish and Serve:
- Sprinkle the honeycomb brittle over the frosted cake. For the best presentation, garnish the cake just before serving.
Notes
- Storage: This cake is best served fresh but can be stored in the refrigerator for up to 2 days. Keep it tightly wrapped to prevent it from drying out.
- Honeycomb Tip: The honeycomb will start to melt if left on the cake for too long. Add it just before serving, or sprinkle it on each slice as you serve.
- Ingredient Temperature: Make sure all ingredients labeled as “room temperature” are actually at room temperature for the best results.
- Frosting Sweetness: The frosting is intentionally not overly sweet to balance the sweetness of the cake. Feel free to add 2-3 tablespoons of powdered sugar if you prefer a sweeter frosting.
- Prep Time: 30 mins
- Cook Time: 60 mins
- Category: Baking, Cake, Dessert
- Method: Baking
- Cuisine: American
Nutrition
- Serving Size: 1 slice
- Calories: 480
- Sugar: 28g
- Sodium: 320mg
- Fat: 28g
- Saturated Fat: 16g
- Unsaturated Fat: 10g
- Trans Fat: 0g
- Carbohydrates: 52g
- Fiber: 2g
- Protein: 6g
- Cholesterol: 152mg