
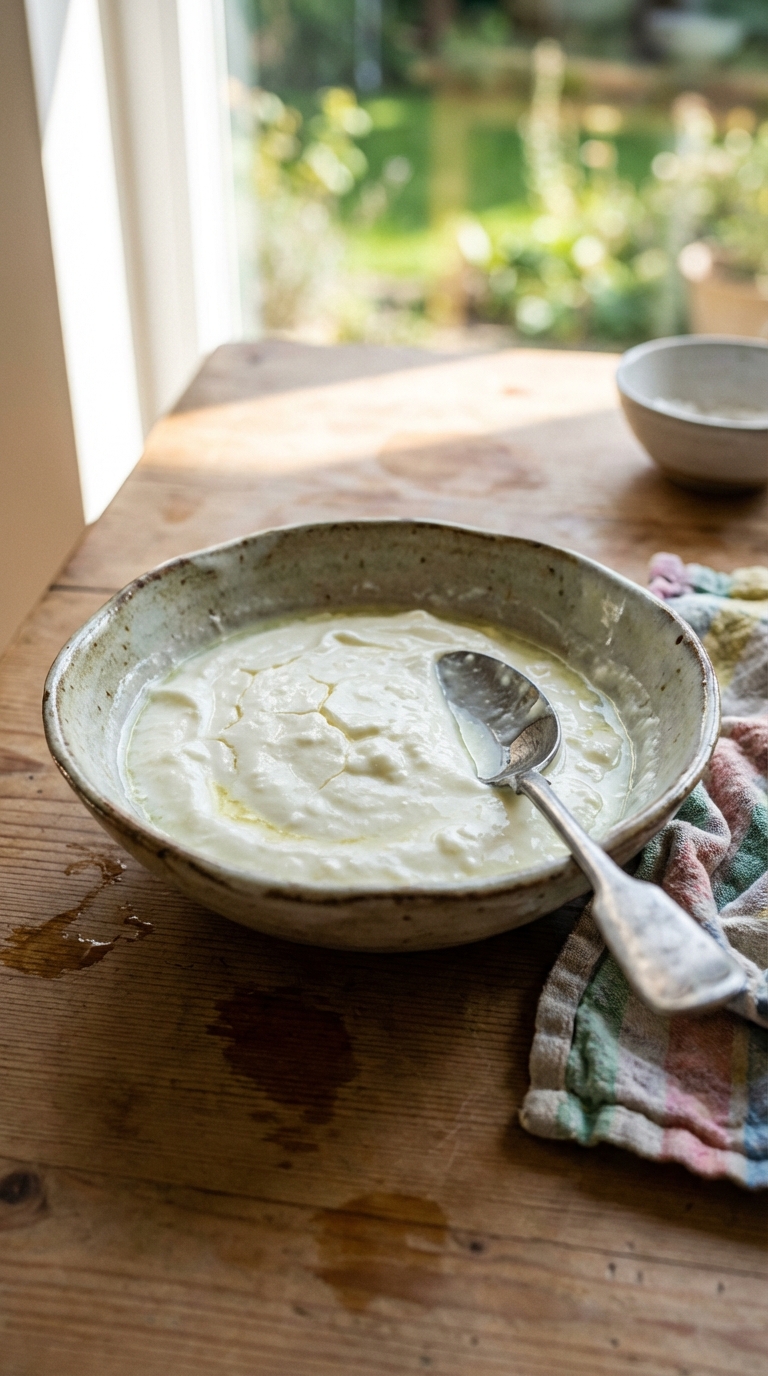
Have you ever thought about making your own homemade yogurt? Maybe you’re concerned about preservatives, flavorings, or additives found in store-bought varieties. Or perhaps you’re convinced (like me!) that homemade food is always healthier, cheaper, and tastier than anything you can buy at the supermarket.
If you’ve answered yes, making yogurt at home is definitely for you. Once you taste your own batch, you’ll probably never look back. Yogurt-making is surprisingly easy, and I’ll guide you through the steps so you feel confident making your first batch.
Choosing the Right Milk for Yogurt
- The type of milk you choose influences the taste and texture of your yogurt:
- Cow’s milk produces a mild-flavored yogurt with a medium consistency.
- Black goat’s milk has a slightly stronger flavor, creating yogurt that’s softer and less firm than cow’s milk yogurt.
- White goat’s milk provides the richest flavor and yields a firmer set compared to both cow’s milk and black goat’s milk.
Should You Boil the Milk?
- Whether or not you boil your milk depends on the type you’re using:
- Fresh milk: It’s best to boil briefly and then cool before adding your starter, as this kills bacteria and helps yogurt set properly.
- Pasteurized milk doesn’t need boiling, since it has already undergone heat treatment. Simply warm it to the right temperature (around 110°F) before adding your yogurt starter.
Selecting a Yogurt Starter
The starter contains live cultures that transform milk into yogurt. You can either use store-bought yogurt (with active, live cultures) or leftover homemade yogurt.
Fresh vs. Older Yogurt Starter:
Fresh yogurt starter produces mild-flavored yogurt.
Older yogurt starter gives a stronger, more tangy and pronounced flavor.
Important tip: If using store-bought yogurt, ensure the label says “live and active cultures.” Yogurt without this label may have been heat-treated and won’t work effectively. If in doubt, start by testing with a smaller quantity of milk (around 1 liter).
How Much Starter Do You Need?
Use approximately 1 tablespoon of starter per liter (about 4 cups) of milk. This is a simple guideline that works consistently.
Incubating Your Yogurt
After mixing milk with your starter, you’ll need to incubate it. Pour the milk into a container, cover it tightly, and keep it warm:
- Wrap the pot in a blanket or place it in a warm spot.
- The incubation period significantly affects the final texture and sourness of your yogurt:
- Shorter incubation (4-6 hours): mild flavor and softer texture.
- Longer incubation (8-12 hours): tangier flavor and firmer texture.
Temperature Tip: Cooler weather requires longer incubation (up to 10-12 hours), while warmer conditions might need just a couple of hours.
Regular Yogurt or Greek Yogurt?
Regular yogurt becomes Greek yogurt when strained to remove whey, creating a thicker, creamier consistency. Straining also reduces lactose levels, making Greek yogurt slightly easier on digestion.
To make Greek-style yogurt:
- Line a colander with cheesecloth or a clean, white kitchen towel.
- Set the colander over a bowl.
- Pour your yogurt into the lined colander.
- Let it strain in the fridge for 2-3 hours until desired thickness is achieved.
- Stir occasionally for even consistency.
Quick Straining Method:
- Gather the cloth edges, twist gently, and squeeze out excess whey over the sink or bowl.
- Tie off the cloth and continue pressing gently to remove liquid. Be careful not to press too hard, as you want to avoid squeezing out solids.
Yogurt Troubleshooting
My yogurt didn’t set and is too runny:
- Incubate longer or keep it in a warmer place.
- Wrap your container in a blanket to retain heat.
My yogurt separated. Is it ruined?
- A little whey separation is completely normal. Just gently stir it back in.
- Extensive separation, with clear liquid and solids distinctly separated, usually means something went wrong. This yogurt won’t set properly, and it’s best to start over.
Using the leftover whey:
- Don’t throw away the whey—it’s nutritious and useful! Substitute it for buttermilk or milk in baking, pancakes, smoothies, or even soups.
- You can also use it to water houseplants, giving them extra nutrients.
Once you’ve successfully made your own yogurt, you’ll realize how satisfying (and delicious) homemade yogurt can be. Enjoy!

Homemade Yogurt: An Easy Step-by-Step Guide
- Total Time: 10 minutes
- Yield: Makes about 5 cups
- Diet: Gluten-Free, Vegetarian
Description
Just milk and a starter culture create creamy, homemade yogurt. This simple recipe ensures delicious results every time.
Ingredients
- 5 cups (1 liter) milk
- 1 tablespoon plain yogurt
Instructions
- Pour 5 cups (1 liter) of milk into a large pot. Heat over medium heat, stirring occasionally, until it reaches 104°F (40°C). If using fresh milk (unpasteurized), bring it first to a boil, then allow it to cool down to 104°F (40°C).
- Add 1 tablespoon of plain yogurt with active cultures to the warm milk. Stir thoroughly to ensure the starter yogurt is evenly distributed throughout the milk.
- Cover the pot with a tight-fitting lid. Place the pot in a warm, draft-free spot. Wrap the pot with a blanket or multiple blankets to maintain a consistent warm temperature, especially in colder conditions.
- Allow the yogurt to ferment undisturbed for at least 4 hours. After 4 hours, gently check the yogurt. If it appears too runny, cover again and allow fermentation to continue. Fermentation typically takes 6-8 hours but can take up to 10-12 hours in colder environments.
- Once set, refrigerate your yogurt for at least 3-4 hours before serving to achieve the best texture.
Notes
- Use full-fat milk for the creamiest yogurt.
- For a thicker yogurt, use less milk or let it ferment for a longer time.
- Store homemade yogurt in an airtight container in the refrigerator for up to 10 days.
- Prep Time: 5 minutes
- Cook Time: 5 minutes
- Category: Breakfast
- Method: No-Cook
- Cuisine: American
Nutrition
- Serving Size: 1 cup
- Calories: 120
- Sugar: 5
- Sodium: 50
- Fat: 5
- Saturated Fat: 3
- Unsaturated Fat: 2
- Trans Fat: 0g
- Carbohydrates: 10
- Fiber: 0g
- Protein: 8
- Cholesterol: 10
If you liked this, you’re going to love our other cooking guides:
How to Grill Picanha – Easy Step by Step Guide
Bread Baking at Home: Tips for the Perfect Crumb
10 Cookie Baking Tips to Make you a Master Cookie Maker
Step by Step Guide to Making Tuscan Pici Pasta
An Italian Classic: How to Make Ciabatta Bread
Frequently Asked Questions
Do I need to boil fresh milk before making yogurt?
Yes, it’s best to briefly boil fresh milk and then cool it before adding your yogurt starter, as this kills bacteria and helps the yogurt set properly.
What type of milk should I use for the best yogurt texture?
For a firmer yogurt, use white goat’s milk; cow’s milk produces a milder yogurt with medium consistency, while black goat’s milk yields a softer texture.
What temperature should I warm pasteurized milk to before adding the starter?
You should warm pasteurized milk to around 110°F before adding your yogurt starter.


Same here, this is my number one recurring recipe. I make it so often and it is 100% perfect.
Trust all these comments. This is LEGIT.
This has made my breakfast my favorite meal of the day. I make this every week – love it so much!!
I love this recipe it is so easy and it works every time.
This is the only yogurt recipe you’ll ever need. Amazing!