I love coffee-flavoured desserts – they feel like a natural way to conclude a meal somehow – a cup of coffee in dessert form. And, I’d happily end a meal with this Espresso Cheesecake any night of the week!
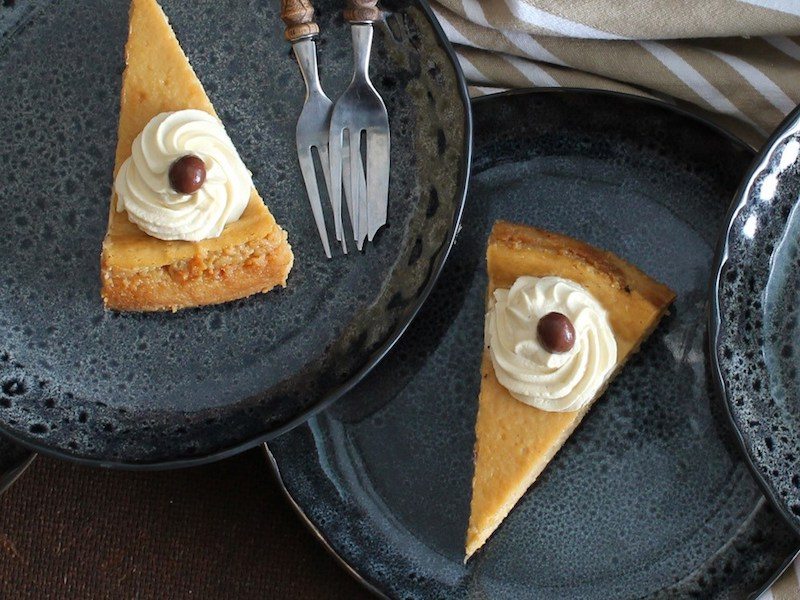
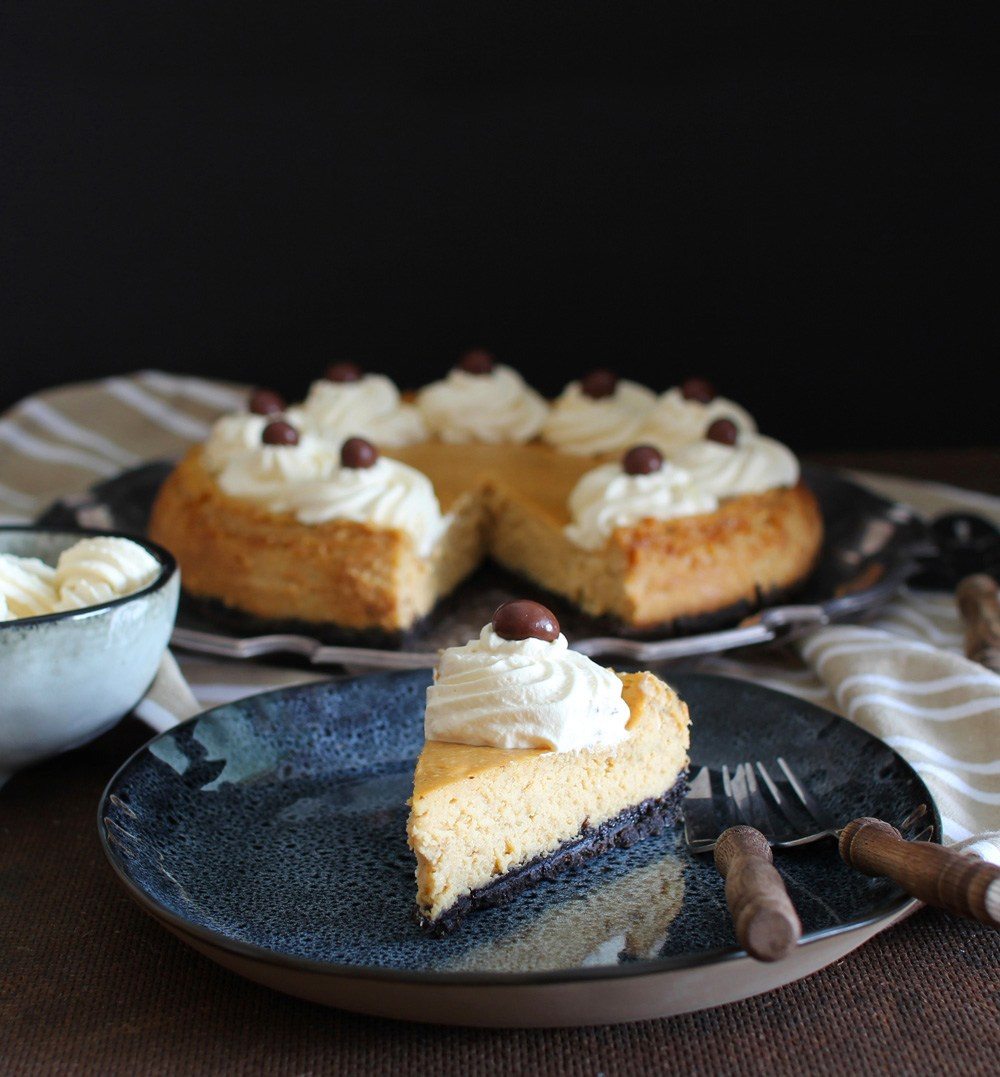
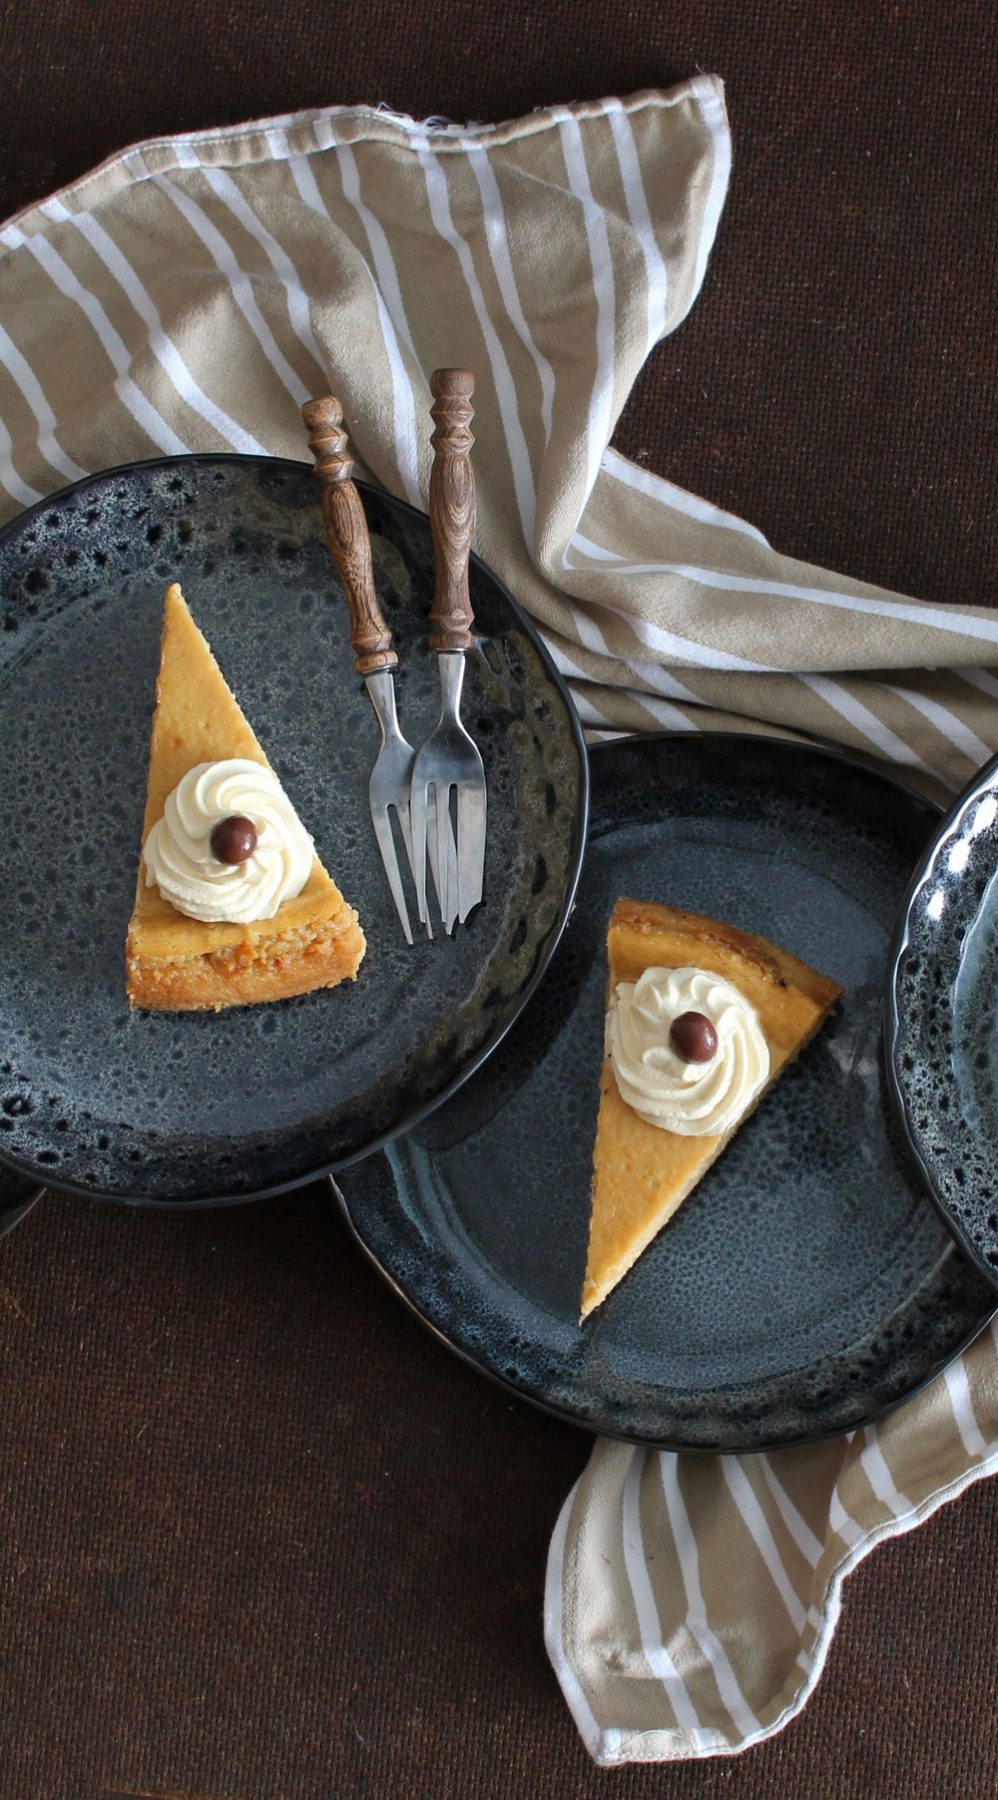
Actually, you could describe its flavour as more Mochaccino than straight coffee. The coffee flavoured cheesecake sits on top of an Oreo cookie base – the perfect combination if you like your coffee spiked with chocolate as I do.
I found the recipe for the cheesecake on FineCooking.com, but did adapt it a fair bit, mainly because I didn’t want such a large cake. I reduced the cream cheese to two packages rather than three, and increased the creme fraiche component for a lighter, more tangy result. Given the reduced amount of filling, I also reduced the eggs from 4 to 3. If I’d had my thinking cap on, I ought to have used an 8 inch springform pan rather than a 9 inch one to compensate for the lesser amount of filling. I will next time…
It was also relatively light for a cheesecake, no doubt thanks to the addition of creme fraiche, and it wasn’t overly sweet either. The coffee flavour was subtle (which would suit most people I think), but if you want a stronger coffee hit you might consider increasing the coffee from 2 to 3 teaspoons. I served the cake with a Kahlua flavoured whipped cream and chocolate covered coffee beans.
Click here for the Oreo crust recipe.
Print
Espresso Cheesecake with Kahlúa Whipped Cream
- Total Time: 9 hours 35 mins
- Yield: 10–12 slices
Description
An Oreo crust, an espresso-spiked batter and served with a Kahlúa whipped cream. This espresso cheesecake sure satisfies our sweet tooth.
Ingredients
For the crust
- 200 g (about 20) chocolate sandwich cookies (such as a dark chocolate cream cookie)
- 60 g (4 tablespoons) unsalted butter, melted
For the cheesecake:
- 500 g (17.6 oz) cream cheese, at room temperature
- 250 g (8.8 oz) crème fraîche
- 2 tablespoons all-purpose flour
- Pinch of salt
- 1 1/4 cups caster (superfine) sugar
- 1 tablespoon pure vanilla extract
- 2 teaspoons instant espresso powder (or ground coffee granules)
- 3 large eggs, at room temperature
Coffee cream:
- 300 ml heavy cream
- 1 tablespoon coffee liqueur
- 1 tablespoon icing sugar (confectioner's sugar), or to taste
To garnish:
- Chocolate-covered espresso beans
Instructions
For the crust:
- Pulse the cookies in a food processor until fine crumbs form (or seal in a bag and crush with a rolling pin). Stir in the melted butter until the crumbs look like wet sand.
- Press firmly into the base of a greased 9-inch springform pan. Chill in the fridge for 15 minutes while you prepare the filling.
For the cheesecake:
- Position a rack in the center of the oven and heat the oven to 190°C (375°F).
- In a stand mixer fitted with the paddle attachment, beat the cream cheese, crème fraîche, flour, and salt on medium speed, scraping down the sides frequently, until very smooth and fluffy, about 5 minutes. Make sure there are no lumps (strain through a sieve if needed).
- Add the sugar and continue beating until well blended and smooth.
- Add the vanilla and instant espresso powder and beat until blended, about 30 seconds.
- Add the eggs one at a time, beating just until blended after each addition. Do not overbeat once the eggs are in or the cheesecake will puff and crack as it cools.
- Pour the filling into the chilled crust and smooth the top.
- Bake until the center jiggles like jelly when nudged, 55–65 minutes. The cake will be slightly puffed around the edges and the center will still look moist.
- Set on a rack and cool completely, then cover and refrigerate until well chilled — at least 8 hours and up to 3 days.
For the coffee cream:
- Combine the cream, coffee liqueur, and icing sugar in a bowl and whip until the cream is firm and holds its shape when piped. Store in the fridge until needed.
To serve:
- Unclasp and remove the side of the springform pan. Run a long, thin spatula under the crust and carefully slide the cake onto a flat serving plate.
- Pipe the coffee cream on top (keep the remainder to serve alongside), scatter over the chocolate-covered espresso beans, and serve. To cut cleanly, run a thin knife under hot water, wipe dry, and heat after every slice.
Notes
For a stronger coffee hit, increase the espresso powder from 2 to 3 teaspoons. The crème fraîche keeps the cheesecake lighter and more tangy than a standard cream cheese version — it’s a worthwhile swap.
- Prep Time: 35 mins
- Cook Time: 60 mins
- Category: Baking, Dessert
Frequently Asked Questions
Can I use a different type of crust instead of Oreo for the cheesecake?
Yes, you can substitute the Oreo crust with a graham cracker crust or a chocolate cookie crust if you prefer.
How can I adjust the coffee flavor in the cheesecake if I want it stronger?
To enhance the coffee flavor, increase the espresso from 2 teaspoons to 3 teaspoons for a more pronounced taste.
What can I use instead of Kahlúa in the whipped cream topping?
If you don’t have Kahlúa, you can use any coffee liqueur or replace it with espresso or strong coffee for a non-alcoholic option.