The fleeting garlic scape season is upon us and when you start to eat with the seasons, one of the by-products is genuine excitement when certain foods become available. I’m talking like, kid-in-a-candy-store-and-the-next-morning-is-Christmas, kind of anticipation. I think it’s in part because you know that once a new fruit or veggie shows up at the market, you’re time with it is limited. Just like precious gems and metals, the scarcer, the more valued. This week, my precious food gems were garlic scapes.
Garlic scapes are the curly-cue green sprouts that shoot up from the tops of garlic bulbs. Scape season is very short and once scapes are harvested, that’s it, there will be no more until the same time next year. There is no replanting or regrowth, as is the case with other sprouts, like pea shoots and sunflower shoots. Scapes at the market are an indicator that the first garlic bulbs of the season will be soon to follow.
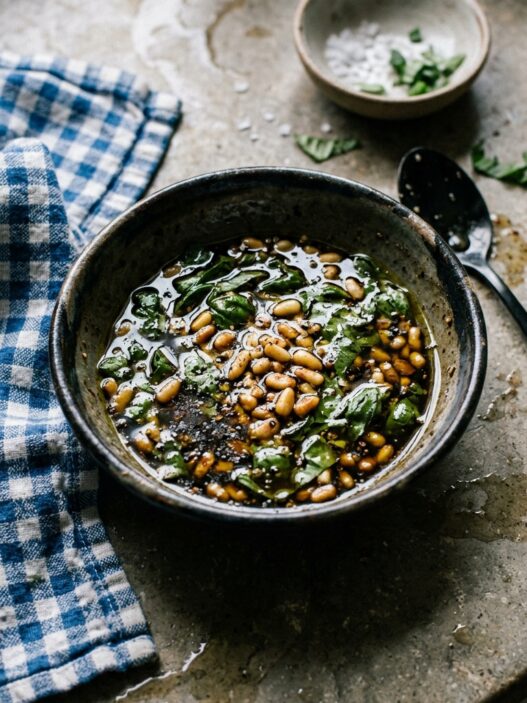
While I find their unique appearance whimsical and inviting, I can see why fellow market-goers often pass them by. En masse, their resemblance to a pile of thin green snakes might be off-putting. I think many find their coils unwieldy and intimidating. But there is no need to fear, as garlic scapes can be used in all of the same ways you might use garlic cloves. Their coils need only be rinsed, trimmed and chopped to be used in place of garlic for sautéing. Or, you might even consider sautéing them whole, in butter or olive oil and eating them as you would a vegetable side dish, as I heard one fellow scape-lover suggest last week.
Once tasted, you will find their flavor milder than that of garlic cloves. In many ways, I think of scapes as a {dare I say} more-perfect form of their older garlic brother. Scapes provide sweet garlic flavor, without the harsh bite that cloves sometimes offer.
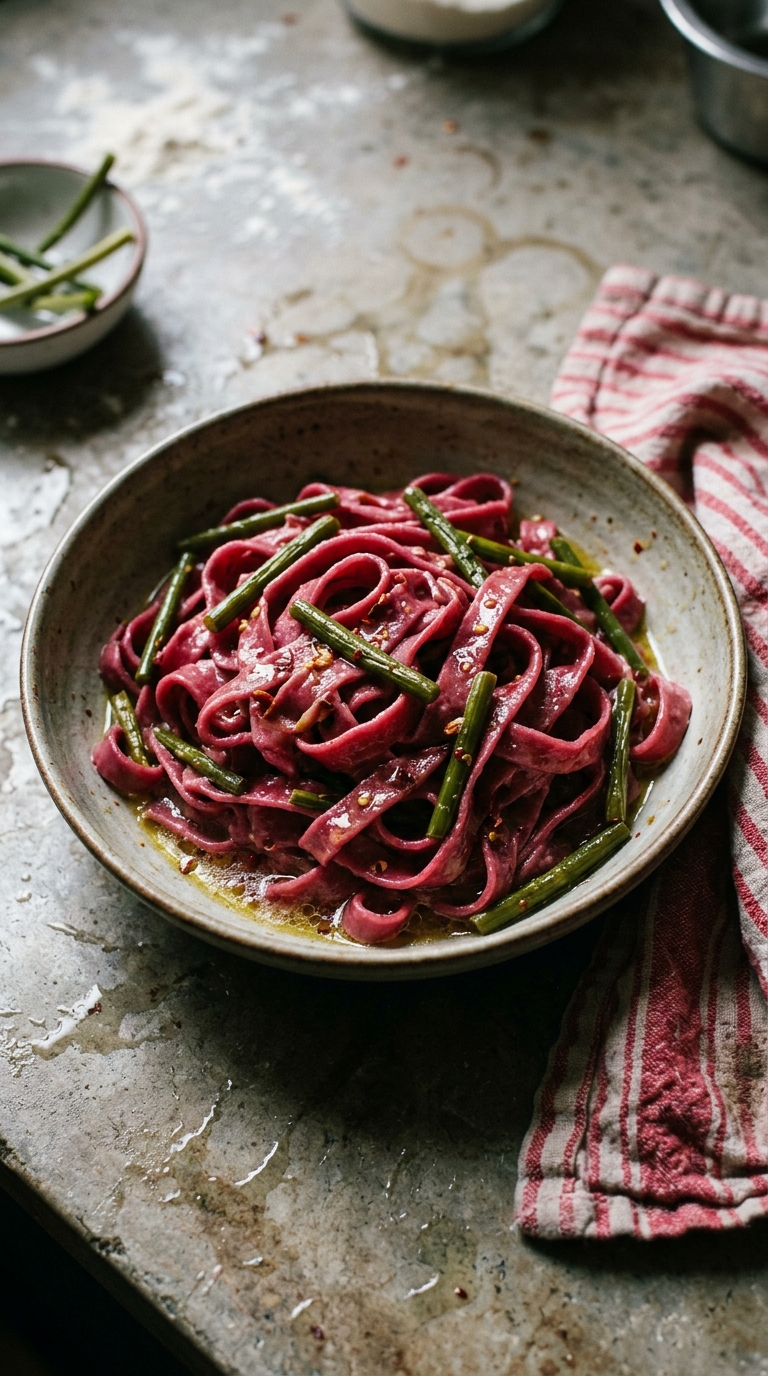
This week, along with the scapes I picked up a picture-perfect bunch of beets, complete with a bushy bouquet of beet greens. I had other plans for the beet greens, so I used three of the beets to flavor and color a pound of fresh beet fettuccine, which I immersed in a twist on a classic Italian aglio, olio e peperoncino sauce. Where the aglio, or garlic, flavor is usual derived from minced garlic cloves, I substituted diced garlic scapes. The heat from the peperoncino, or chili flakes, balances this simple olive oil sauce nicely. And the scapes are delicate enough that the beet fettuccine isn’t overpowered. While the pasta does take some time to make, the sauce is a cinch – and the result is a fairly impressive and colorful dish. I find scapes easier on the breath than regular garlic, which means this could even be a meal perfect for a date-night or special occasion. Nothing says love like pink pasta.
Since I am a self-proclaimed garlic junkie, perhaps my word is biased. But, once you experiment, I think you, too, will become an active follower of the garlic scape cult. Come the end of June, when the scapes disappear from the market stands, you’ll be counting the days until next May.
Homemade Beet Fettuccine with Garlic Scapes
- Total Time: 2 hours
- Yield: 4
Description
This colorful dish screams early summer in New York. The beet fettuccine is immersed in simple, but flavorful sauce, fueled by the garlicky goodness of garlic scapes.
Ingredients
Beet Pasta Dough
- 2 large red beets
- 2 tsp kosher salt
- 1 tsp black pepper
- A drizzle of olive oil
- 2 cups (250 g) all purpose flour
- 1 cup (160 g) semolina flour
- Eggs, 3 large
Garlic Scape sauce
- 1/3 cup (3 oz / 85 ml) extra virgin olive oil
- 12 garlic scapes, trimmed and cut into 2 inch lengths
- 1-2 tsp red chili flakes
- 1 tbsp (.5 oz / 15 g) salted butter
- Salt and pepper, to taste
Instructions
- Preheat the oven to 375ºF (190ºC)
- Coat the beets in a drizzle of olive oil, and a generous pinch of both salt and pepper.
- Tightly wrap the beets in aluminum foil, so no steam escapes while cooking. Place in the middle of the oven. Roast for roughly 45 minutes, or until they are fork tender.
- Allow the beets to cool before peeling them.
- Dice the peeled beets and place in the bowl of a food processor. Puree until smooth.
- Combine the beet puree, 3 eggs and a pinch of salt in the bowl of a stand-mixer. Using the whisk attachment, beat until combined and smooth.
- Switch to the dough hook attachment and add the flour.
- Turn on low speed, and allow the dough to just combine.
- Once it has come away from the sides of the bowl, turn the dough onto a lightly floured work surface and knead for 5-6 minutes.
- Once the dough is smooth, pat into a round disc and cover with plastic wrap. Set to the side to rest for at least 30 minutes.
- Once the dough has rested, cut it into 6 equal pieces.
- Using your hands, shape one piece into a rectangle and roll it through the widest setting on your pasta machine. Fold it in half and pass it through the widest setting again.
- Gradually, you will make the sheet of dough thinner by making the pasta roller more narrow- working your way through the settings, one notch at a time. At each setting, pass the dough through twice.
- Dust the sheet of pasta with semolina or flour as you go, to ensure it does not stick to the machine.
- Once you have achieved the thin dough you’d like, switch to the pasta cutter attachment. I used fettuccine, but you can feel free to use whichever shape you would like.
- Dust the cut pasta with flour or semolina and hang it over a pasta drying rack, or, like me, you can create a pasta drying rack by using a round knife steel or rolling pin. Alternatively, if you have the counter space, you can lay the pasta out flat on well floured sheet pans.
- Go through the same process with each of the 6 portions of dough.
- To cook the pasta – bring a large pot of well salted water to the boil. Drop the pasta in. Remember, fresh pasta cooks far more quickly than dried pasta – so it should only need 3 or 4 minutes at most.
- In a pan wide enough to hold the pasta, start your sauce by combining the olive oil, chili flakes, scapes, and a pinch of salt and pepper.
- Let the sauce cook over low heat for at least 10-12 minutes. The low heat is important, so you don’t burn the sauce. Gently heating give the chili and scapes time to infuse the oil with their flavors.
- Using tongs, grab the cooked pasta from the water and drop it into the warm oil. Tongs are preferred as opposed to draining through a colander because the action allows you to bring along just enough of the starchy pasta water to add body and flavor to the sauce.
- Once all of the pasta is in the oil, add the tbsp of butter and allow it to melt.
- Gently stir to combine all of the flavors and coat the pasta with the sauce. Taste and adjust seasoning.
Notes
- The prep time includes the time it takes to rest the dough, which is at least 30 minutes.
- It’s very important to let the dough rest, so that the glutens you’ve worked hard to develop by kneading it have to time relax a little.
- You can easily up the heat factor by adding more chili flakes to the sauce.
- Prep Time: 1 hour 30 mins
- Cook Time: 15 mins
- Category: Pasta
- Cuisine: Italian
Nutrition
- Serving Size: 1 serving
- Calories: 520
If You Liked This Recipe, You’ll Love These
- Barley Salad with Radishes and Garlic Scapes
- Quick and Easy Garlic Shrimp Fettuccine
- Sticky Pork Belly with Garlic Chili Glaze
- Chili and Garlic Steamed Clams
Frequently Asked Questions
What are garlic scapes and can I substitute regular garlic?
Garlic scapes are the curly green sprouts that grow from the tops of garlic bulbs during a brief late-spring season. The article notes that their flavor is milder and sweeter than regular garlic cloves without the harsh bite, and they can be used in any recipe that calls for garlic — just rinse, trim, and chop them. If scapes aren’t available, minced garlic cloves are the logical substitute, though the flavor will be more pungent.
Why does the dough need to rest for 30 minutes?
The notes explain that resting the dough is essential to allow the glutens developed by kneading to relax. Without the rest, the dough will be too elastic and snap back when you try to roll it thin through the pasta machine.
Why use tongs to transfer the pasta to the sauce instead of a colander?
The recipe specifically calls for tongs so you bring a small amount of the starchy pasta cooking water along with the pasta into the oil sauce. That pasta water adds body and flavor to the simple olive oil, chili flake, and garlic scape sauce — a technique that a colander would eliminate entirely.
Why cook the sauce on low heat for 10–12 minutes rather than quickly?
The low heat is intentional — the instructions say that gently heating the olive oil, chili flakes, and scapes over low heat for at least 10–12 minutes gives the chili and scapes time to infuse the oil with their flavor without burning the sauce.