
Growing up in Malaysia, I loved sitting at the table and peeling apart the colorful layers one by one, enjoying each piece slowly. There was something so satisfying about the soft, chewy texture and the subtle sweetness paired with coconut flavor—it’s a dessert that feels as playful as it is delicious.
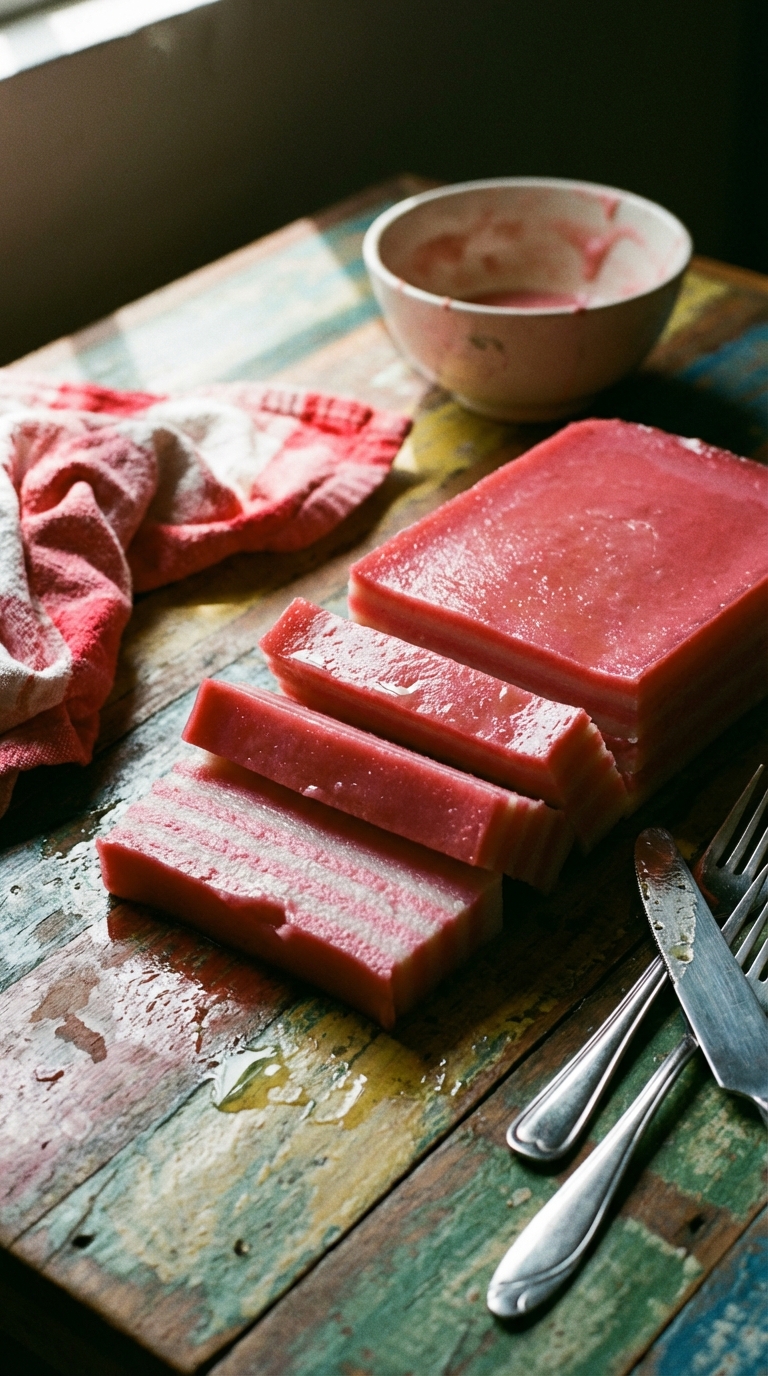
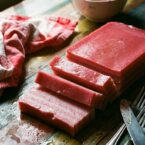
This recipe is made with six layers instead of the traditional nine, because I personally think the effort / output doesn’t really warrant a full nine layer cake. However, if you use a smaller pan, the layers will look even taller. Also, while the alternating pink and white layers are festive, you could easily switch it up with more colors if you’re feeling creative.
For me and many other Malaysians, Kuih Lapis is a a little taste of my childhood. Whether you like to peel the layers apart like I do or just dive in and enjoy the whole thing, I hope this recipe brings some joy and a bit of tradition to your kitchen.
How to Make Kuih Lapis – Malaysian Steamed Layer Cake
Prepare the Coconut Mixture:
- Boil the liquids:
- In a medium pot, combine water, sugar, and pandan leaves. Bring to a boil, stirring until the sugar dissolves.
- Turn off the heat, remove pandan leaves, and stir in the coconut milk. Let the mixture cool completely.
- Mix the flours:
- In a large bowl, whisk together tapioca flour and rice flour. Gradually add the cooled coconut mixture, whisking continuously until smooth.
- Strain the batter through a sieve to remove lumps.
- Divide and color:
- Divide the batter into two equal portions. Add rose pink coloring to one portion, leaving the other portion white. Stir each batter well before using.
Steam the Layers:
- Prepare the pan:
- Grease a 7-inch (18 cm) square or round cake pan with a little oil. Place the pan in a steamer and preheat for a few minutes over high heat.
- Steam the layers:
- Pour about ½ cup of the white batter into the heated pan. Steam for 4 minutes, or until set.
- Add ½ cup of the pink batter on top of the white layer. Steam for another 4 minutes.
- Repeat the process, alternating layers, until all batter is used. Stir the batter each time before pouring.
- Create a final vibrant layer:
- For the last layer, add an extra drop of pink coloring to deepen the shade. Steam for an additional 6 minutes.
Cool and Serve:
- Cool completely:
- Allow the kuih to cool completely in the pan. Invert the pan to release the cake.
- Brush a little oil over the surface for a glossy finish, if desired.
- Slice neatly:
- Grease a knife with a little oil to prevent sticking while cutting. Serve at room temperature.
101 Guide to Succeeding with Kuih Lapis
About Kuih Lapis:
- Kuih Lapis is a traditional Southeast Asian dessert, particularly popular in Malaysia, Indonesia, and Singapore. The name translates to “layered cake,” and its vibrant layers and chewy texture are iconic in festive occasions.
Key Tips:
- Smooth Batter:
- Straining the batter ensures a lump-free, silky consistency.
- Even Layers:
- Use a ladle or measuring cup for consistent layer thickness.
- Color Mixing:
- Stir the batter before each pour to prevent the flours from settling.
- Cooling Time:
- Allow the kuih to cool completely before slicing to ensure clean cuts.
- Pan Preparation:
- Grease the pan lightly to prevent sticking but avoid over-greasing to keep the layers intact.
Kuih Lapis – Malaysian Steamed Layer Cake Snack
- Total Time: 45 minutes
- Yield: Serves 8
- Diet: Vegetarian
Description
Striking pink and white layers of this Southeast Asian dessert are created by steaming a delicate coconut batter. A beautiful and delicious treat!
Ingredients
- 1 1/2 cups (350 g) tapioca flour
- 2/3 cups (100 g) rice flour
- 2 cups (500 ml) water
- 1 cup (200 g) sugar
- 2 cups (500 ml) thick coconut milk
- 4 pandan leaves
- Rose pink coloring
- pinch salt
Instructions
Prepare the Coconut Mixture
- In a medium pot, combine water, sugar, and pandan leaves. Bring to a boil, stirring until the sugar dissolves. Turn off the heat, remove pandan leaves, and stir in the coconut milk. Let the mixture cool completely.
- Mix the flours:
- In a large bowl, whisk together tapioca flour and rice flour. Gradually add the cooled coconut mixture, whisking continuously until smooth. Strain the batter through a sieve to remove lumps.
Divide and color
- Divide the batter into two equal portions. Add rose pink coloring to one portion, leaving the other portion white. Stir each batter well before using.
Steam the Layers
- Grease a 7-inch (18 cm) square or round cake pan with a little oil. Place the pan in a steamer and preheat for a few minutes over high heat.
- Pour about ½ cup of the white batter into the heated pan. Steam for 4 minutes, or until set. Add ½ cup of the pink batter on top of the white layer. Steam for another 4 minutes. Repeat the process, alternating layers, until all batter is used. Stir the batter each time before pouring.
- For the last layer, add an extra drop of pink coloring to deepen the shade. Steam for an additional 6 minutes.
Cool and Serve
- Allow the kuih to cool completely in the pan. Invert the pan to release the cake. Brush a little oil over the surface for a glossy finish, if desired.
- Grease a knife with a little oil to prevent sticking while cutting. Serve at room temperature.
Notes
- For a smoother batter, use a fine-mesh sieve to strain the batter twice after combining the flours and coconut mixture.
- To achieve even layers, use a measuring cup to pour consistent amounts of batter into the pan for each layer.
- Store leftover Kuih Lapis in an airtight container in the refrigerator for up to 3 days; it’s best served at room temperature.
- Prep Time: 15 minutes
- Cook Time: 30 minutes
- Category: Dessert
- Method: Steaming
- Cuisine: Malaysian
Nutrition
- Serving Size: 1 slice
- Calories: 250
- Sugar: 25
- Sodium: 50
- Fat: 10
- Saturated Fat: 5
- Unsaturated Fat: 5
- Trans Fat: 0g
- Carbohydrates: 45
- Fiber: 2
- Protein: 2
- Cholesterol: 15mg
Frequently Asked Questions
What gives Kuih Lapis its distinctive layered appearance?
Each layer is individually poured and steamed before the next one is added. Alternating colors, usually from pandan extract and food coloring, create the striped look. Patience is essential since each layer takes several minutes to set.
Why is my Kuih Lapis rubbery or too dense?
Over-steaming individual layers or using too much tapioca starch can make the cake tough. Each layer should steam just until set, about 3 to 5 minutes. The batter consistency should be pourable, not thick.
Can I make Kuih Lapis without a steamer?
You need consistent, even steam for the layers to set properly, so a steamer is strongly recommended. In a pinch, you can use a large pot with a rack inside and a tight-fitting lid, making sure the water stays at a steady boil throughout.


Hi Jovita, 400g is too much and too sweet. I used 200g of sugar.
Please check my blog post https://www.anncoojournal.com/kuih-lapis-steamed-layer-cake/
Hi mdm, your recipe sound easy to do… I just have a question in your recipe in ingredients part stated that 400g of sugar and used 280g… Can you explain abit on this… Tq
Recipe for steamed layered cake(kueh lapis) is written clearly & can be easily understood even for a first timer in baking! ??
Thank you Ann for your generosity to share.
Always looking for correct kuih lapis recipe.
Initially fr Kuala Lumpur. Living in Perth since 1987.
Keep well??
Can this kuih be freezed or it has to be consume by the next day
Hi Adelene, You cannot put this “kuih” in the freezer. The “kuih” will becomes as hard as stone. It’s better to consume it on the same day after steaming or place the “kuih” in the chiller and re-steam for a few minutes the next day.
Hi ,I would like to know if I have to cool the coconut milk,syrup completely? And if I would like to make big potion,using steam bake oven isn’t advisable?
Should I multiply the ingredients and how should I go along with it ,pls advise thanks.
Hi Audrey, Sorry that I’m not sure about using the steam bake oven as we usually used the traditional way of steaming this dessert. Suggest that you make the same portion in the recipe before proceeding to make a larger one.
Yes, you must cool the coconut milk before mixing the flours together.Otherwise the flours will get lumpy if the liquid is hot.
Hi Ann , your steamed kueh lapis is easy to follow. I will try am sure it will turn up well. Please post more steam Kueh and fatt kueh.. My family l ove steam food. no baking type. thank you
this was amazing thanks ann
Tried your recipe for the first time and although I made a mistake with one of the layers and it bled through, the kuih was still a hit at the party! Thank you! Any tips on how to store it to be eaten the next few days?
The flavour is good but unfortunately it was too rubbery and not like the kuih lapis I usually get from the stalls. I was quite disappointed. I added tepung gandum and it fixed the texture for me.
Can I use dried Pandan Leaves, and if so, how?
Recipe did not work for me. Too much liquid for too little flour
Good morning Ann …I tried to make Kueh lapis .. it’s very yummilicious.. but it is very soft n bit watery…Can Ann helping me to solve it ? ..Which part I make wrongly… thank you ..
Hi Annabelle, Each layer must be fully steamed over high heat and cooked before adding the next layer.
ps. you must stir the mixture well before steaming each layer.
Hi ive tried many eecipe but i find yours the best, however, l did the opposite, more rice flour than tapioca floour, it turn out well. Thks for sharing..
Hi…
Im so glad the whole dish came out looking prety. Thanks for sharing.But I felt overall mine looked dry..normally the shop one more oily. Wonder what kind of oil should be used. My hubby said the oil i used may be giving the bitter taste.
Tks
SONYA GILL