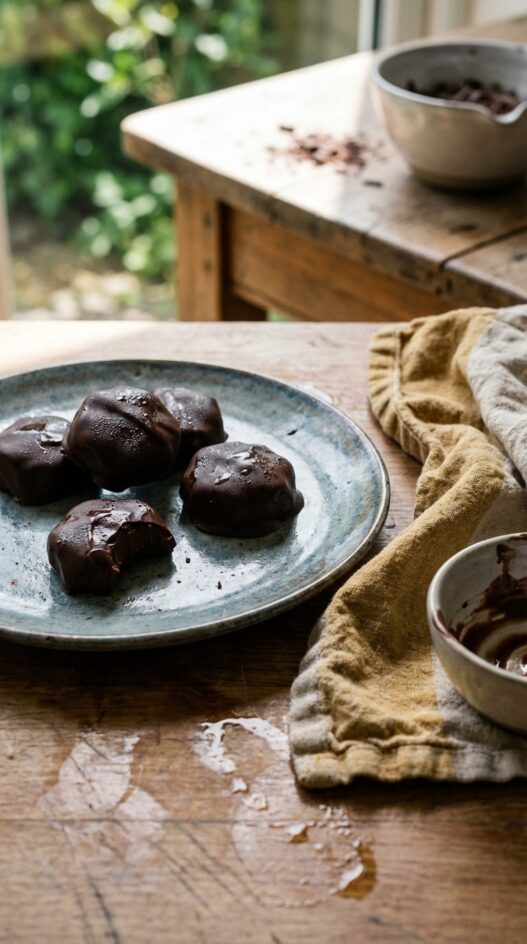

I love making these because they look like something from a chocolate shop and take almost no effort. Two ingredients: dark chocolate and rum. Pour into molds, refrigerate, done. they’re thing you bring out at the end of a dinner party and people assume you’ve been in the kitchen for hours, when really you were just watching the chocolate set. If you’re serious about chocolate, use something in the 70% range, because the rum needs a proper bitter base to land on.
How to Make Rum Spiked Chocolates
Melting the chocolate
A double boiler gives you more control than a microwave. Keep the heat low and stir often so the chocolate stays glossy and smooth. Overheated chocolate seizes up and turns grainy, so patience is your friend here.
Adding the rum
One teaspoon is enough to perfume the chocolate without overpowering it. Dark rum works better than white here. Stir it in quickly once the chocolate is off the heat and pour into molds right away before it starts to firm up.
Rum Spiked Chocolates
- Total Time: 10 minutes
- Yield: Makes 6-8
- Diet: Omnivore
Description
Rich dark chocolate meets a hint of rum in these elegant little treats. Perfect for a special occasion or a sophisticated dessert.
Ingredients
- 5 oz (150 g) dark chocolate 70%
- 1 teaspoon rum
Instructions
- Break or chop the dark chocolate into small, even pieces. Smaller pieces melt faster and more evenly.
- Set up a double boiler: fill a saucepan with about 1 inch of water and bring to a gentle simmer over medium-low heat. Place a heatproof bowl on top, making sure the bottom doesn’t touch the water.
- Add the chocolate to the bowl and stir frequently with a spatula as it melts, about 3-4 minutes. Remove from heat as soon as the last few pieces have melted; the residual heat will finish the job.
- Stir in the rum and mix until fully incorporated.
- Carefully pour the chocolate into silicone candy molds, filling each about 3/4 full. Tap the mold gently on the counter to release any air bubbles.
- Refrigerate for at least 2 hours, or until the chocolates are completely set and firm to the touch. Pop them out of the molds and store in an airtight container in a cool place.
Notes
- Use high-quality dark chocolate for the best flavor.
- For a stronger rum flavor, increase the amount to 1.5 teaspoons, but taste and adjust according to preference.
- Store chocolates in an airtight container at room temperature for up to a week, or in the refrigerator for up to two weeks.
- Prep Time: 5 minutes
- Cook Time: 5 minutes
- Category: Dessert
- Method: No-Cook
- Cuisine: Global
Nutrition
- Serving Size: 1-2 chocolates
- Calories: 150
- Sugar: 15
- Sodium: 1
- Fat: 10
- Saturated Fat: 6
- Unsaturated Fat: 4
- Carbohydrates: 15
- Fiber: 2
- Protein: 2
- Cholesterol: 5
Frequently Asked Questions
Can I use milk chocolate instead of dark?
You can, but the result will be much sweeter and the rum flavor will be less distinct. If you prefer milk chocolate, consider adding a pinch of flaky sea salt on top to balance things out.
How long do these keep in the fridge?
Stored in an airtight container, they last about two weeks in the fridge. Let them sit at room temperature for five minutes before eating so the texture softens slightly.
What if I don’t want to use alcohol?
Replace the rum with half a teaspoon of vanilla extract or a drop of peppermint extract. You can also add a pinch of espresso powder for depth without any alcohol.