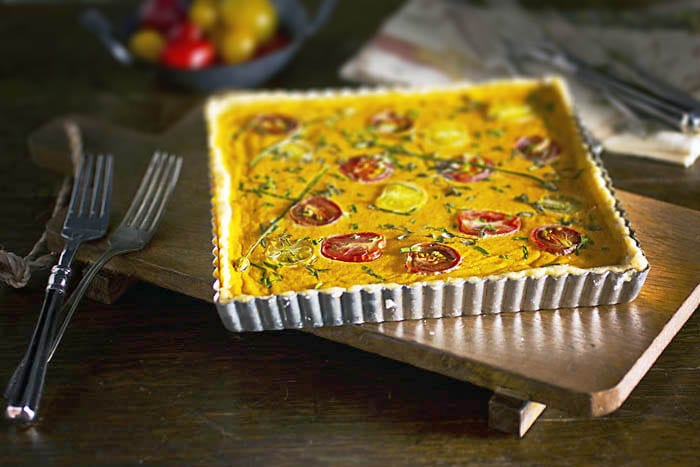
Blending the cheese with the tomatoes gives this stunner a lovely orange-ish hue.
By Debra Smith

Gluten-Free Heirloom Tomato Tart
- Total Time: 2 hours
- Yield: 6-8 1x
Description
Blending the cheese with the tomatoes gives this stunner a lovely orange-ish hue.
Ingredients
Scale
INGREDIENTS:
- 1 recipe for Gluten-Free Pie Crust (recipe follows)
- 1 cup crushed tomato puree
- 5 ounces grated cheese mixture: I used Pecorino-Romano, Parmigiano-Reggiano and Fontina
- 3 large eggs, slightly beaten
- ½ teaspoon kosher salt
- ¼ teaspoon black pepper
- ½ teaspoon Sriracha
- Assorted small heirloom tomatoes
- Fresh thyme for garnish
- Fresh chives for garnish (chive blossoms are a pretty touch)
FOR THE CRUST:
- 12 Tbsp unsalted butter, frozen
- 268 grams Gluten-free AP flour mix, cold (freeze for at least 30 minutes)
- 1 teaspoon psyllium husk (OMIT if your flour mix has xanthan gum already added)
- ½ teaspoon salt
- ¼ teaspoon baking powder
- ½ cup mascarpone cheese, cold
- 5 Tablespoon ice water
Instructions
CRUST
- Place chilled dry ingredients into the bowl of a food processor and pulse 3-4 times to blend flours together
- Add both butter and mascarpone cheese; pulse until mixture looks like small peas – about 8-10 pulses, give or take
- Add water and pulse again until the mixture is more sand-like and it just begins to cling to the side of the work bowl
- Dump the mixture onto a lightly floured surface and divide into 2 pieces, pressing/squishing the dough together until it forms a ball
- Wrap each piece of dough tightly in plastic wrap and refrigerate overnight; this allows the flours plenty of time to hydrate and makes it easier to handle (you’re only going to use 1 crust for this particular recipe; the other will keep in the refrigerator for 2-3 days or in the freezer, wrapped tightly, for up to 3 months)
- About 15 minutes before rolling, remove from refrigerator to let it soften a bit; preheat oven to 400 degrees
- Place disk between 2 pieces of parchment and roll – size of dough should be approximately 2-inches larger than the dish/pan you are using
- Remove top piece of parchment and carefully, turn the bottom parchment over so that the crust is now able to be placed into tart pan
- Gently peel parchment from the crust and nestle the crust into your tart pan; no worries if it tears or is a bit thin near the edges – you’ll use any trimmings to fill in where needed and once the tart is filled and baked, no one is the wiser!
- Generously prick the bottom of the tart with a fork; place in the freezer for 20 minutes
- Remove tart shell from the freezer and place on a baking sheet; line the tart with a sheet of foil or parchment, fill with pie weights, rice or beans and bake for 20-25 minutes or until just beginning to brown
- Carefully, remove the liner and weights, leaving the tart on a rimmed baking sheet; cool
FOR THE TART
- Reduce oven temperature to 300 degrees
- Place crushed tomatoes, eggs, cheese, sriracha, salt and black pepper in a blender and blend until frothy
- Pour tomato mixture into cooled crust; slice a few of the heirloom tomatoes in half and place cut-side facing up across the tart
- Sprinkle with herbs and bake for 45 minutes, rotating halfway through the baking time
- The tart is done when a knife inserted in the center comes out clean
- Cool completely and serve with more fresh heirloom tomatoes
- Prep Time: 1 hour
- Cook Time: 1 hour
- Category: Baking


