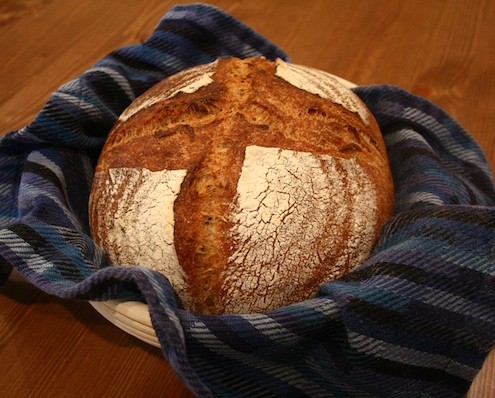
It’s actually not that difficult to fit baking bread into a busy schedule, and no magic abilities are needed to get the bread to rise properly. Sara Clevering tells more.
Text And Photo By Sara Clevering

When I tell people one of my favorite things to bake is bread–not bread from a mix, not quick bread, but old-fashioned, slow-rising, yeasted bread–the first question is invariably a stupefied, “how do you have the time,” often followed by the admission that “I just can’t get my bread to rise. I just don’t have the touch.”
What I tell them is that it’s actually pretty easy to fit baking bread into a busy schedule and that no special abilities are needed. It requires a bit of forethought (which admittedly can be challenging), but the actual work involved is minimal. Once the dough comes together, you spend most of the time sitting back and letting your dough do the work while you do something else. Even so, from start to finish can be several hours, and often enough, you don’t want to be stuck at home waiting to see if it’s time to punch down your dough, or if it’s doubled in size yet, or finally just baking it. Spring is here after all, and weekend time is precious! Fortunately, with a few tricks (none of which require any new equipment) you can easily work baking bread into your schedule.
Making your own bread only seems like some sort of alchemy: bread, water, salt, and yeast somehow transformed into one of the most essential of foods. But it’s not magic. It just comes down to understanding one basic principle about how yeast, your essential partner in this process, behaves. And the good news is that yeast is not a complicated, high-maintenance creature: it’s simply more active when it’s warm, and less active when it’s cold. The more active it is, the faster your dough rises. What’s more, only a slight increase in temperature can have an exponential effect on yeast’s activity: raising the dough’s temperature by a few degrees can have a dramatic effect.
So: if your dough is rising too slowly, warm it up. If your dough threatens to grow all over your countertop before you can even pre-heat the oven, Strega Nona style, cool it down.
Putting the brakes on a rapidly expanding dough couldn’t be easier–just pop it in the refrigerator or some other cool place. If, on the other hand, your dough is too sluggish (“It’s been over two hours and it just won’t rise!”) you have a few options. If you’ve got a nice warm spot in your house, you can set the it there. (Sometimes I put my dough in our south-facing sunroom: it reliably rises as it basks in warmth of the sun’s rays). Or you can simulate what bakers call a “proofing box”–a warm “microclimate” that will gently warm your bread-to-be and get those yeast going. Set the dough in the oven and turn on the oven light. Alternatively, preheat the oven to 200 (or its lowest setting) and hold for five to ten minutes, then turn it off and put your dough inside. Finally, my ultimate standby, from a fellow blogger: heat a jar of water in the microwave until it boils, set the dough inside (microwave off) next to the hot water. The humidity effectively transfers the heat to the dough. I think of this process as taking my dough to the spa.
Once you understand this principle, you can use it offensively as well as defensively to speed along what is called the “fermentation” process.
If you know your house runs cool, you can plan to use one of the methods above to make sure you aren’t waiting around forever for your dough to rise. Baking books often assume you are in a warm kitchen (because, after all, that’s the environment bakers operate in), and their rising times can therefore be much faster than you’d get at home. In other words, if your dough isn’t rising, it’s probably needs more time or more warmth.
Or, say you’d like to make some bread, but you are going to be gone all afternoon, way too long to leave your dough out–hit the pause button by popping it in the refrigerator while you’re away. You don’t have to be trapped at home for six hours to tend to it. Or maybe you’d like to have fresh baked bread or rolls for a brunch, but getting up at 4am to start the dough doesn’t exactly sound like the ideal way to kick off a lazy Sunday with friends? Mix up your dough the night before (or even two days before), park it in the fridge overnight, then continue in the morning. As a bonus, that slow fermentation will actually bring out more flavor in your dough–in fact, it’s a classic technique used by artisan-style bakeries.
Homemade bread is far better than than anything you can buy in the grocery store–and notably different in what it’s missing: just honest, straightforward ingredients, no additives, stabilizers, and who knows what else. Understanding how to manage the process and work it into that thing called life means there’s no reason not to fill your home with the inviting, comforting aroma of fresh baked bread.


Knives near our hands..
I started making my own bread some 2 years ago and I would say I’ve been happier ever since… ;)
Great article, I really enjoyed reading it and thanks for the tips