
My brother-in-law was visiting from Green Bay recently and I planned to make a braided cinnamon danish. I wanted an over the top breakfast. Unfortunately, we were in the middle of a September heat wave and my kitchen was warm to say the least. It was not an ideal day to laminate the dough.
For those of you who do not know the process, softened (and mine was very soft!) butter is spread over a rectangle of yeast dough, then the dough is folded over the butter, rolled thin, then folded and chilled. This process is repeated 3 times, making an exquisite, tender, buttery dough. Puff pastry is also a laminated dough. So just imagine how tender and buttery this cinnamon danish dough is!
Though Bill and his brother thought the sub-par braided cinnamon danish was outstanding, it was not my finest baking moment. I had to make it again, in a cooler kitchen, so I could share it with you.
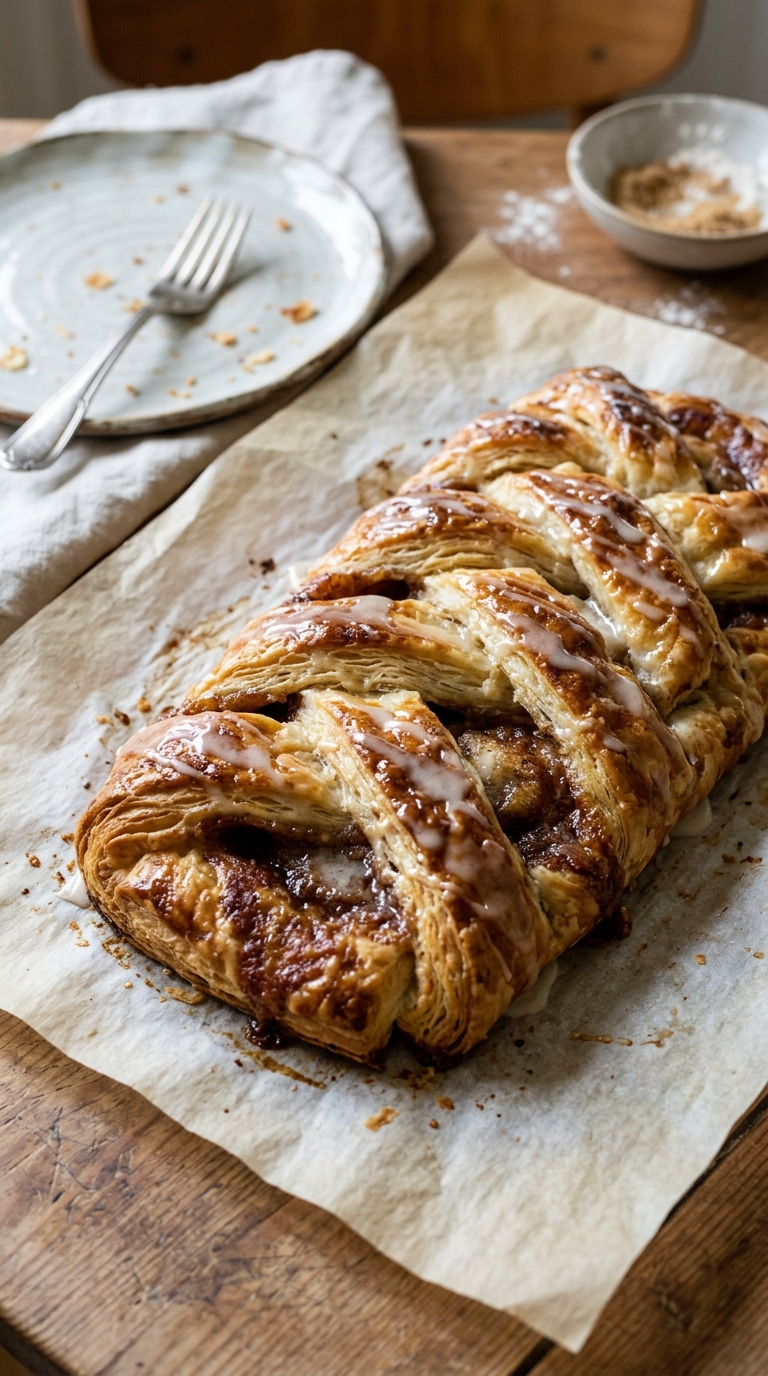
This second attempt worked perfectly, save the typical oozing of the butter during the “turning” process which is a sign of a novice laminator’s inexperience. This gorgeous cinnamon danish was finished with a drizzle of a simple glaze. I applied the frosting by swooping a spoonful back and forth and repeating over and over. Keeping the spoon high makes for thinner striations of icing. The results were magnificent! Whew.
I have sort of a foodie crush on braided breads, from challah to plaited breakfast loaves. My technique for a braided danish is to roll the dough into a large rectangle, 18 x 10-inches in this case. The filling is placed in the middle third of the dough running from one short side to another.
Next comes the making of the strips which form the “braid.” I cut strips a little wider than a half inch, one at a time, from one side to the other, so the sides are symmetrical. The slices should extend right up to the filling. Then starting at one end, cross a strip over the filling, then repeat on the other side. Go back and forth until the strips cover the filling. The ends can be left open or you can attempt to fold and tuck any excess dough under the braid.
This is really not a complicated recipe. The laminated dough takes time, with resting periods in the refrigerator between turns. I like do let the dough chill overnight and then bake it up the next morning. If you’re fearless in the kitchen, give this braided cinnamon danish a go.
More Breakfast Danishes You’ll Love:
Raspberry Danish Braid (This post has a photo of cutting the strips for braiding)
Raspberry Cream Cheese Brioche Pockets
Click here for the laminated dough recipe.
Print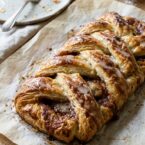
Homemade Cinnamon Danish
- Total Time: 1 hour 30 minutes
- Yield: 1 large danish (8–10 slices)
Description
Make this special breakfast treat, a braided cinnamon danish made with homemade laminated dough.
Ingredients
Laminated Dough:
- 3/4 cup warm milk (about 110°F / 43°C)
- 2 1/4 tsp (1 packet) active dry yeast
- 3 tablespoons sugar, divided
- 2 cups all-purpose flour, plus more for dusting
- 1/2 teaspoon salt
- 1 egg
- 1/2 cup (1 stick / 113 g) unsalted butter, cold, for laminating
Filling:
- 1/4 cup sugar
- 3 tablespoons brown sugar
- 1 tablespoon cinnamon
- 3 tablespoons butter, at room temperature
Glaze:
- 2 tablespoons butter, melted
- 1 cup powdered sugar
- 1/2 teaspoon vanilla
- 1 1/2-3 tablespoons hot water (depending on how thin you want the glaze)
Instructions
Make the laminated dough:
- Combine the warm milk, yeast, and 1 tablespoon of the sugar. Let sit for 5–10 minutes until foamy.
- In a large bowl, whisk together the flour, salt, and remaining 2 tablespoons sugar. Add the yeast mixture and egg. Mix until a soft dough forms. Knead briefly — just until smooth. Do not over-develop the gluten. Wrap in plastic and refrigerate for 30 minutes.
- On a lightly floured surface, roll the chilled dough into a 12 x 8-inch rectangle. Place the cold butter between two sheets of plastic wrap and beat with a rolling pin into an 8 x 6-inch rectangle (about 1/4 inch thick). Place the butter rectangle in the center of the dough. Fold the dough sides over the butter to enclose it fully, like a letter. Press the edges to seal.
- Roll the dough out into a long rectangle (about 18 x 6 inches), then fold it in thirds (like a letter). Wrap and refrigerate for 30 minutes. This is one “turn.” Repeat for a total of 3 turns, chilling 30 minutes between each. After the final turn, refrigerate overnight (or at least 4 hours).
Assemble and bake:
- Remove dough from the refrigerator and let sit at room temperature for about 15 minutes. Preheat oven to 350°F.
- Make the filling: mix the softened butter, sugars, and cinnamon together.
- Roll the dough into an 18 x 10-inch rectangle. Spread the filling down the center third. Slice from each outer edge to the filling at 1/2-inch intervals on both sides. Fold the strips over the filling, alternating sides, to form a crosshatch braid.
- Transfer to a parchment-lined baking sheet. Bake about 30 minutes until puffed and golden brown.
- Make the glaze: combine the melted butter, powdered sugar, and vanilla. Add hot water until you reach the desired drizzling consistency. Drizzle over the cooled danish.
Notes
Work in a cool kitchen — butter that gets too warm will smear into the dough instead of creating distinct layers. Chilling overnight after the final turn makes braiding much easier the next morning.
- Prep Time: 1 hour
- Cook Time: 30 minutes
- Category: Dessert
Frequently Asked Questions
What should I do if my butter is too soft during the lamination process?
If your butter is too soft, try chilling the dough and butter briefly before starting the lamination process again. This will help maintain the layers and prevent excessive oozing during the folds.
How can I achieve the perfect glaze consistency for my cinnamon danish?
To achieve the right glaze consistency, start with powdered sugar and add a small amount of milk or water until you reach a smooth, pourable texture. Keeping the spoon high while drizzling will create thinner striations.
Is it necessary to chill the dough between turns during the lamination process?
Yes, chilling the dough between turns is crucial as it helps firm up the butter and dough, making it easier to handle and achieving the desired flaky texture.


Butter oozed at turn three the first time I tried laminating this dough in a warm kitchen. Chilled the slab thirty extra minutes between turns the next time and it held together. The braid itself is easier than it looks, and the spoon-held-high glaze trick gave my kitchen a pastry-case look for Sunday brunch.
You’re claiming this recipe is yours though you use pictures water marked by another blog and her text practically word for word.
Hi Crystal, this recipe was provided to this website by Liz, the author of That Skinny Chick Can Bake.
I like so much these kind of sweets especially with cappuccino.