Sponsored Post: Check out these easy entertaining tips for all your winter holidays and dinner parties, complete with charcuterie and pâté. This is a sponsored post in collaboration with Les Trois Petits Cochons.
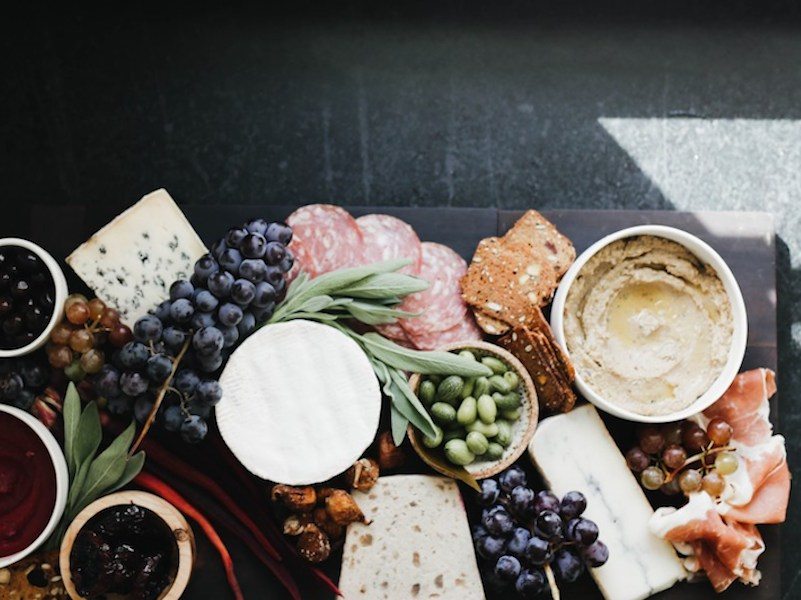
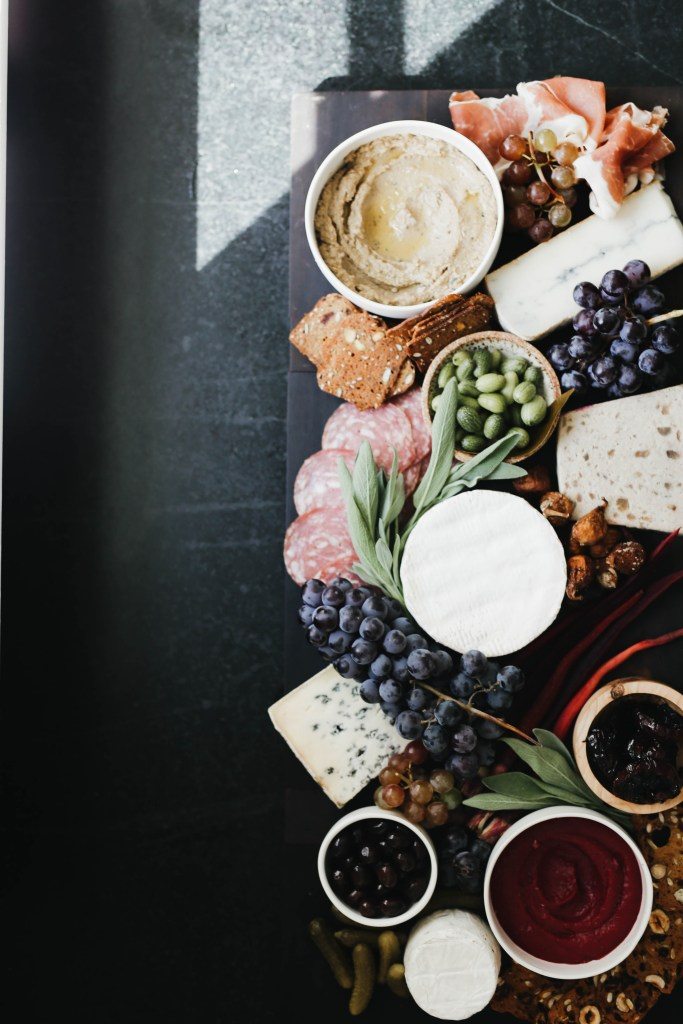
Serve up this festive charcuterie board with delicious meats, pâté, a beet dip and roasted carrots.
Our Christmas tree is up, little white lights twinkle from the dogwood tree next to our porch, and our fireplace boasts a roaring fire more often than not. The holiday season has snuck up on us once again, but we’re embracing every moment. It is always a special time of year, but this year, as we enjoy the season for the first time in our new home, it feels particularly so.
For me, the holidays are about gathering with my loved ones – usually around a table. It’s such a simple act that is often overcomplicated with too many details. Not surprisingly so, this thinking tends to discourage people from hosting. And frankly, if I overthought every dinner, I would stop hosting people as well. The truth is though, the table and menu don’t need to be fussed over. In fact, a simpler menu is the key to a great party – one that you as the host can enjoy as much as your family and guests.
Typically, when I host a dinner party, I start the night out with a board of cheeses and charcuterie. It requires little effort and can easily be put together ahead of time, allowing me the flexibility to enjoy a glass of wine with my guests, rather than stressing over the food. Better yet, it allows me to get creative. I love experimenting and catering to every palate with different varieties of charcuterie, cheeses, and various accoutrement. To me, building a charcuterie board is about thinking outside of the box – doing away with traditional “rules” and “guidelines” and having a little fun. Who says a charcuterie board has to be a pile of salami and cheese? That type of rigid thinking will always result in a “bored” board – one that will fail to excite both you and your guests.
I’m here today to share a festive, “un-bored” charcuterie board filled with a wide range of delicious charcuterie from Les Trois Petits Cochons, cheeses, dips, and unexpected accoutrements. Below you’ll also find a list of 10 tips – meant as a guide, not as a rule book – on how to assemble your own beautiful, lively board. And, in the spirit of the holidays, I’ve also included a few recipes that I feel pair particularly well with the charcuterie as well as add festive color, including a beet + cashew dip, simple roasted carrots, and pickled gherkin cucumbers.
The earthiness and subtle sweetness of the beet dip brings out the rich, salty flavors of the rillettes and pâté. The cashews in the dip also provide substance and richness – making it not only a great complement to the charcuterie, but also a delicious main attraction for any vegans or vegetarians you may have in your crowd. The roasted carrots are about as simple as they come – meant as an unexpected substitute to traditional raw crudite, but can be eaten with your fingers just the same. And, the pickled gherkin cucumbers act as a light palate cleanser – providing a sweet alternative to the more traditional cornichons that are also on the board.
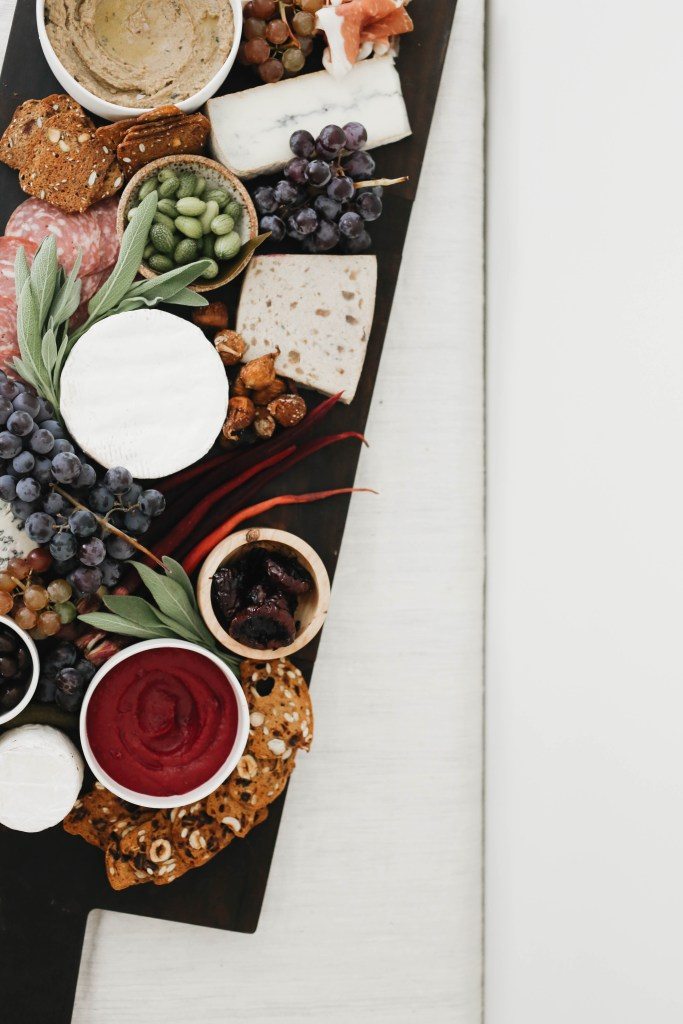
Here’s what I put on my board:
1 (7 ounce) container Trois Petits Cochons Rillettes de Canard
1 (4 ounce) Trois Petits Cochons Pâté aux Pommes et Cidre
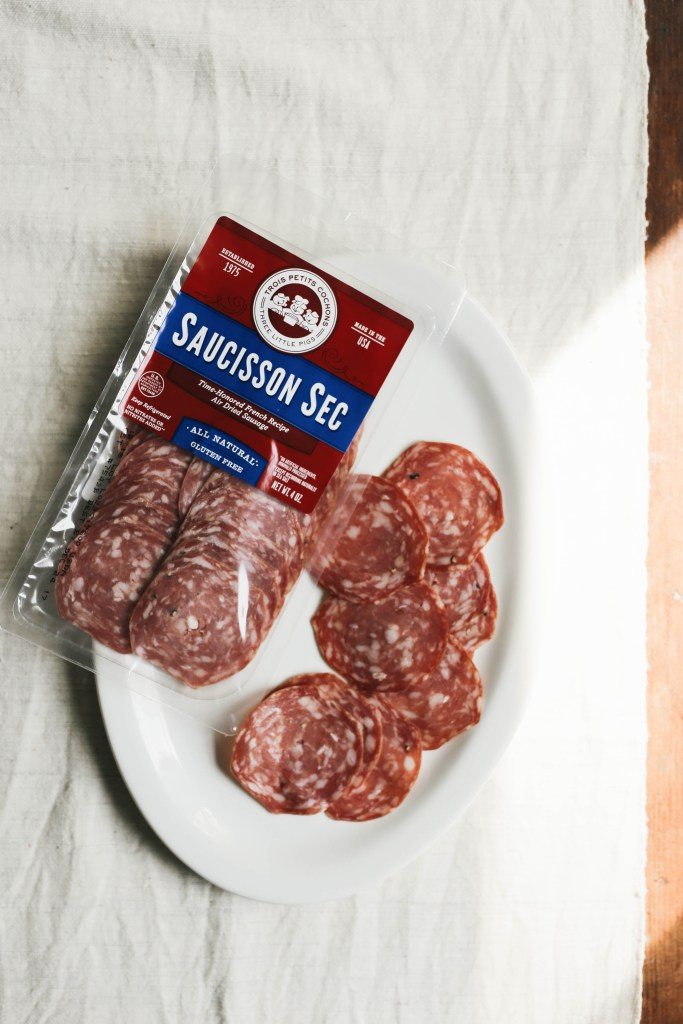
1 (4 ounce) package Trois Petits Cochons Sliced Saucisson Sec
1 (3 ounce) package Trois Petits Cochons Sliced Jambon Sec
Trois Petits Cochons Cornichons Piquants
beet + cashew dip (recipe below)
simple roasted carrots (recipe below)
pickled gherkin cucumbers (recipe below)
assorted hard and soft cheeses
assorted crackers
olives
grapes
dried fruits (plums, fermented figs)
fresh herbs
10 tips for assembling an ‘un-bored’ charcuterie board:
1. When choosing charcuterie to include, make sure to use a good variety of textures and flavors – Trois Petits Cochons offers many delicious options. For this board, I used a few of their sliced cured meats (dry cured ham and air dried sausage) for snacking, as well as a pâté and rillettes for spreading on crackers.
2. The same logic applies to cheeses – make sure to include a range of textures and flavors. I included both goat’s and cow’s milk cheeses, as well as a mixture of hard and soft textures. A wedge of pungent blue cheese will satisfy those with more adventurous palates, while sweeter cheeses like aged gouda and gruyère are always crowd pleasers.
3. Include complementary flavors. Accoutrements should complement the charcuterie, not overwhelm it. Sweet flavors, like grapes and dried fruits, complement saltier charcuterie and cheeses, while sour, acidic flavors, like cornichons and other pickled vegetables are great palate cleansers.
4. Don’t stop at fruits and pickles – boards benefit from all different kinds of foods that aren’t necessarily “traditional”. Try including some fun dips or spreads (like this beet + cashew dip, below), or other unexpected small bites like vegetable fritters, crostini, deviled eggs, or even simple roasted vegetables that can be eaten with your fingers (like these simple roasted carrots, below) – anything that complements your charcuterie and keeps things interesting. It’s also a good idea to make sure at least one of these options is vegan or at least vegetarian, to satisfy all palates in your crowd.
5. Make it easy on yourself. For the items that you make yourself, choose recipes that can be made in advance. The recipes I’ve included below are all great options that can easily be made in advance. Even the roasted carrots can be made ahead of time and served at room temperature.
6. When assembling, “anchor” your board. Start with a large wheel of cheese or pâté in the center of your board that can act as your anchor or starting point around which you can arrange other cheeses, meats, and accoutrements. For mine, I used a wheel of brie.
7. More is more. I think charcuterie boards look most appealing and are most festive when they are piled high with different foods. Once you place your larger items on the board, fill in any empty spaces with smaller things (crackers, grapes, figs, olives, etc).
8. Mix up the colors. Break up similarly colored pâtés and cheeses with brightly colored accoutrement. This will help the true stars of the board pop. And, to give things a festive-vibe, include holiday-inspired shades (here, I used the beet + cashew dip and purple carrots for shades of red, as well as gherkins and fresh sage for pops of green).
9. Garnish with fresh herbs. Fresh herbs will brighten up any dish, and the same applies for charcuterie boards. They add a touch of green, as well as a fresh fragrance. For my board, I included a few bundles of fresh sage, to keep in the holiday theme, but really any herb would look nice here – fresh bay leaves, parsley, chives, winter savory, and thyme are some great options.
10. Serve a stack of small plates next to the board. Sharing straight off the board is always fun, but small plates will encourage guests to take their own helpings. This is especially true for cocktail parties where guests will tend to crowd around the food.
Print
Festive Holiday Charcuterie Board
Ingredients
beet + cashew dip
- ½ cup raw (unsalted cashews)
- 4 small beets (14 oz total, greens trimmed + halved)
- 1 leek (white + light green parts only, halved lengthwise + cleaned)
- 2 large cloves garlic (unpeeled)
- 5 tablespoons olive oil (plus more to garnish)
- 1 15 ounce can cannellini beans
- 1 teaspoon salt
- 1 tablespoon balsamic vinegar
- juice of ½ a lemon
- sea salt flakes (to garnish)
simple roasted carrots
- 1 bunch of carrots (peeled + greens trimmed (I used purple carrots))
- 1 tablespoon olive oil
- salt + freshly cracked black pepper (to taste)
pickled gherkin cucumbers
- 1 cup Mexican sour gherkin cucumbers (or other miniature cucumber variety)
- 1 cup white vinegar
- 1/3 cup sugar
- 2 tablespoons salt
- 1 teaspoon mustard seeds
- 1 bay leaf
Instructions
beet + cashew dip
- Add the cashews to a small bowl and cover with hot water. Allow to soak for 1 ½ hours.
- Preheat the oven to 450°F. In a cast iron skillet or baking sheet, toss the halved beets, leeks, and unpeeled garlic cloves with 2 tablespoons of the olive oil. Roast in the oven, tossing the vegetables occasionally to avoid burning, until the beets are tender when pierced with a knife, about 40 – 50 minutes. If you find that your garlic and leeks are browned, but the beets are still undercooked, just remove the leeks and garlic and allow the beets to continue to roast until tender. Remove from the oven and set aside to cool.
- Drain the cashews. In a food processor or a high-powered blender, add the cashews, cannellini beans, and 3 tablespoons of water. Blend until smooth. (If using a blender, you may need to use the tamper attachment to get things going). Once cool enough to handle, peel the beets either by rubbing between paper towels. Cut each half into half again and add the pieces to the food processor. Squeeze the roasted garlic cloves from their skin and add along with the leeks, salt, balsamic vinegar, and lemon juice. Blend until smooth. With the motor running, add the remaining 3 tablespoons of olive oil in a slow and steady stream until completely incorporated. Spoon the dip into a bowl. Wrap in plastic and refrigerate until ready to serve (up to 2 days) or garnish with a drizzle of olive oil and sprinkle of sea salt flakes to serve immediately. If not serving immediately, remove the dip from the refrigerator a few hours in advance to allow to come to room temperature and garnish with the olive oil and salt right before serving.
simple roasted carrots
- Preheat the oven to 425°F. Halve any larger carrots lengthwise, if needed, so they are all roughly the same thickness. On a large cast iron skillet, or sheet pan, toss the carrots with the olive oil and salt + pepper to taste. Arrange in a single layer and roast, tossing once halfway through, until the carrots are tender when pierced with a knife, but not limp,* about 25 – 30 minutes.
- *It’s important to not overcook your carrots. They should be just tender-crisp, so that they can easily be picked up and eaten with your hands.
pickled gherkin cucumbers
- In a small saucepan, heat the vinegar, 1 cup of water, sugar, salt, mustard seeds, and bay leaf over high heat until boiling. Reduce the heat to low and simmer, stirring occasionally, until the sugar and salt have dissolved. Remove from the heat and cool slightly.
- Add the gherkins to a sealable glass container (like a weck jar). Pour the warm brine over them and allow to cool completely. Once cool, seal the container and refrigerate overnight before serving. Pickles can be kept in the refrigerator for up to 2 months.


