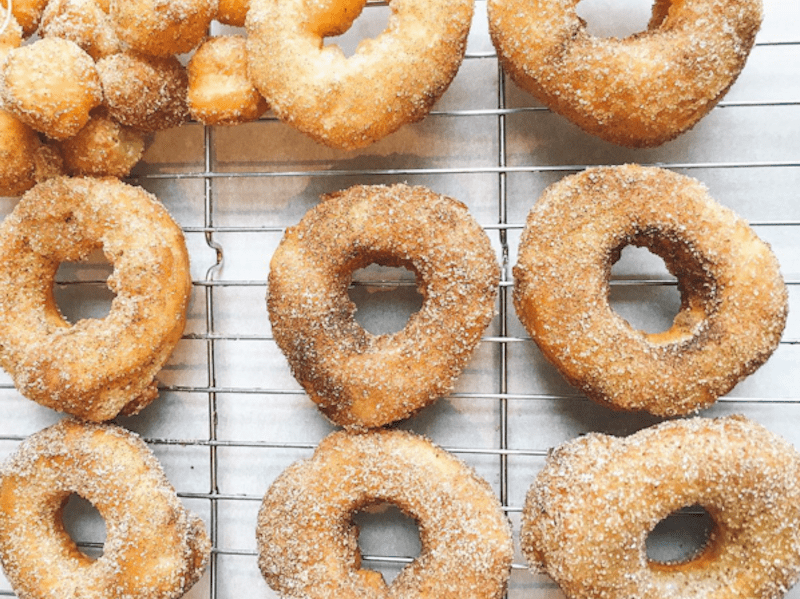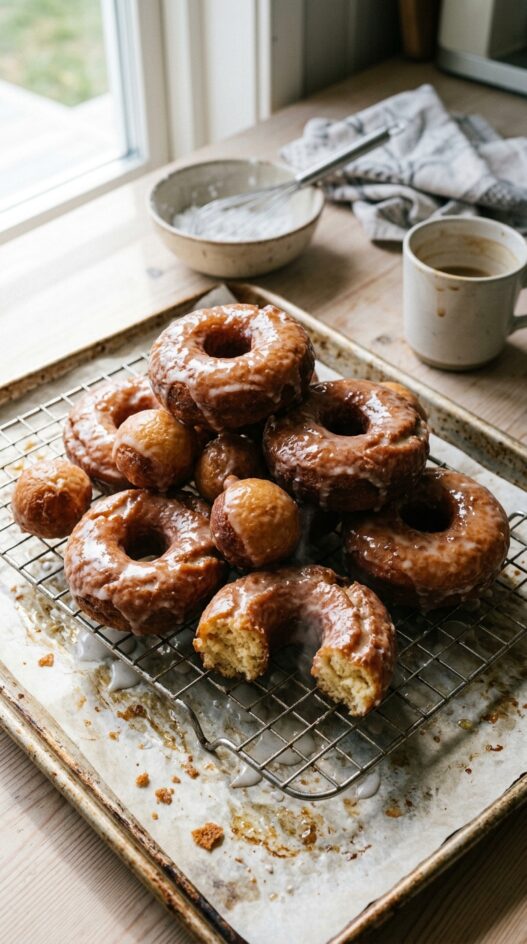
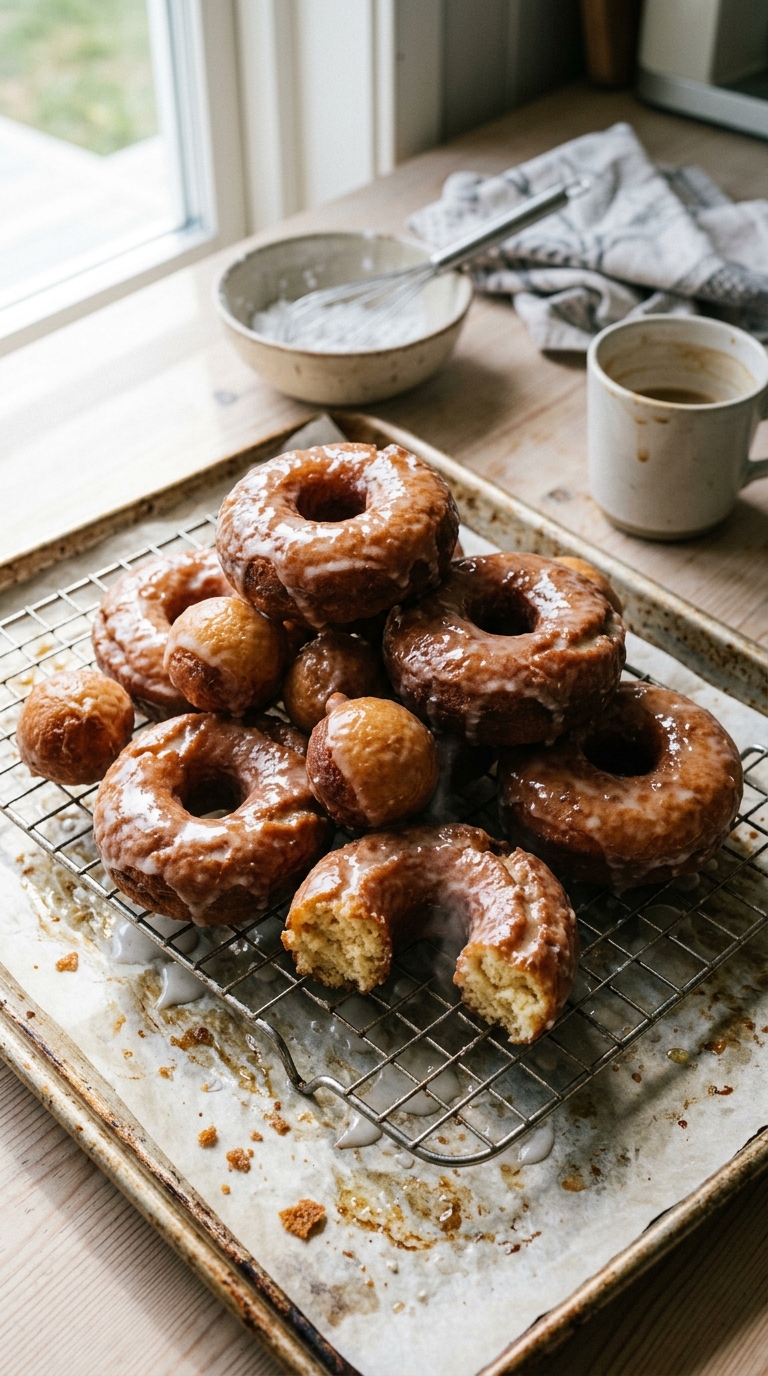
These Old Fashioned Sour Cream Cake Donuts are UNREAL. Unreal. The inside is soft, tender and cakey; and the outside is crispy with a classic sweet glaze. Just like the kind you get at the donut shop. And they weren’t that difficult. They are easier to mix than cake. They spend a little time in the refrigerator and then you cut them out like cookies. Then they hang out a little longer in the refrigerator. Then in under 2 minutes, you have perfect old-fashioned donuts. It’s kind of dangerous now that I know that they are this easy.I smell trouble.
Oh no…that’s just fryer oil heating up…
I’m kind of “meh” on yeast-raised donuts. I don’t get it. I probably never will. But cake donuts fill my soul and stomach with happiness.There is only one kind of cake donut that will do. It’s not baked; it’s fried. Legit fried.Because do you know what a baked donut is? It’s CAKE, people. Cake in a donut shape. And there ain’t nothin’ special about that. 

Sour Cream Cake Donuts
- Total Time: 40 minutes
- Yield: 20 1x
Description
These cake donuts are incredibly moist and tender, thanks to a secret ingredient: sour cream! A simple powdered sugar glaze finishes them off perfectly.
Ingredients
For the Donuts:
- 240 g Granulated sugar (1 1/4 cups)
- 36 g butter (2.5 tablespoons)
- 90 g egg yolks (about 5 large yolks)
- 380 g sour cream (1 1/2 cups)
- 600 g pastry flour (All-Purpose flour is fine ( 4 3/4 cups))
- 15 g baking powder (1 tablespoon + 3/4 teaspoon)
- 12 g kosher salt (1 tablespoon)
- 96 fl oz Oil for frying (I used canola)
For the Glaze:
- 100 g whole milk (100ML)
- 4 g kosher salt (1 teaspoon)
- 400 g powdered sugar (3 1/4 cups)
Instructions
To Make the Donut Dough:
- In a large bowl sift together the pastry flour and baking powder. Whisk in the salt to distribute. Set aside.
- Line a large mixing bowl with plastic wrap and then spray the surface of the plastic wrap. Set aside.
- In the bowl of a stand mixer fitted with the paddle attachment, beat together the granulated sugar, butter, and yolks on high speed until the mixture lightens and the volume increases, about 2 minutes.
- Stop the mixer and add the sour cream, then mix on medium until the mixture is smooth and homogenous.
- With the stand mixer on low, gradually add the dry ingredients to the bowl a large spoonful at a time. Add the next spoonful when you only see a few large streaks of flour left in the bowl. Stop the mixer when the dry ingredients are fully incorporated. You want to do this as quickly as possible so that not too much gluten develops, which will make tunnels in your cake and it will be tough.
- Transfer the dough to the plastic wrap lined bowl, spray the top of the dough with nonstick spray and then fold the edges of the plastic over the top to cover.
- Refrigerate for 60 minutes. At this point the dough can be held in the fridge for up to 1 week.
To Cut & Fry:
- Line a baking half-sheet pan with parchment paper and spray the paper with nonstick spray and set aside.
- Lightly dust a work surface with flour. While the dough is still in the bowl dust the top of the dough with flour. Turn the dough out onto your floured work surface, floured side down. Lightly dust the top with more flour.
- Working quickly to keep the dough cool, roll out the dough to ½ inch thick.
- Brush any excess flour from the top of the dough. Use a 3-inch and 1 ¼ – inch ring cutters to cut the donuts and holes. Lightly tap the rings in flour before cutting each donut. Place the donuts and donut holes on the prepared sheet pan. [After I cut all my donuts, I went back and cut more “holes” with the small cutter from the scraps of dough. Waste not, want not!]
- Cover sheet pan with plastic wrap, but be sure not to let the plastic touch the top of the donuts. Chill in the refrigerator for 30 minutes. I let mine chill overnight at this step.
- While your donuts chill, make the glaze. In a medium bowl whisk together the milk, powdered sugar and salt. Cover the glaze with plastic wrap directly on the surface. You can heat up the glaze over a pot of simmering water on the stove if you want it thinner. I dipped my donuts while they were still very hot, so I didn’t need to do this.
- Pour oil into a fryer or a Dutch oven, making sure the oil is at least 2 inches deep. Heat your oil to 350° F. Adjust your heat to keep the temperature between 350° – 360° F while frying. You will need a clip-on fry/candy thermometer for this. I heat my oil up to 360° F before adding a batch of donuts because the cold dough will lower the temperature of the fryer oil.
- Gently place 3 donuts in the fryer, keep the remaining donuts in the fridge. Once they rise to the surface, cook for 30 seconds and then flip them with a slotted spoon. Fry until the bottom develops a nice golden brown color, about 80 seconds. Flip it again and then fry for another 80 seconds or until the color is a nice even golden brown. Transfer to a wire rack set over a sheet pan or paper towels. Donut holes fry for 30 seconds then flip, then another 60 seconds, then flip, then another 40-60 seconds. They will puff up and be golden brown all over. You can cook them for the same amount of time as the full donuts but they will be a little dry. [Before I fried all of my donuts, I tested one and broke it open to make sure it was cooked. ]
- Once the donut is just barely cool enough to handle (I only waited about 20 seconds but I have no feeling left in my fingertips…), dip the donut in the glaze and place back on the wire rack. Dipping a hot donut will give you a nice, even glaze that isn’t too thick or too thin!
- Store in an airtight container overnight but they are best consumed the day they are fried…with coffee.
- Prep Time: 20 minutes
- Cook Time: 20 minutes
- Category: Dessert
- Cuisine: American
Frequently Asked Questions
What type of oil is best for frying the sour cream cake donuts?
For frying the sour cream cake donuts, a neutral oil with a high smoke point, like vegetable or canola oil, works best.
How long should I refrigerate the donut dough before cutting it out?
The donut dough should be refrigerated for a short time after mixing, typically around 30 minutes, to help it firm up for easier cutting.
What is the purpose of using sour cream in the cake donuts?
Sour cream adds moisture and richness to the cake donuts, resulting in a tender and soft interior.