
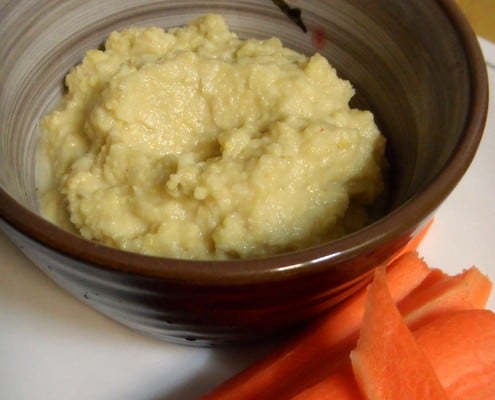
One of my favourite comfort foods any time of year is a homemade hummus recipe that anyone can make. Although some people object to eating uncooked garlic, there are some advantages to this. Having lived in Korea for nearly 2 years, I have become accustomed to using garlic as a staple ingredient. Koreans use it in their annual kimchi preparation which is currently well underway! But the smell of cabbage and garlic will not be fazing me. With winter in full swing, it is always a battle to keep coughs and sneezes at bay. Using garlic before you feel a cold coming is commonly know to help boost the immune system. It has been said that taking a dose of garlic, can shorten the symptoms and help you get back on your feet.
With this in mind, and the fact that I have recently acquired a massive bag of dried chickpeas, I thought I would try introducing the world to my simple hummus recipe.
Print
Simple Hummus Recipe
- Total Time: 2 hours 5 minutes
- Yield: 4 servings
Description
Elizabeth Ellory’s simple hummus recipe combines chickpeas and garlic for a deliciously easy appetizer or snack.
Ingredients
- 2 cups (150g) cooked and drained chickpeas or canned chickpeas, drained
- 3 garlic cloves
- 2 tbsp (30 ml) olive oil
- 1/2 cup (120ml) squeezed lemon juice
- 1/4 tsp cayenne pepper
- 1 cup (240ml) cold water
- Salt to taste
Instructions
A note on dried chickpeas
- Soak your dried chickpeas over night and then boil with a little salt for around 2 hours until soft.
- Drain away any froth during the boiling process.
- Alternatively you can use canned chickpeas if you don’t have the patience, but I really enjoy the anticipation. Either way your chickpeas are ready to roll!
The Hummus itself
- Put the garlic, lemon and olive oil into a blender and process until the garlic is pureed.
- Add the chickpeas, cayenne pepper and gradually add a little water to help blend the ingredients into a thick paste. Add a little more water if necessary to help the blender push round the drier ingredients.
- Add sea salt to taste.
- I have tried adding fresh rosemary or a table spoon of balsamic vinegar to the mixture and blending for a further 30 seconds. This can really add some flavour to your hummus.
- Sprinkle with a little cayenne pepper to present and serve with crudities or freshly baked flat bread as a light snack or deliciously tempting appetiser.
Notes
- For a smoother texture, peel the chickpeas before blending.
- Store hummus in an airtight container in the refrigerator for up to a week.
- Add more cayenne pepper for a spicier version.
- Serve with pita bread, vegetable sticks, or as a spread on sandwiches.
- Prep Time: 5 minutes
- Cook Time: 2 hours
- Category: Appetizer
- Cuisine: Mediterranean
Nutrition
- Serving Size: 1/4 cup
- Calories: 150
- Sugar: 2
- Sodium: 240
- Fat: 7
- Carbohydrates: 18
- Fiber: 4
- Protein: 6
- Cholesterol: 0
If You Liked This Recipe, You’ll Love These
- Mujadara Recipe: Middle Eastern Lentils and Rice
- How to Make Hummus Without Tahini
- Pumpkin Masala Curry
- Weeknight Chana Masala
Frequently Asked Questions
This hummus has no tahini — is that intentional?
Yes, deliberately. I use 1 cup of cold water and 2 tbsp of olive oil in place of tahini. The focus is on the chickpea and raw garlic flavor — the result is a lighter, less nutty hummus than the Middle Eastern standard.
Can I use canned chickpeas instead of dried?
Yes — canned chickpeas work and you can skip the overnight soak and 2-hour boil entirely. I prefer dried for the experience of the process, but either way your chickpeas are “ready to roll.”
Are there flavor variations the author suggests?
I’ve personally tried adding fresh rosemary or a tablespoon of balsamic vinegar and blending for another 30 seconds — both add interesting depth. For heat, try increasing the 1/4 tsp cayenne pepper already in the base recipe.



Ive made my own hummus for years but never with raw garlic like this. Took me a couple batches to get the amount right, the first one my husband thought was way too sharp. Second time around we both liked it.
Sounds like a great dip!