
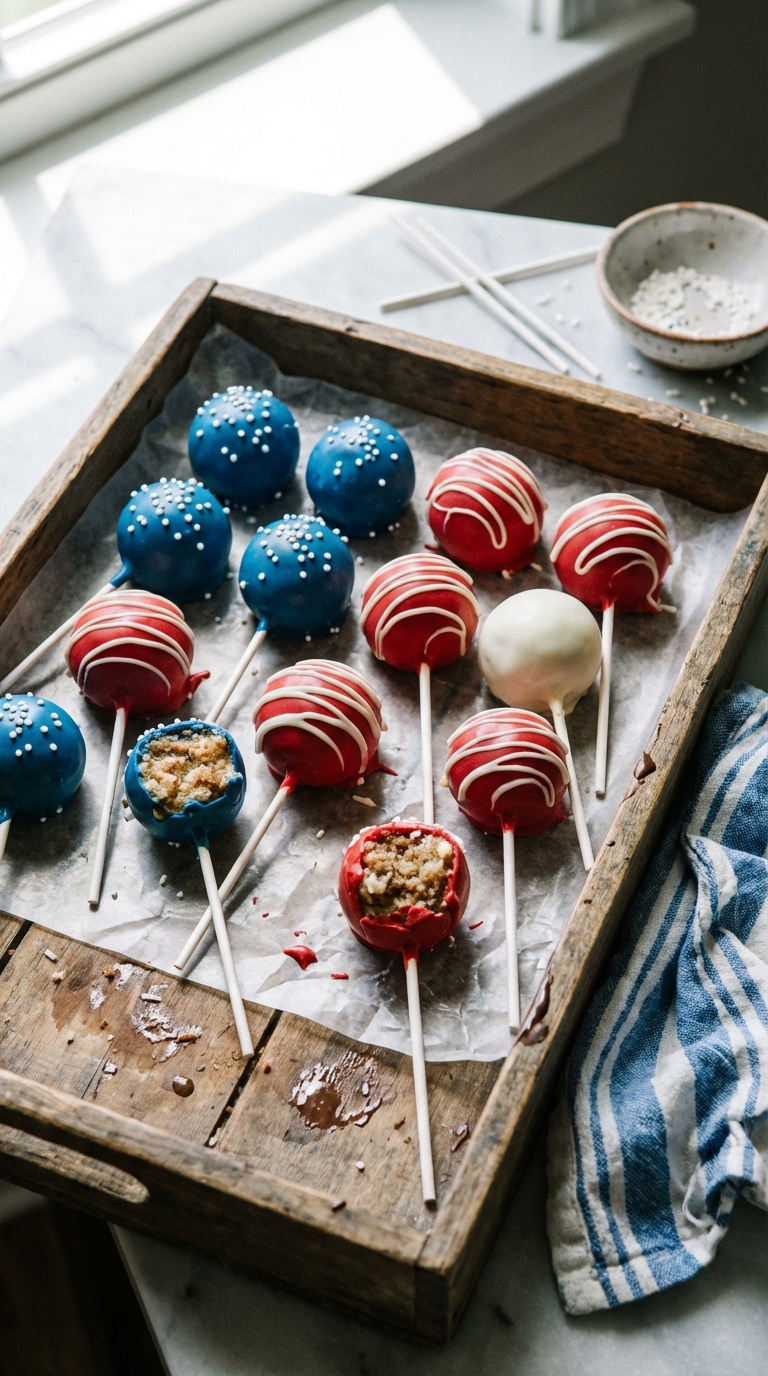
My son and I made these for a Fourth of July party three years ago, and they have shown up at every summer gathering since. They look like they took all afternoon. They did not. Once the cake is baked and cooled, the actual assembly moves fast: crumble, mix with cream cheese frosting, roll, chill, dip in colored chocolate melts, add sprinkles.
The red, white, and blue come from the chocolate melts, not food coloring. Each pop gets dipped in one color. White sprinkles go on while the coating is still wet. Line them up on waxed paper and they look like a display from a bakery window, which is exactly the reaction you want at a cookout.
How to Make Patriotic Cake Pops
Rolling Even Balls
Roll the mixture into 2.5cm (1 inch) balls and set them on waxed paper. If the mixture feels too sticky, chill it for 15 minutes. Dip the tip of each lollipop stick into melted chocolate and insert it into a ball. This acts as glue. Chill for 10 minutes before the full dip. 
Dipping Without Dropping
Melt the chocolate melts according to the package directions. Submerge the entire ball in one motion, then lift straight up and let the excess drip off. Do not swirl or twist. Swirling loosens the ball from the stick. Add sprinkles while the coating is still wet.

Red, White, and Blue Patriotic Cake Pops
- Total Time: 50 minutes
- Yield: Makes 24 1x
- Diet: Omnivore
Description
Fun, festive cake pops perfect for the 4th of July or any patriotic celebration.
Easy to make and always a crowd-pleaser!
Ingredients
- 1 box your favorite cake mix (plus ingredients needed as listed on the box) or your favorite from-scratch cake recipe
- 3/4 cup prepared cream cheese frosting
- 8 oz (227 g) white or blue chocolate melts
- 8 oz (227 g) red chocolate melts
- 1/3 cup white sprinkles
- 50 lollipop sticks
Instructions
- Prepare the Cake
- Bake the cake according to package directions or your recipe. Let it cool completely.
- Crumble the cooled cake into a large bowl.
- Form the Cake Balls
- Add 3/4 of a can of cream cheese frosting to the cake crumbs and mix until well blended.
- Roll the mixture into 1-inch balls and place them on waxed paper.
- Insert Sticks
- Melt a small amount of chocolate melts according to package directions.
- Dip one end of a lollipop stick about ½ inch into the melted chocolate and insert it into the center of each cake ball.
- Place the cake pops in the freezer for about 10 minutes, or in the refrigerator for about 20 minutes, to firm up.
- Dip the Cake Pops
- Melt the remaining chocolate melts according to package directions.
- Remove the cake pops from the fridge/freezer and dip each one into the melted chocolate, allowing the excess to drip off.
- For the “stars” pops, use blue candy melts and add white sprinkles before the chocolate hardens.
- For the “stripes” pops, use red candy melts. After the chocolate hardens, drizzle with white chocolate.
- Set the Pops
- Prop up the cake pops, cake side down, on waxed paper. Let the chocolate harden completely.
- Arrange the pops on a tray to create a Stars and Stripes pattern.
Notes
- To prevent the cake pops from cracking, ensure the cake is completely cool before mixing with the frosting.
- For a richer flavor, use homemade cake instead of a boxed mix.
- Store cake pops in an airtight container at room temperature for up to 3 days, or in the refrigerator for up to a week.
- Prep Time: 20 minutes
- Chilling Time: 20 mins
- Cook Time: 30 minutes
- Category: Dessert
- Method: Baking
- Cuisine: American
Nutrition
- Serving Size: 1 cake pop
- Calories: 150
- Sugar: 20
- Sodium: 50
- Fat: 8
- Saturated Fat: 5
- Unsaturated Fat: 2
- Trans Fat: 0g
- Carbohydrates: 20
- Fiber: 1
- Protein: 2
- Cholesterol: 10
Frequently Asked Questions
How far ahead can I make cake pops?
Coated cake pops keep at room temperature for 2-3 days or in the fridge for up to a week. The chocolate coating seals in moisture, so they stay soft inside. Bring to room temperature before serving.
Why do my cake pops keep falling off the stick?
The cake mixture is too wet, or the stick was not dipped in melted chocolate before inserting. Dip the stick tip in chocolate, push it halfway into the ball, and chill for at least 10 minutes before the full dip.
Can I use store-bought cake and frosting?
Yes, this recipe is designed for it. A box cake mix and prepared cream cheese frosting work well. Crumble the cooled cake, add frosting one tablespoon at a time until the mixture holds together when squeezed.


There is a person on Facebook using your image as her own work. It is the exact same photo. The Facebook page is Janet’s Tasty Treats.
Could not dip in the melted chocolate. Chocolate didn’t pour smooth. If I dipped it the cake would come off. Messy and I won’t do it again Didn’t turn out like the picture at all.
I used my favorite vanilla cake recipe and they turned out amazing. Love the red, white, and blue theme!
So cute, making for 4th!!
Gorgeous!!
These look great!