
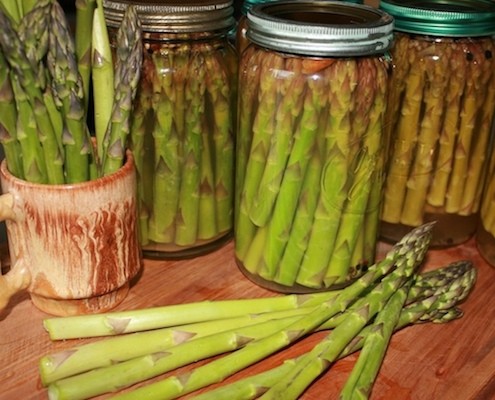
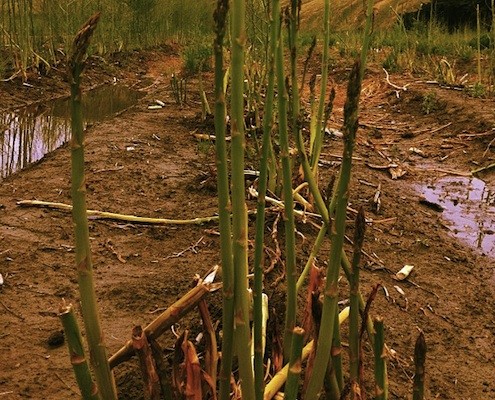
They were first planted 8 years ago, however the first 3 to 4 years were just to get them well established in the ground, that’s a lot of patience for the farmer that is now starting to enjoy a full crop and with a few more projects for the future with a canning and preserving facility.
There are 8 hectares of sandy land, purple and green asparagus growing, they don’t want to try with white asparagus yet, first they need to create a market for them because kiwis are difficult at the moment for trying them. The farm is 40 min away from my house and the idea of the visit is to see for my first time an asparagus field and get a good deal for 10 kilos because I want to preserve them to have for winter time and to be part of my preserved corner pantry.
To get this recipe going I have some home made apple cider vinegar from the last summer and coriander seeds that my partner saved before the first snow.
Preserved Asparagus
- Total Time: 80 minutes
- Yield: 4 jars
Description
Preserve the fresh taste of asparagus with this simple pickling recipe using homemade apple cider vinegar and aromatic spices.
Ingredients
- 4 1/2 lb (2 kg) of asparagus, trimmed to the size of the jar
- 4 cups (960 ml) of apple cider vinegar
- 4 cups (960 ml) of water
- 3 1/2 tbsp (52 ml) raw sugar
- 3 1/2 tbsp (52 ml) sea salt
- 2 tsp coriander seeds
- 2 tsp black peppercorns
- 8 dried chillies
Instructions
- Trim the asparagus to fit the height of your jars. Pack the trimmed asparagus tightly into 4 sterilized jars.
- In a large pot, combine the apple cider vinegar and water. Bring the mixture to a boil over medium-high heat.
- Once boiling, remove the pot from heat and stir in the raw sugar and sea salt until fully dissolved.
- Add the coriander seeds, black peppercorns, and dried chillies to the vinegar mixture.
- Carefully pour the hot vinegar mixture over the asparagus in the jars, ensuring the asparagus is fully submerged.
- Seal the jars with sterilized lids and process in a boiling water bath for 10 minutes. Remove the jars and let them cool to room temperature.
- Store the jars in a cool, dark place for at least 2 months before consuming to allow the flavors to develop.
Notes
- For the best flavor, use freshly picked asparagus.
- If you can’t use them immediately, store them in a bucket with a little water to keep the ends fresh.
- These pickled asparagus can be stored in a cool, dark place for several months.
- They make a great addition to salads, sandwiches, or as a snack.
- Prep Time: 60 minutes
- Cook Time: 20 minutes
- Category: Condiment
- Cuisine: Australian
Nutrition
- Serving Size: 1/4 jar
- Calories: 15
- Sugar: 2
- Sodium: 880
- Fat: 0
- Carbohydrates: 3
- Fiber: 1
- Protein: 1
- Cholesterol: 0
If You Liked This Recipe, You’ll Love These
- New Zealand Warrigal Greens Gnocchi
- Spicy Pickled Radishes
- Grilled Asparagus With Haloumi
- Spring Asparagus Pesto
Frequently Asked Questions
How long do I need to wait before the pickled asparagus are ready to eat?
Store the sealed jars in a cool, dark place for at least 2 weeks before consuming to allow the flavors to develop. Once opened, they can be stored for several months — a genuine pantry-staple preserve.
Why does the recipe use apple cider vinegar instead of white vinegar?
I used homemade apple cider vinegar from the previous summer — it contributes a mild, fruity acidity that suits the delicate flavor of asparagus better than the sharper bite of white vinegar. The 4 cups (960 ml) of apple cider vinegar is balanced with an equal 4 cups of water, raw sugar, and sea salt in the brine.
How should I store fresh asparagus if I can’t pickle them right away?
Store fresh asparagus in a bucket with a little water at the ends to keep them fresh until you’re ready to process them — the same way you’d hold cut flowers.




How long will these last preserved like this? 6 months, longer?
Funny how one can be stuck in ones own little world. Here, it’s all about winterfood – but reading your article made me realize that only half the world is having winter right now. Thanks!