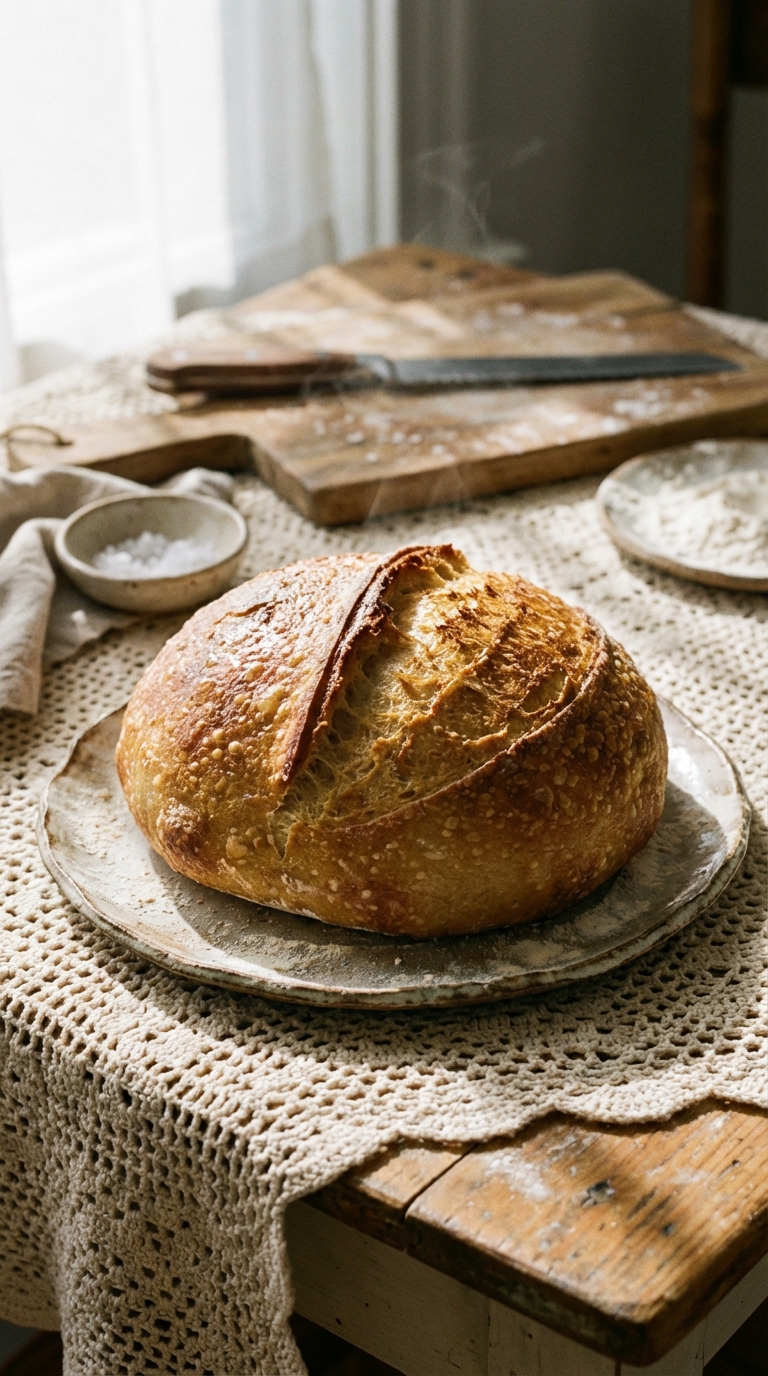
A crisp outer crust, a chewy, sour center and no special tools needed. Check out our guide to making homemade sourdough bread in your own kitchen.
This is a homemade sourdough loaf we have been perfecting in our kitchen for awhile now. It’s easy, straightforward and requires minimal special tools. We have good bread days and bad bread days (like the dead of winter when the whole kitchen feels cold), but this recipe is tried and true. The only piece of equipment we insist on is a Dutch oven pan. Read on below for all the reasons why. For this loaf, we used a 4.5 quart round dutch oven from Le Creuset. It’s the perfect size for this loaf and even if you double the amount of dough, it will fit perfectly in this pan. Don’t you just love that lilac-like Provence color? It’s stunning. This pan is the perfect conductor of heat to steam the bread and gift it a great crust. Plus, the enameled cast iron means clean up is especially easy. We also love that this pan is for more than just baking bread. Check out the video here.
A few notes before you get going…
The Starter
We have had our started for a few years now and it was a gift from a friend, so it is good and strong with plenty of bubbling natural yeast. Need to start your own starter? It’s so easy! Read how here. The night before we want to use our starter to make this loaf, we like to feed it and then leave it our at room temperature until we are ready to start mixing.
Hydration
We like to play with hydration in this bread formula. This means some days we may add more water than what is called for below. If you are kneading by hand, this can make the dough difficult to work with and may make it hard to shape the dough at the end. BUT, the dough will come out extra chewy and with a beautiful open structure (read: larger holes in each slice) that is a favorite quality of sourdough.
Mixing
While you can use a stand mixer and a dough hook to make this bread, we opted not to, just to show that you can do it by hand. If you are doing it by hand, we suggest starting the mixing process in a bowl to minimize the mess and then turning the dough out onto a floured surface and kneading it until a good gluten structure has formed. To test to see if the bread has been kneaded enough, we like to pull a piece off dough out of the formed ball and stretch it between our fingers. If it can create a square and stretch without tearing, it is ready to go. Check out the video for a visual of this.
Scoring
Scoring the bread before baking helps it rise in an even manor and ensures that is bakes evenly. We use a sharp knife, a razor blade or lame, which is a tool just for scoring bread. Make an x, a square, some slashes or get creative!
Preheating the Pan
To help achieve that perfect crust, we like to preheat the pan in a 500F oven. Once the dough is ready, we place it in the hot pan, put the lid back on and put it all in the oven, which we turn down to 450F. The hot lid on top of the hot pan helps to steam the bread and gives it a crisp crust.
How to Make Homemade Sourdough Bread
- Total Time: 47 minutes
- Yield: 1 8 inch loaf
Description
Feel free to double these amounts for a large loaf!
Ingredients
- 127 grams water (warm)
- 5 grams sugar
- 3 grams yeast
- 170 grams sourdough starter (fed)
- 194 grams flour
- 5 grams salt (kosher)
Instructions
- In a large bowl, mix together the sugar and water. Stir until sugar is dissolved.
- Sprinkle the yeast on top and let it sit a few minutes, or until it begins to bubble.
- Stir in sourdough starter, flour, and salt. Once it is stirred together, turn the dough out onto a floured surface and knead for about 10 minutes or until a good gluten structure has formed. See tips above. Add more flour as needed.
- Place the dough in a greased bowl and refrigerate for 12 hours. OR, shape it into the desired round shape and let sit at room temperature for about an hour on a floured towel or until it has risen fully. Touch the dough with your finger and leave an imprint. If the dough springs back about half way, it has risen enough.
- If the dough has been in the fridge for 12 hours, take it out of the fridge and shape into a boule, or round, shape and let it rise on a floured towel for about 2 hours.
- Preheat the oven to 500F with a dutch oven pan and lid in the oven.
- Once the oven is heated and the dough has risen enough, carefully remove the pan and lid from the oven and flip the towel with the bread on it into the hot pan. Use a knife to score the bread in the pan. (Be careful! We have burned the edges of our arms many times if we aren’t being aware of the hot pan)
- Return the lid to the top of the pan and place the pan with the bread back into the oven. Decrease the temperature to 450 and bake for about 12 to 15 minutes.
- Remove lid when the bread looks shiny on top and is starting to take on color. Continue to bake for 10 to 15 more minutes or until the bread sounds hollow when tapped.
- Let the bread cool before cutting.
- Enjoy!
- Prep Time: 20 minutes
- Cook Time: 27 minutes
- Category: Baking
- Cuisine: American
Frequently Asked Questions
Why is a Dutch oven necessary for this sourdough bread recipe?
A Dutch oven is essential because it creates a steamy environment that helps develop a crisp outer crust while allowing the bread to rise properly during baking.
How should I prepare my sourdough starter before using it for this recipe?
You should feed your sourdough starter the night before and leave it at room temperature to ensure it is active and bubbly when you mix it into the dough.
What is the importance of hydration in making this sourdough bread?
Hydration affects the dough’s texture and crumb; experimenting with different hydration levels can lead to variations in the chewiness and rise of the bread.