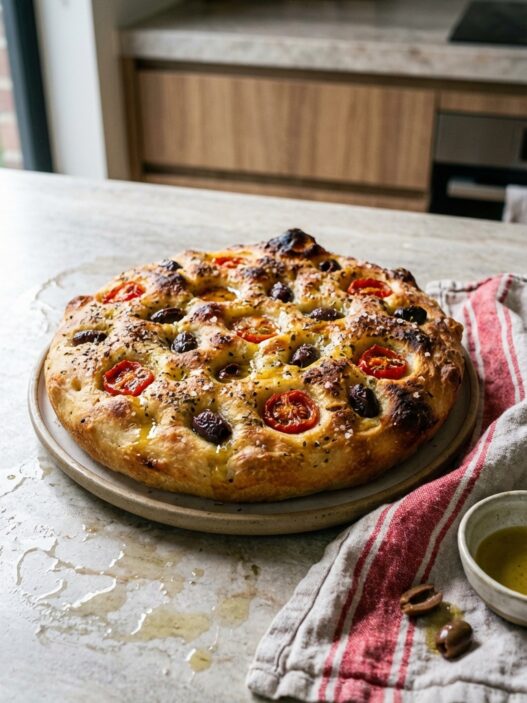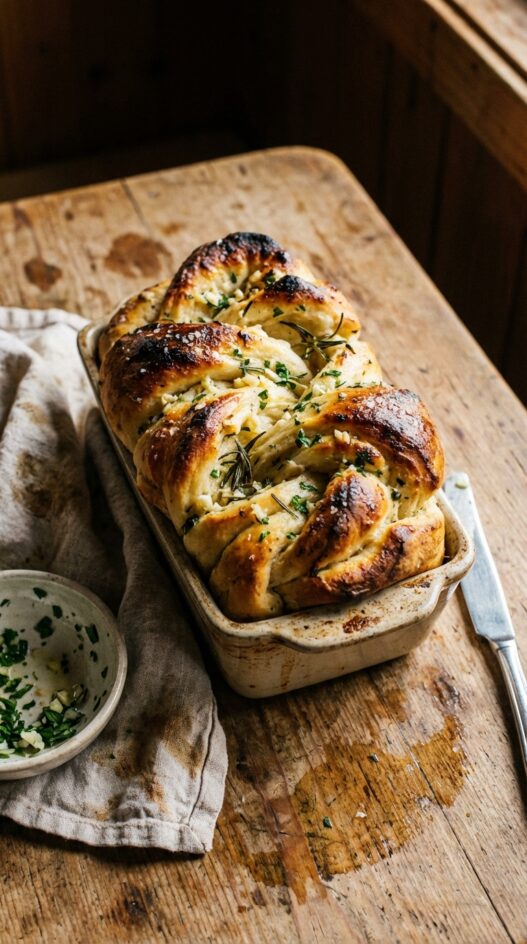

Layered with rosemary, parsley, garlic and butter, this pull-apart bread is a dream come true when you’re craving soft, flavorful carbs.
Garlic and Herb loaded Pull-Apart Bread is the perfect bread for your next meal. It’s flavorful and fun to serve — no knife required. You can literally just pull slices from the loaf.
My dad baked the best bread, and my mom’s is right up there, too. What I wouldn’t do for another taste of his bread! He rarely ate store-bought bread, preferring to bake it himself every few weeks. When it was bread-baking day, the whole house smelled absolutely heavenly. Can you imagine!
His bread was chewy on the outside and soft and fluffy on the inside. It was irresistible and perfect on its own, although I’d never turn down a slice with homemade jelly or butter slathered on it.
I can’t tell you how hard it was to wait for a roll to cool before snatching one and tearing into it. There were always both loaves and rolls, and the extra dough was turned into pizza.
My dad worked in a commercial bakery when he was young and always talked about “the junk” that was included in the ingredients. That was a long time ago, and even back then he recognized the importance of whole foods and ingredients.
I haven’t perfected my dad’s art of baking bread, even after a few sessions with my mom. Maybe I never will, or maybe one day I’ll surprise myself. Until then, I can happily enjoy one loaf at a time, like this recipe for Garlic & Herb Pull Apart Bread. At first it seemed odd to me to make just one loaf, but then I realized that most people don’t bake oodles and oodles of bread at a time!
This is an easy bread to make, and the fresh herbs and garlic really make it special. It makes enough for one loaf, but you’ll be left with some extra dough. I popped the extra dough into three wells of a muffin tin, which turns into a few pretty rolls.
I hope you’ll give Garlic & Herb Pull Apart Bread a try. You’ll love the smell as it bakes, and how wonderful it tastes.
Print
Garlic and Herb Loaded Pull-Apart Bread
- Total Time: 45 minutes
- Yield: Makes 1 loaf and 3 muffins
- Diet: Omnivore
Description
Soft, buttery pull-apart bread bursting with garlic, rosemary, and parsley. Perfect for sharing!
Ingredients
- 1/4 cups (60 ml) warm water
- 1/2 ounce (14 g) dry active yeast
- 3 cups (710 ml) flour
- 3 tablespoons sugar
- 1-1/2 teaspoons salt
- 1/2 cups (118 ml) milk
- 1/2 cups (118 ml) melted butter
- 2 eggs
- 3 cloves (minced) garlic cloves
- 1 tablespoon fresh rosemary
- 1 tablespoon fresh parsley
- Nonstick cooking spray
- Sea salt
Instructions
- Add the yeast to the bowl of a stand mixer. Pour the warm water over the top. Gently stir and allow the mixture to sit for a few minutes.
- Add the flour, sugar, and 1-1/4 teaspoons salt to a medium bowl and whisk to combine.
- Add the dough hook to the stand mixer and add half the flour mixture to the bowl. Mix on low until it begins to combine with the yeast mixture.
- While mixing, pour in the milk followed by 1/4 cup of the melted butter. Allow it to mix for a few minutes.
- One at a time, add the eggs. Continue to mix until incorporated.
- Add the remaining flour mixture and mix until incorporated. The dough should be soft and just slightly sticky.
- Lightly coat a large bowl with nonstick cooking spray.
- Lightly flour a clean work surface. Transfer the dough to the surface and knead it lightly a few times. Pat it into a round ball.
- Transfer the dough to the bowl, cover it with a clean towel, and allow it to rest in a warm area for about an hour. The dough should almost double in size.
- When the dough has risen, sprinkle more flour on your work surface. Transfer the dough to the surface and punch it down a few times. Roll it out to a large oval, about 1/4-inch thick.
- Lightly coat a 9×5-inch loaf pan with nonstick cooking spray. Do the same in 3 wells of a muffin tin. Preheat your oven to 350°F (177°C).
- Combine the remaining 1/4 cup of melted butter with the remaining 1/4 teaspoon salt, garlic, and herbs.
- Use a biscuit cutter (4-5 inches in diameter) to cut rounds out from the dough. Brush the butter mixture over one side of each round and fold in half. One at a time, place the folded rounds in the loaf pan, pressed up against each other, rounded side facing up.
- Gather the dough scraps together and roll it out flat and continue cutting out rounds. Continue until there is no dough left.
- Gather the dough rounds that won’t fit in the loaf pan and place in the muffin wells (three rounds per muffin well).
- Brush any remaining butter mixture over the top of the dough, and in between the rounds. Sprinkle the top with a bit of sea salt.
- Bake for about 25 minutes, or until the tops turn lightly golden.
- Cool slightly before serving.
Notes
- For richer flavor, use unsalted butter and add salt to taste.
- To make ahead, prepare the dough and refrigerate overnight. Let it rise at room temperature before shaping and baking.
- Leftover bread can be stored in an airtight container at room temperature for up to 2 days or frozen for up to 1 month.
- Prep Time: 20 minutes
- Cook Time: 25 minutes
- Category: Baking
- Method: Baking
- Cuisine: American
Nutrition
- Serving Size: 1 slice
- Calories: 300
- Sugar: 10
- Sodium: 400
- Fat: 15
- Saturated Fat: 8
- Unsaturated Fat: 5
- Carbohydrates: 40
- Fiber: 2
- Protein: 5
- Cholesterol: 50
Frequently Asked Questions
What type of herbs can I use if I don’t have rosemary or parsley?
You can substitute rosemary and parsley with other herbs like thyme or oregano, but keep in mind that it will alter the flavor profile slightly.
How do I properly incorporate the garlic into the dough?
To incorporate the garlic, finely mince it and mix it into the butter before brushing it onto the dough layers, ensuring even distribution.
Can I use store-bought dough instead of making it from scratch?
Yes, you can use store-bought dough; just make sure to layer it with the garlic and herb butter as directed for the best flavor.