Pickling cucumbers are in the local farmers markets and you know what that means, don’t you? Time to make some dill pickles.
By Laura Davis
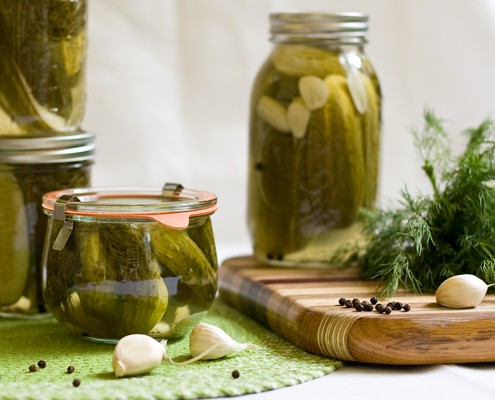
When I make pickles I have to hide them from my husband or he will eat every last one before anyone notices. My family enjoys them but I like to use them in recipes and have them on hand for grilling and barbecues if there are any left.
Here are a couple of interesting tidbits about pickles:
Did you know that dill pickles out sell sweet pickles 2 to 1? I didn’t, I thought it was the other way around.
Did you know that the word “pickle” was derived from the middle English word “pikel” which was originally was a spicy meat sauce that accompanied meat? Me neither! I have read that when it was hard to preserve meats that sauces and spices were used to mask the unpleasant flavor or odor of the meat. Sounds appealing, eh?
Did you know that pickles played a role in the discovery of America in 1492? An Italian merchant and explorer named Amerigo Vespucci was involved with Columbus’s voyage and stocked the ship with vitamin C rich pickles. At the time, a vitamin C deficient disease called scurvy was cause for the failure of many voyages. Vitamin C is not at its peak levels in pickled food but is enough to prevent scurvy outbreaks which were fatal at the time. It is also believed that America was named after this merchant/explorer’s name, Amerigo.
Historically in the south and worldwide, preserving and pickling are a way to carry the summer’s bounty into the colder months. These days it is not so necessary to to can foods because many foods are available year round. Lets face it, nothing beats making your own jams and preserves, or freezing fresh corn or peas, or making your own dill pickles. I limit my pickling to cucumbers but okra, peppers, watermelon rind, beans, carrots, onions all can be pickled and that is only naming a few.
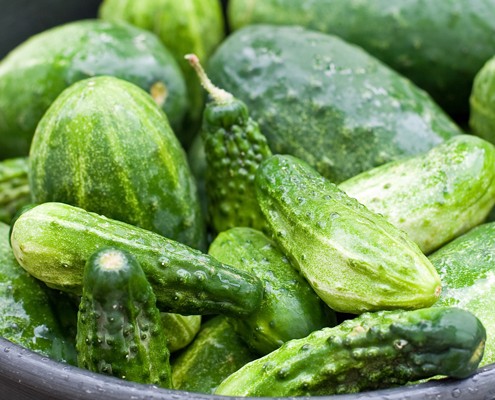
This recipe uses fresh dill and garlic and is fairly easy as far as preserving or pickling goes. Try to get small pickling cucumbers. This year it was a half and half mix so I quartered the larger cucumbers into spears. I have never done this before, I usually leave the pickles whole, so we will see how it turns out. If you like a little heat to your pickles then drop a couple of red pepper flakes in each jar before filling with the cucumbers.
Dill Pickles
- Total Time: 40 minutes
Description
Dill pickles using fresh dill and garlic made in your own kitchen that can be enjoyed throughout the year can’t be beat!
Ingredients
- 4 lbs (1814 g)pickling cucumbers, 4 inches or less, washed well
- 14 large garlic cloves, peeled and cut in half
- 1/4 cup (60.3 g)pickling salt
- 3 cups (710 mL) water
- 2 3/4 cups (651 mL) vinegar (5% acidity)
- 28 springs of fresh dill, rinsed well (a single bunch should do)
- 35 peppercorns
Instructions
PROCESSING PICKLES:
- This recipe requires that you process the pickles to preserve them. I used the water bath method which is to wash the jars and lids, sterilized them in boiling water for 10 minutes, take them out and set them up on clean towels without touching the rims or insides. Place the lids on and tighten the bands onto the jars. Process the filled jars for 10 minutes covered in gently boiling water. Canning equipment makes this job easier, although I have canned quite a few times without.
RECIPE
- Bring the vinegar, pickling salt, water, garlic to a boil and let boil for about 1 minute.
- Into the clean jars place the 4 garlic halves and 5 peppercorns (8 garlic halves and 10 peppercorns if using quart jars). Add 4 or 5 large dill sprigs to each jar as you place the cucumbers in them. If some of the cucumbers are large then cut them in half or quarter lengthwise.
- Pour boiling brine mixture over the top covering the pickles but leaving 1/2 inch at the top of the jar. Using a sterilized, wide mouth funnel is handy for this and helps keep the rims clean. Place the lids on the clean rims and screw on the bands tight. Process the jars for 10 minutes. Allow the jars to cool to room temperature. Label and store them in a cool place and allow to stand for at least 2 weeks before opening (a month is better).
- Tip: To check if the jars have sealed, push down on the top of the lids and it should be tight but if it “pops” or pushes down then store that jar in the fridge because it probably didn’t seal correctly.
- Prep Time: 30 mins
- Cook Time: 10 mins



Thank you for sharing your recipe…new to canning and wanted to make great dill pickles…..
i would love 2 buy 4 or 5 jars of homemade pickels .. please reply 2 my email adress!! thanks
These look so good! I am a bit of a pickle addict and homemade is the best way to go :)
I LOVE dill pickles! They look great!
Thanks Tamara!
I’m with your husband I love homemade dill pickles! Your recipe sounds Wonderful, a great way to use up the fresh dill in the garden;-)
Thanks, My dill didn’t do too well this year – maybe too dry and hot.