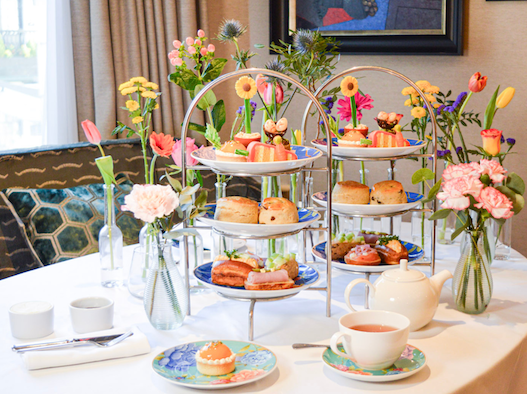
I love afternoon tea. It’s by far my favorite thing to do whenever I stay at a nice hotel or visit a new city. The opulent, layered trays of sandwiches and pastries, the formality how how the tea is served, the dressing up, the accompanying glass of Champagne. What’s not to love?
Now these very elegant experiences are obviously always incredibly exciting – but why settle for having a delicious tea ceremony only when traveling? Nay, say I, I want my scones and lemon curd served in the comfort of my own home – on just a regular weekend day, without having to check in to a five star hotel.
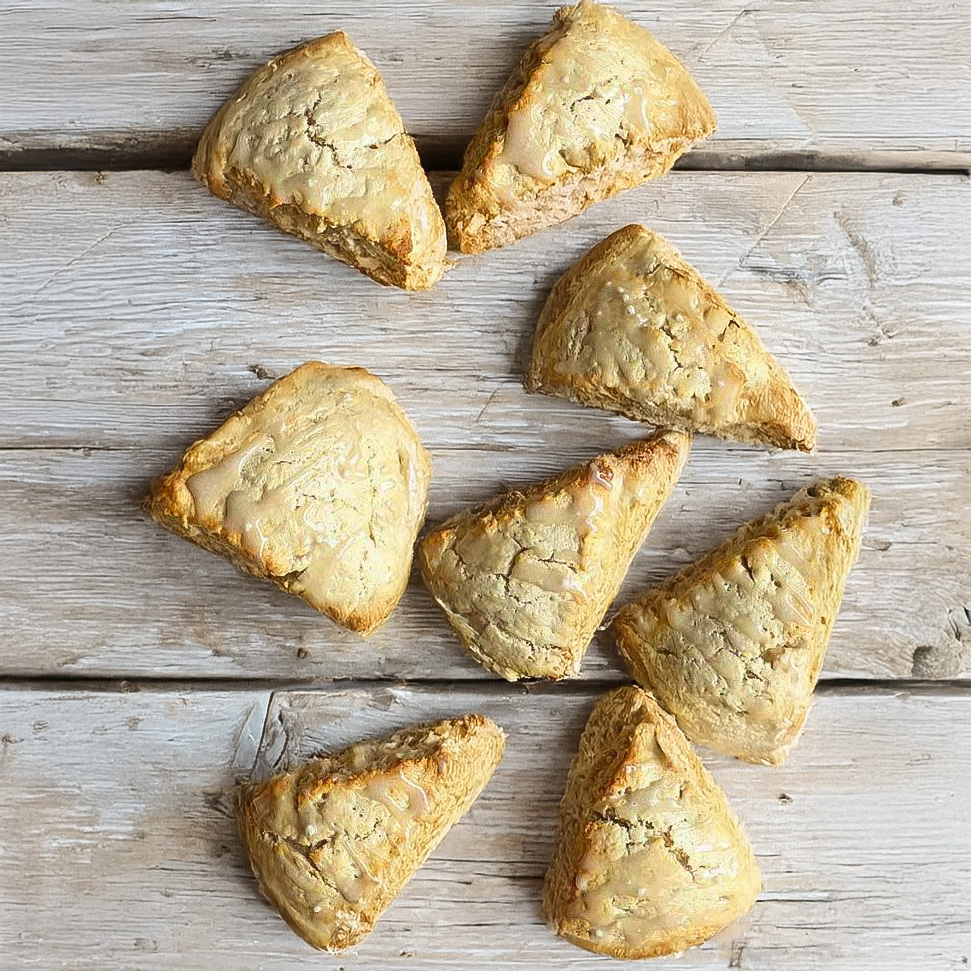
After baking hundreds of scones over the years, these are by far my favorites. They pack the perfect crumble, balance the sweetness just right, and they simply melt in your mouth. Serve with clotted cream, good butter, jam or homemade lemon curd.
You know what? It’s like being in a five star hotel after all…

How to Make the Perfect Scones at Home
1. Preheat and Prep:
- Preheat your oven to 400°F (200°C).
- Line a large baking sheet with parchment paper or a silicone baking mat and set aside.
2. Combine Dry Ingredients:
- In a large mixing bowl, whisk together the all-purpose flour, granulated sugar, and baking powder until fully combined.
3. Cut in the Butter:
- Add the cold, cubed butter to the flour mixture.
- Use a pastry cutter or fork to cut the butter into the dry ingredients until the mixture resembles coarse crumbs with pea-sized butter chunks. Be careful not to overmix.
4. Mix Wet Ingredients:
- In a separate mixing bowl, whisk together the heavy whipping cream, egg, and vanilla extract until well combined.
5. Combine Wet and Dry Ingredients:
- Pour the wet ingredients into the dry mixture and gently stir until just combined. Avoid over-mixing the dough, as it can become tough.
6. Shape the Dough:
- Transfer the dough onto a lightly floured surface. Shape the dough into a ball and flatten it into a 7-inch disc (18cm) that’s about 1-inch thick.
- Using a sharp knife or a bench scraper, cut the dough into 8 equal-sized wedges.
7. Chill the Dough:
- Place the scone wedges onto the prepared baking sheet, making sure they have a bit of space between them.
- Pop the entire baking sheet into the freezer for 5-10 minutes to chill the dough. This helps the scones rise properly and stay flakey.
8. Brush and Bake:
- Remove the scones from the freezer and brush the tops with a little extra heavy whipping cream.
- Bake in the preheated oven for 15-18 minutes, or until the tops of the scones are lightly golden and the centers are cooked through.
9. Cool the Scones:
- Remove from the oven and allow the scones to cool completely on a wire rack.
10. Make the Glaze:
- In a medium-sized mixing bowl, whisk together the powdered sugar, milk, and vanilla extract until smooth.
- If the glaze is too thick, add more milk a teaspoon at a time; if it’s too thin, add more powdered sugar.
11. Glaze and Serve:
- Drizzle the glaze over the cooled scones and let it set for 10-15 minutes.
- Serve and enjoy!
Recipe Notes:
- Don’t skip the chilling step. This ensures the butter stays cold and the scones rise beautifully, creating that flaky texture.
- Avoid overworking the dough. This can make your scones tough instead of soft and tender.
- You can add mix-ins like dried fruit, chocolate chips, or citrus zest for extra flavor.
- Make sure your butter is cold! It’s the key to light, flaky scones.

How to Make Perfect Homemade Scones
- Total Time: 35 minutes
- Yield: 8 scones 1x
Description
There are few things as satisfying as afternoon tea – and there are few things so rewarding as making your own scones for your next tea-ceremony. Luckily, scones are also incredibly easy to make, and with this foolproof recipe – you simply can’t go wrong.
Ingredients
For the Scones:
- 2 cups all-purpose flour (240g), spooned and leveled
- 1/3 cup granulated sugar (67g)
- 1 tbsp baking powder (15g)
- 6 tbsp cold unsalted butter, cubed (85g)
- 1/2 cup heavy whipping cream (120ml), plus extra for brushing
- 1 large egg
- 1 tsp vanilla extract
For the Glaze:
- 1 cup powdered sugar (120g)
- 1/2 tbsp whole milk (7.5ml)
- 1/2 tsp vanilla extract
Instructions
1. Preheat and Prep:
- Preheat your oven to 400°F (200°C).
- Line a large baking sheet with parchment paper or a silicone baking mat and set aside.
2. Combine Dry Ingredients:
- In a large mixing bowl, whisk together the all-purpose flour, granulated sugar, and baking powder until fully combined.
3. Cut in the Butter:
- Add the cold, cubed butter to the flour mixture.
- Use a pastry cutter or fork to cut the butter into the dry ingredients until the mixture resembles coarse crumbs with pea-sized butter chunks. Be careful not to overmix.
4. Mix Wet Ingredients:
- In a separate mixing bowl, whisk together the heavy whipping cream, egg, and vanilla extract until well combined.
5. Combine Wet and Dry Ingredients:
- Pour the wet ingredients into the dry mixture and gently stir until just combined. Avoid over-mixing the dough, as it can become tough.
6. Shape the Dough:
- Transfer the dough onto a lightly floured surface. Shape the dough into a ball and flatten it into a 7-inch disc (18cm) that’s about 1-inch thick.
- Using a sharp knife or a bench scraper, cut the dough into 8 equal-sized wedges.
7. Chill the Dough:
- Place the scone wedges onto the prepared baking sheet, making sure they have a bit of space between them.
- Pop the entire baking sheet into the freezer for 5-10 minutes to chill the dough. This helps the scones rise properly and stay flakey.
8. Brush and Bake:
- Remove the scones from the freezer and brush the tops with a little extra heavy whipping cream.
- Bake in the preheated oven for 15-18 minutes, or until the tops of the scones are lightly golden and the centers are cooked through.
9. Cool the Scones:
- Remove from the oven and allow the scones to cool completely on a wire rack.
10. Make the Glaze:
- In a medium-sized mixing bowl, whisk together the powdered sugar, milk, and vanilla extract until smooth.
- If the glaze is too thick, add more milk a teaspoon at a time; if it’s too thin, add more powdered sugar.
11. Glaze and Serve:
- Drizzle the glaze over the cooled scones and let it set for 10-15 minutes.
- Serve and enjoy!
Notes
Don’t skip the chilling step. This ensures the butter stays cold and the scones rise beautifully, creating that flaky texture.
Avoid overworking the dough. This can make your scones tough instead of soft and tender.
You can add mix-ins like dried fruit, chocolate chips, or citrus zest for extra flavor.
Make sure your butter is cold! It’s the key to light, flaky scones.
- Prep Time: 20 minutes
- Cook Time: 15 minutes
- Category: Baking, Bread, Scones, Tea
- Method: Baking
- Cuisine: American, British, French
Nutrition
- Serving Size: 1 scone
- Calories: 270
- Sugar: 13g
- Sodium: 200mg
- Fat: 12g
- Saturated Fat: 7g
- Unsaturated Fat: 3g
- Trans Fat: 0g
- Carbohydrates: 35g
- Fiber: 1g
- Protein: 5g
- Cholesterol: 60mg













These scones were amazing! They were so light and fluffy, I couldn’t stop at just one.
A classic recipe done right! I’ve made a lot of scones, but these are hands down my favorite. Soft inside, crispy outside. What more could you ask for?
This scone recipe is seriously foolproof. I’ve made it twice already, and both times, it was spot-on!
Was in a rush and didn’t chill the dough long enough. Ended up with flat scones, but they still tasted good. Gonna try again with more patience!
OMG, these scones were divine! I may have eaten three in one sitting… oops. No regrets!
Thanks for a lovely recipe.
I’ve made these scones thrice now, and they are perfect every time. Flaky, buttery, just the right amount of sweetness. My kids love them too!