It’s hard to find someone who doesn’t love a great pizza.
With the endless array of possible toppings, you can find something for just about any palate, from the most adventurous of eaters to the pickiest of youngsters. Pizza ‘like’ dishes – a flatbread with some sort of topping – can be found in many cuisines, Greek, Persian, Egyptian. The modern ‘Italian’ style pizza, originated in Naples, where the daring Neopolitans topped flatbread with the latest fruit that had just arrived from the New World – the tomato. Most Europeans were reluctant to try it, fearing it was poisonous. Once the aversion to the tomato passed, this dish became increasingly popular, first with the poorer classes, but eventually reaching the tables of royalty.
In 1889, the King and Queen of Italy, Umberto I and Margherita di Savoia, visited Naples and wanted to try the pizzas made by a famous local pizzaiolo (pizza maker), named Raffaele Esposito. He prepared several kinds for them, and the Queen especially liked one with basil, tomatoes and mozzarella; Esposito had created this one to commemorate the Italian flag. This pizza is still known today as Pizza Margherita.
But the toppings are the easy part. What makes or breaks a great pizza is the crust. As I just led a cooking class where we made pizzas in a wonderful wood fired oven, I’ve been researching – and trying – various pizza doughs, to find one that has great flavor, thin crust, crispy; and one that is pretty straightforward to produce and handles well. I’ve come across many a recipe, and have cooked pizzas with both Jody Adams and Susan Regis, two very well-know Boston area chefs who have joined us in Italy on our bike tours, and have wonderful pizzas on their menus. Each has their own dough recipe, with some similarities, and some differences. I’ve included a variation of each below, and offer my findings as to what makes the best ‘home’ pizzas.
The Keys to your Best Home Pizza
1. Whatever crust recipe you use, an extended overnight rise is the key to a flavorful crust. Both Jody and Susan recommend this; so does Peter Reinhardt, leader in the artisanal bread movement, instructor at Johnson & Wales, and author of several books, including American Pie: My Search for the Perfect Pizza. In fact, to quote Peter:
“The single biggest flaw in most pizza dough recipes is the failure to instruct the maker to allow the dough to rest overnight in the refrigerator (or at least for a long time). This gives the enzymes time to go to work, pulling out subtle flavor trapped in the starch. The long rest also relaxes the gluten, allowing you to shape the dough easily, “
Of course, a wood-fired home oven is best. But lacking this, a pizza stone in your oven is an adequate substitute. Crank up the heat. When I cook in a brick oven, 500° to 550° or so works well, and I set my conventional oven at this temperature. Allow it sufficient time to preheat and come to this high temp, at least 45 minutes.
2. Which flour to use? This is something for you to play with, and discover your own preference. But here’s what I’ve learned in my reading and experimenting.
Unbleached flour is a given – this delivers the best flavor. Susan uses high-gluten flour; this dough will have a little more ‘tolerance’, and will hold together better during handling. However, it will be a bit more elastic and can fight you a bit as you shape it. Giving it plenty of rest, and adding a bit of olive oil to the dough can help. Susan also adds semolina flour to her dough, which gives it a nice rustic texture. You could also try adding a bit of whole wheat flour if you wish.
Jody uses only all-purpose flour. This flour is less ‘hard’ (contains less protein), and will result in a crust with a little softer chew. The dough will be a bit more prone to tear as you shape it, but also will fight you a bit less.
3. Shaping the dough – stretch, don’t roll.
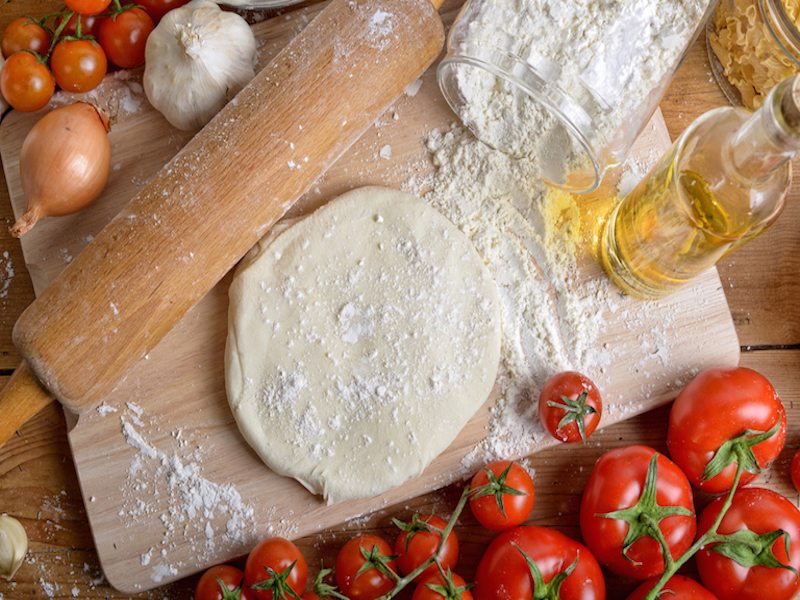
I’m not an expert who can confidently shape a pizza with a few tosses into the air, and I’ll assume most home cooks aren’t either. So how to shape the pizza? Both Susan and Jody recommend stretching, not rolling. Rolling will flatten out any air pockets, eliminating any of those big ‘bubbles’ than can form in the crust – which we like. Jody’s instructions use gravity to assist in the stretching; Reinhardt recommends using your fists (which should be well floured), instead of your fingers, to avoid tearing the dough.
Print
Description
Here’s two versions of ingredients, and instructions that will work for either. The instructions are based on several recipes; Jody’s, Susan’s, and Peter Reinhart’s recipe in The Bread Baker’s Apprentice. I don’t claim my recipe below is any better than any of these, but it is as basic as I could make it, without significantly changing the end product.
Ingredients
- Jody Adam’s Dough Ingredients:
- Makes dough for two 12-inch pizzas
- 3/4 cup 0.2 l warm water
- 1/2 package yeast (scant 1 teaspoon)
- 1 tablespoon kosher salt
- 2 tablespoons extra virgin olive oil
- 1 1/2 to 1 3/4 cups 150 to 175g unbleached all-purpose flour, plus more as needed
- Susan Regis Dough Ingredients:
- Makes dough for three 12-inch pizzas
- 1 cup 0.25 l warm water
- 1/2 teaspoon fresh yeast
- 1 1/2 cups 150g high gluten flour (1 1/2 cups unbleached all purpose, with 1 T gluten)
- 1/2 cup 50g all purpose flour
- 1/2 cup 50g semolina flour
- 1 teaspoon salt
- 2 tablespoons olive oil
- Additional 2 tablespoon all purpose flour for dusting
Instructions
- If you haven’t used your yeast in a while, begin by proofing the yeast to make sure it is still active. Combine the yeast and warm water in a large bowl. After a few minutes, bubbles should form. If nothing happens after 10 or 15 minutes, discard and begin again with fresh yeast.
- Add the salt and olive oil and mix well. Stir in the flour(s), 1/2 cup at a time. As you incorporate the last 1/2 cup of flour, the dough should become to stiff to stir. Turn it out onto a floured counter and begin to knead. Continue kneading until smooth and elastic, about 7 minutes or so. Try to use as little flour as possible during the kneading process; the less flour you use, the lighter the dough. The dough should be tacky, even sticky. You can do this in a stand mixer if you prefer.
- Divide the dough into 2 or 3 pieces (one for each pizza you plan on making.) Sprinkle flour over the dough, flour your hands and shape each piece into a ball. Place each ball in a medium bowl, drizzle with olive oil and turn the ball to coat it in the oil. Place each in a large plastic bag and put in the refrigerator to rest overnight, or up to 3 days. Note, at this point you can freeze any extra dough just as they are in the plastic bag for up to 3 months.
- On the day you are making your pizza, remove the dough balls from the refrigerator 2 hours before you plan to make the pizza. Place the dough balls on a floured counter, sprinkle with flour, dust your hands and press the dough balls into flat discs. Cover with plastic wrap and let rest for 2 hours.
- An hour before you plan to cook, place your pizza stone in the oven and preheat to 500° to 550°.
- Dust a pizza peel, back of a sheet pan or large wooden cutting board with semolina flour or cornmeal. Dip your hands in flour, including the backs and knuckles, and lift one piece of dough. Here are a couple of ways to shape the dough:
- Reinhart: Very gently lay the dough across your fists and carefully stretch it by bouncing the dough in a circular motion on your hands, carefully stretch it by bouncing the dough in a circular motion on your hands, giving it a little stretch with each bounce. Keep your hands well-floured throughout, if the dough begins to stick, put it back down on the counter and reflour your hands. At this point, you can move to the toss, or just continue to stretch. If you have trouble stretching the dough, or if the dough keeps springing back, let it rest for 5 to 20 minutes so the gluten can relax, and try again.
- Adams: Take up one of the flattened dough disks, and grasp with both hands kind of like you were holding a steering wheel, but with your hands a bit closer together; at 11 o’clock and 1, rather than 10 and 2, letting the dough hang down. Gravity will be doing the stretching for you. Rotate the dough disc by moving your hands along the edge in a circle. Don’t try to stretch the ball into a full circle all at once; it will gradually stretch, and you may be find allowing the partially stretched dough to rest while you work on another one more effective overall.
- When the dough is stretched to your liking, place it on your peel or pan, making sure you have enough semolina or cornmeal that the disc will move when you give the peel a shake. Top with your favorite toppings, keeping in mind that the more you use, the more difficulty you will have sliding it into the oven, and the crust will not cook as nicely if it is overloaded. I usually pick at most 4 different items, including sauce and cheese.
- Slide the pizza onto the hot stone (or bake on the sheet pan, if you don’t have a stone.) The pizza should cook in 5 to 8 minutes; check halfway through and rotate if necessary to cook evenly on both sides. Remove from oven, and let sit for 3-5 minutes before slicing.





Hi, is the amount of flour listed above correct? I always see recipes always calling for 3 cups of flour when making pizza. Can you list the amount of salt and oliveoil for 3 cups of flour?
Hello John. There are many recipes for pizza dough, making enough dough for a number of pizzas, of a certain size, and assuming a certain thickness of crust. The Jody Adams recipe makes enough dough for 2 12″ pizzas with a thin crust. For 3 cups flour you would double the original recipe, so 2 tablespoons salt and 4 tablespoons olive oil. The Susan Regis recipe is for 3 12″ pizzas with a slightly thicker crust. This calls for a total of 2 1/2 cups flour, close to your 3 cups. You could get out your calculator and increase all the quantities by 20% to get your 3 cup version. Enjoy!
Hello Terry, I agree with your friend. Preheating the oven takes longer than you might think. You want the entire oven HOT, including the internal frame, the pizza stone, everything. Not just the air inside. 45 minutes is what I typically do. Best of luck!
Hi Kathy, I heard from a friend that for best results you have to preheat the oven for 45 min. This made no sense to me at first as I could not see any reason why someone just keep the heat for 45 minutes without baking. Is there something I am not comprehending? What is your opinion?
Thanks
You want the oven as hot as it can get and you don’t want it to cool off when you attempt to slide the pizza onto the stone.