
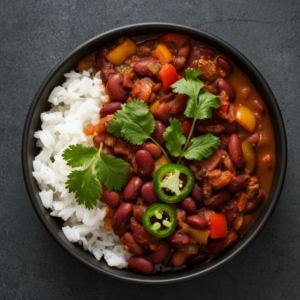
I learned to appreciate “weird” foods from the French side of my family. While my Southern/Scotch grandmother filled our bellies with her chili and soups, cookies and fudge sauce — the Caribbean/French side swooned over things like boudin noir (blood sausage), accras (codfish fritters), calves liver, and marrow. In fact, once when I was ten, my grandmother, Madou, served a whole calves brain topped with tomato sauce for dinner one night. Picture that… and then picture my horrified 10-year-old response.
However, the boudin noir is amazing. I still love calves liver, the accras is a family-wide favorite and I always claim any leftover marrow bones from dinner.
For those of you who’ve decided to stick around, you’re gonna love this.
My first recollections of marrow came from my grandfather who would always greedily pick the beef bones from the pot or platter and noisily suck the marrow out. It’s like intense umami butter – with a fatty richness that coats your tongue. I can’t get enough – so much so – that whenever I see them on a menu or in the market, I get them.
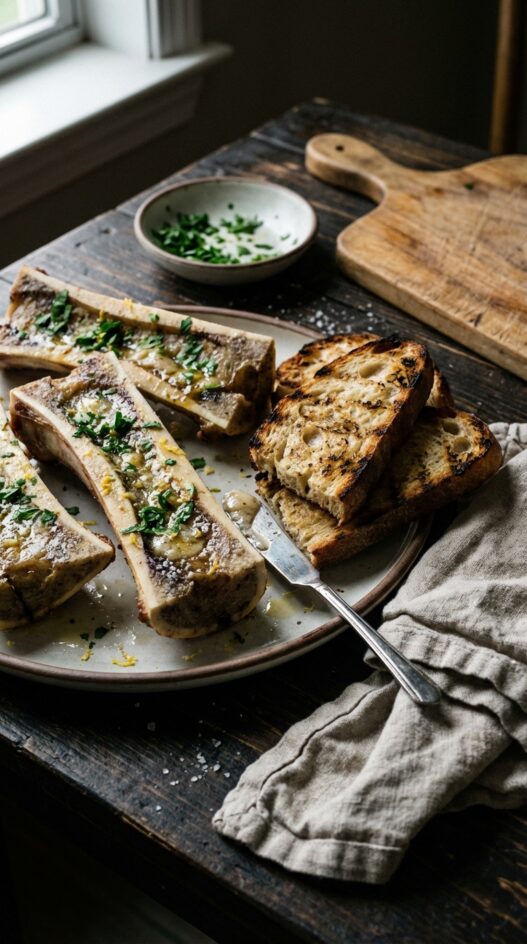
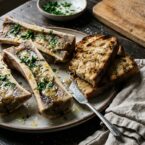
Restaurants can source the long bones and butcher them vertically, like a long narrow serving dish for the heavenly marrow. Diners scoop out the marrow and spread it on bread or toast points. My butcher doesn’t cut the bones vertically, so I work with the cross cut bones and that’s just fine. I like to rub a little garlic on grilled bread and finish with fresh parsley and a little lemon zest – kind of like a gremolata. With a glass of red wine or bubbly, it’s positively DECADENT!
How to Prepare and Serve Bone Marrow
1. Preheat the Oven
- Preheat your oven to 425°F (220°C).
- Line a baking sheet with foil.
2. Prepare the Marrow Bones
- Place the marrow bones cut-side-up on the foil-lined baking sheet.
- Sprinkle with kosher salt.
3. Roast the Marrow Bones
- Roast the bones in the preheated oven for about 20 minutes. The marrow should be soft and starting to pull away from the bone.
4. Grill the Bread
- While the bones are roasting, heat a grill to medium-high heat (about 400°F / 200°C).
- Grill the bread slices on both sides until browned and crisp, with some charred bits for added flavor.
- Transfer the grilled bread to a sheet pan.
- Rub one side of each bread slice lightly with the raw garlic clove. The crispy bread will act as a grater, infusing it with garlic aroma and flavor.
5. Prepare the Garnish
- Finely chop fresh parsley.
- Zest a lemon.
6. Serve the Marrow Bones
- When the marrow bones are done roasting, transfer them to a serving platter.
- Sprinkle with chopped parsley and lemon zest.
7. Enjoy!
- Serve the marrow bones with the grilled garlic toasts.
- Use a small spreader knife to scoop out the marrow and spread it on the bread, like butter.
- Enjoy immediately while warm.
Recipe Notes
- Bone Marrow Cut Lengthwise: If your marrow bones are cut lengthwise, adjust the roasting time to about 15 minutes. The marrow should still be soft and pull away from the bone easily.
- Garlic Flavor: Don’t overdo the garlic rubbing; a light touch gives the perfect hint of flavor.
How to Prepare and Serve Bone Marrow at Home
- Total Time: 25 minutes
- Yield: Serves 2
- Diet: Omnivore
Description
Rich, buttery bone marrow, simply roasted and served with crispy garlic toast. A sophisticated yet easy appetizer.
Ingredients
- 2 lbs (907 g) marrow bones
- 0.25-0.5 tsp kosher salt
- 4-5 slices bread from a boule or country loaf with a sturdy crust
- 1 clove garlic
- Chopped parsley
- Lemon zest
Instructions
- Preheat your oven to 425°F (220°C). Line a baking sheet with foil.
For the Soup
- Place the marrow bones cut-side-up on the foil-lined baking sheet. Sprinkle with kosher salt.
- Roast the bones in the preheated oven for about 20 minutes. The marrow should be soft and starting to pull away from the bone.
- While the bones are roasting, heat a grill to medium-high heat (about 400°F / 200°C). Grill the bread slices on both sides until browned and crisp, with some charred bits for added flavor. Transfer the grilled bread to a sheet pan. Rub one side of each bread slice lightly with the raw garlic clove.
- Finely chop fresh parsley. Zest a lemon.
- When the marrow bones are done roasting, transfer them to a serving platter. Sprinkle with chopped parsley and lemon zest.
- Serve the marrow bones with the grilled garlic toasts. Use a small spreader knife to scoop out the marrow and spread it on the bread, like butter. Enjoy immediately while warm.
Notes
- For richer flavor, soak the marrow bones in cold water for 30 minutes before roasting.
- If you don’t have a grill, you can toast the bread in a dry skillet over medium-high heat until golden brown and crispy.
- Leftover roasted marrow can be stored in an airtight container in the refrigerator for up to 2 days and enjoyed cold or reheated.
- Prep Time: 5 minutes
- Cook Time: 20 minutes
- Category: Main Course
- Method: Roasting
- Cuisine: French
Nutrition
- Serving Size: 1 bone
- Calories: 250
- Sugar: 1
- Sodium: 200
- Fat: 22
- Saturated Fat: 12
- Unsaturated Fat: 8
- Trans Fat: 0g
- Carbohydrates: 10
- Fiber: 1
- Protein: 10
- Cholesterol: 100
Get more cooking tips and classes here:
How to Make Better Coffee at Home: 10 Expert Tips for a Great Cup
How to Cook Every Type of Lamb
DIY Yogurt Recipe – Creamy Homemade Yogurt Made Easy
Seafood Masterclass: How to Choose, Handle and Cook Like a Pro
Frequently Asked Questions
What type of bones should I use for bone marrow?
You can use cross cut beef bones, as they are widely available, or if you can find them, long bones cut vertically for better presentation.
How do I prepare the grilled bread to serve with the marrow?
Rub the grilled bread with a little garlic and finish it with fresh parsley and lemon zest to enhance the flavor.
Can I use any type of fat to spread on the bread instead of marrow?
While marrow offers a unique richness, if you don’t have it, consider using a high-quality butter or a spread made with similar umami flavors, but it won’t replicate the experience.


Roasting bone marrow at home felt fancy but it could not have been easier, just scoop it onto toast with a little flaky salt. So rich and decadent, an amazing little treat!
salt + bread + marrow = pure joy.
the raw garlic rubbed on grilled bread is proper delish! charred sourdough is my go-to for it.
Tried a dry pilsner alongside instead of the red wine most people suggest and it worked better for me. The marrow is already so rich — you want something dry and slightly bitter to cut through it, not add to it.