
Whatever the reason i have been craving simple, nostalgic, comfort food. A fire in the fire place, pot roast slowly braising in the oven, and a bowl full of homemade butterscotch pudding.
Truly it does not get any more comforting than homemade pudding. As a kid I would love finding a bowl cooling in the fridge. Is it strange that I actually liked the skin? For us as kids it was always chocolate pudding, but as a adult I have much love for butterscotch.
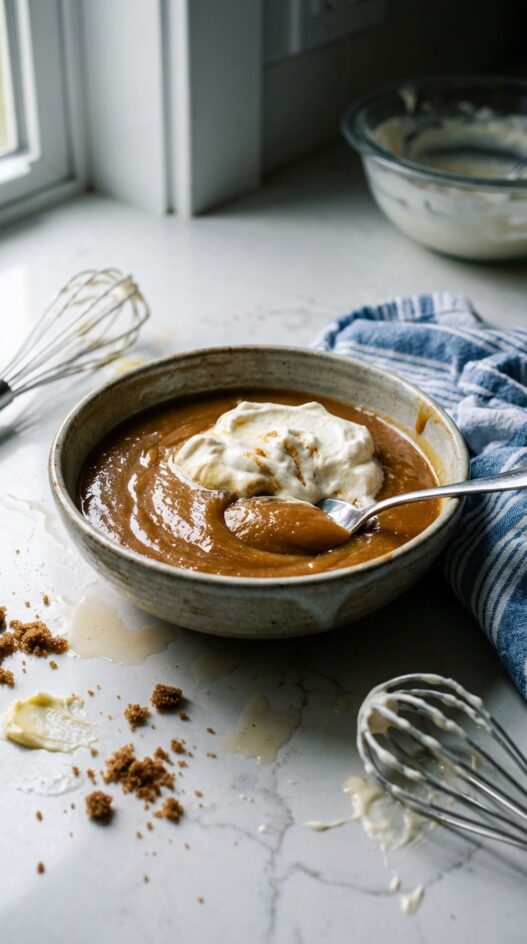
This homemade butterscotch pudding is as smooth as silk. It is pure comfort in a bowl. The perfect ending to a family meal, and nearly as easy to make as the box. There are no fancy ingredients or special equipment needed, and besides the chilling time (this is best made early in the day so it can chill for 4 – 6 hours) homemade pudding requires very little time.
If you are looking for a comforting dessert, this homemade butterscotch pudding is it.
Print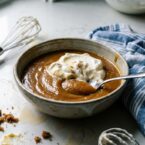
Not From a Box: Butterscotch Pudding
- Total Time: 15 minutes
- Yield: Serves 6
- Diet: Omnivore
Description
Skip the box! This homemade butterscotch pudding is creamy, dreamy, and surprisingly easy to make. A perfect end to any meal.
Ingredients
- 1/4 cups (60 ml) cornstarch
- 1/2 tsp salt
- 2 1/4 cups (539 ml) milk
- 3 large egg yolks
- 4 Tbsp butter
- 1 cups (237 ml) dark brown sugar
- 1 cups (237 ml) heavy cream
- 1 tsp vanilla
Instructions
- Combine the cornstarch and salt with 1/4 cup of milk in a bowl; scrape up any cornstarch stuck to the bottom.
- Whisk the egg yolks into the milk/cornstarch mixture and set aside.
- Melt the butter in a large saucepan with high sides over medium-high heat.
- Whisk in the brown sugar.
- Whisk until the butter and sugar are smooth and begin to bubble.
- Reduce heat to medium-low and whisk in the cream and remaining milk. (Some sugar may harden; it will melt as the mixture heats.)
- Once the sugar has melted and the cream/milk mixture is hot, add about a cup to the cornstarch/milk/egg mixture and whisk.
- Add the mixture back to the saucepan and cook, whisking constantly, for 3-5 minutes until the pudding thickens.
- Boil the pudding for 2 minutes. (It should be fairly thick.) Remove from heat and whisk in vanilla.
- For a smoother texture, strain the pudding through a fine-mesh strainer.
- Place plastic wrap directly on the surface of the pudding to prevent a skin from forming.
- Chill for at least 30 minutes (best for 4-6 hours).
- Serve with freshly whipped cream.
Notes
- For a richer flavor, use brown butter instead of regular butter.
- If you don’t have heavy cream, you can substitute with full-fat coconut milk for a slightly different flavor profile.
- To prevent the pudding from becoming grainy, whisk constantly while cooking and ensure the cornstarch is fully incorporated before adding to the hot mixture.
- Prep Time: 5 minutes
- Cook Time: 10 minutes
- Category: Dessert
- Method: Simmering
- Cuisine: American
Nutrition
- Serving Size: 1 cup
- Calories: 350
- Sugar: 40
- Sodium: 100
- Fat: 20
- Saturated Fat: 12
- Unsaturated Fat: 6
- Carbohydrates: 45
- Fiber: 1
- Protein: 5
- Cholesterol: 150
Frequently Asked Questions
What type of sugar should I use for the butterscotch pudding?
You should use brown sugar for the butterscotch flavor, as it adds the necessary depth and caramel notes.
How can I prevent the skin from forming on my pudding while it chills?
To prevent a skin from forming, cover the surface of the pudding with plastic wrap, pressing it directly onto the surface before chilling.
Is it necessary to chill the pudding for 4-6 hours?
Yes, chilling for 4-6 hours ensures that the pudding sets properly and develops the right texture.