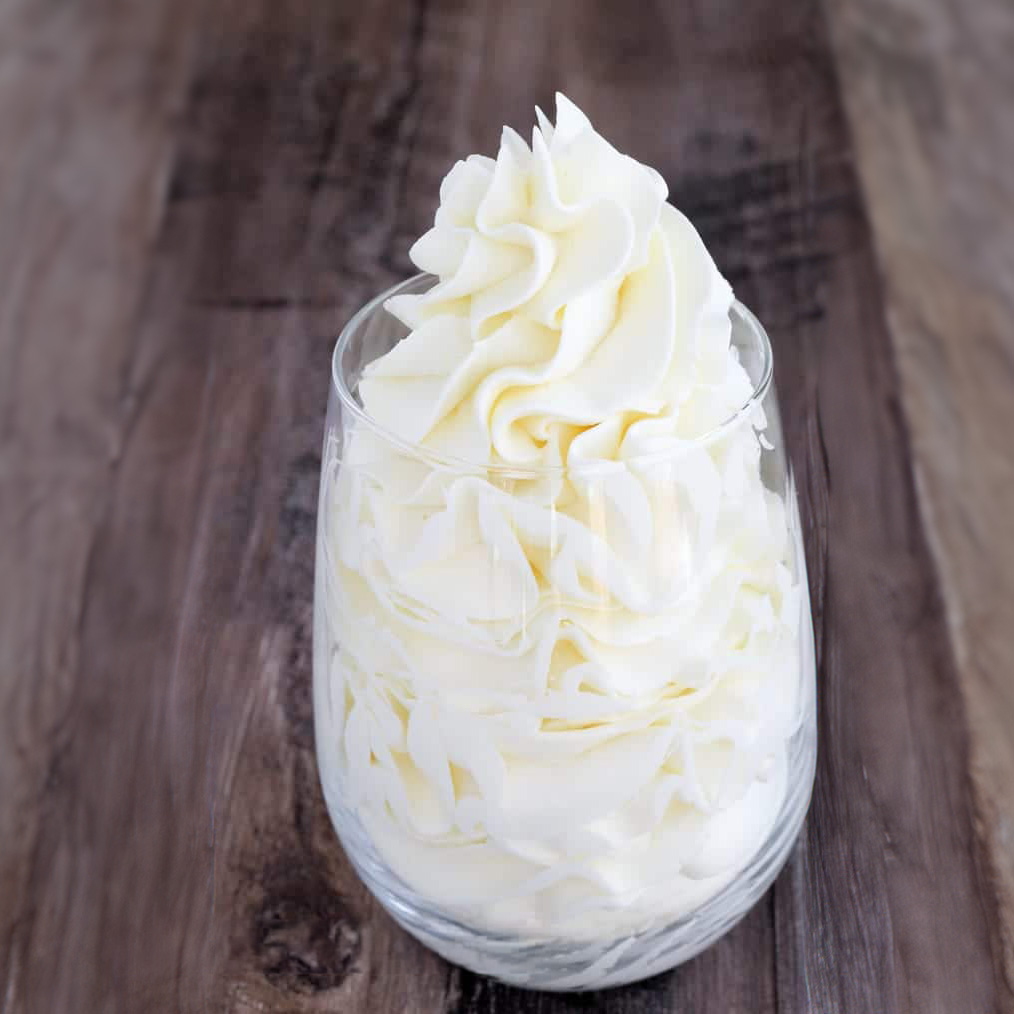
Here are all the tips you need to make smooth, creamy Italian Meringue Buttercream, perfect for flawless cake frosting.
Italian Meringue Buttercream (IMB) is a favorite for many bakers because of its lighter texture and less sweet flavor compared to other buttercreams. It’s creamy, stable, and adaptable, making it perfect for cakes, cupcakes, or as a filling. Though it may seem slightly intimidating at first, once you understand the steps and techniques, it becomes much easier to master. In this guide, we’ll break down each part of the process to ensure your success.
What Is Italian Meringue Buttercream?
Italian Meringue Buttercream is a frosting made by whipping egg whites into stiff peaks and combining them with sugar syrup cooked to the soft ball stage (235°F / 113°C). Butter is then added to create a smooth and luxurious buttercream that is both light and rich.
Why Choose Italian Meringue Buttercream?
Compared to other buttercreams, IMB stands out for its balanced flavor and texture:
- Lighter than Swiss and German buttercream
- Not overly buttery like French buttercream
- Less sweet than American buttercream
It’s also highly stable and can be frozen for months without losing its texture.
Step-by-Step Process
1. Prepare Your Ingredients and Equipment
- Measure everything beforehand to ensure smooth execution. Precision is key.
- Make sure your mixing bowl is clean and free of any fat or grease, as even a small amount can prevent the egg whites from whipping properly.
2. Whip the Egg Whites
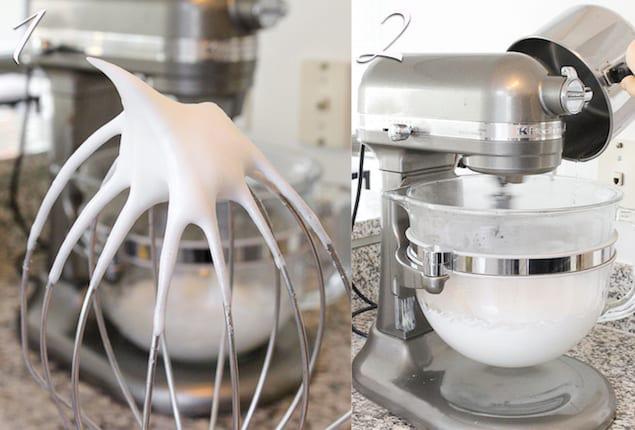
- Begin by whipping the egg whites to stiff peaks. Ideally, they should reach stiff peaks at the same time your sugar syrup reaches the correct temperature (235°F). If your egg whites are whipping too fast, reduce the mixer speed to medium. Keep the egg whites moving but not overwhipping.
3. Cook the Sugar Syrup
- While the egg whites are whipping, heat the sugar and water to the soft ball stage (235°F / 113°C). Use a candy thermometer to monitor the temperature, or use the classic test: drop a small bit of syrup into ice water, and if it forms a malleable ball, it’s ready.
- Be careful not to overcook the sugar, as this can result in hard sugar lumps in your buttercream.
4. Combine the Syrup and Egg Whites
- With your mixer on high speed, slowly and carefully pour the sugar syrup down the side of the mixing bowl. Avoid hitting the whisk, as this could cause the hot syrup to splash or solidify on the whisk instead of mixing into the meringue.
- Keep mixing until the meringue forms stiff peaks and has cooled to just slightly warm. If the meringue is too hot when you add the butter, it will melt and ruin the texture.
5. Add the Butter
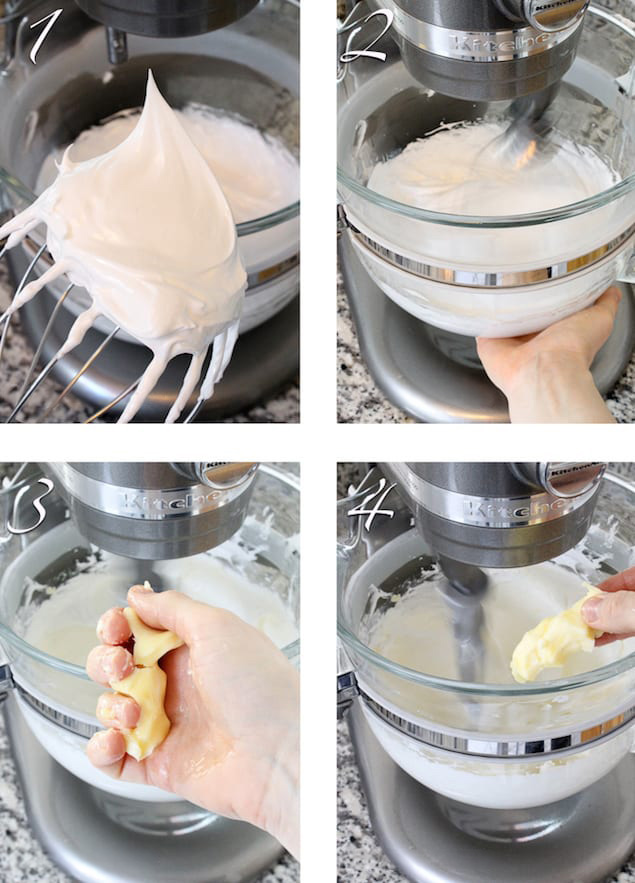
- Switch to the paddle attachment and begin adding the butter, one piece at a time. The butter should be soft but slightly cool. Squeeze each piece between your fingers to soften further before adding.
- Continue mixing until the butter is fully incorporated and the buttercream becomes smooth and creamy. If it looks lumpy or curdled, keep mixing—it will come together!
6. Whip Until Fluffy
- Once the butter is fully incorporated, switch back to the whisk attachment and whip the buttercream until it’s light and fluffy. This is also the time to add any desired flavorings (such as vanilla, almond extract, or fruit purées).
Tips for Italian Meringue Buttercream Success
- Control the Egg Whites: If your sugar syrup is taking longer than expected, reduce the mixer speed to low to keep the egg whites moving without overwhipping.
- Pour Carefully: When adding the sugar syrup, pour it down the side of the bowl to prevent it from splashing or solidifying on the whisk.
- Monitor the Temperature: Don’t start adding the butter until the meringue has cooled to just slightly warm.
- Fixing Soupy Buttercream: If your buttercream turns soupy, switch back to the whisk and beat it on high until it firms up.
- Fixing Broken Buttercream: If the buttercream looks curdled, keep mixing—it will come together as the butter continues to incorporate.
- Refreshing Stored Buttercream: To refresh refrigerated buttercream, beat it with the paddle attachment until smooth, then switch to the whisk to fluff it up. For frozen buttercream, thaw it in the fridge overnight before refreshing.
Recipe Notes
- Flavor Variations: You can easily customize IMB by adding extracts, fruit purées, or other flavorings after the butter is fully incorporated.
- Freezing Tips: IMB can be frozen for up to 3 months. To use, thaw in the fridge overnight and refresh as outlined above.
- Consistency: If your butter is too soft, it can make the buttercream soupy. Start with cool, slightly softened butter for the best texture.
Step-by-Step Guide: How to Make Perfect Italian Meringue Buttercream
- Total Time: 25 minutes
- Yield: Enough for 24 cupcakes or 1, double tier layer cake 1x
Description
Here are all the tips you need to make smooth, creamy Italian Meringue Buttercream, perfect for flawless cake frosting.
Ingredients
2 cups sugar (375g), divided
2/3 cup water (150g)
5 large egg whites (150g)
Pinch of salt, optional
Pinch of cream of tartar, optional
2 cups butter, cubed (4 sticks or 1 pound), cool but not cold
2 teaspoons vanilla extract
Instructions
1. Prepare Your Ingredients and Equipment
- Measure everything beforehand to ensure smooth execution. Precision is key.
- Make sure your mixing bowl is clean and free of any fat or grease, as even a small amount can prevent the egg whites from whipping properly.
2. Whip the Egg Whites
- Begin by whipping the egg whites to stiff peaks. Ideally, they should reach stiff peaks at the same time your sugar syrup reaches the correct temperature (235°F). If your egg whites are whipping too fast, reduce the mixer speed to medium. Keep the egg whites moving but not overwhipping.
3. Cook the Sugar Syrup
- While the egg whites are whipping, heat the sugar and water to the soft ball stage (235°F / 113°C). Use a candy thermometer to monitor the temperature, or use the classic test: drop a small bit of syrup into ice water, and if it forms a malleable ball, it’s ready.
- Be careful not to overcook the sugar, as this can result in hard sugar lumps in your buttercream.
4. Combine the Syrup and Egg Whites
- With your mixer on high speed, slowly and carefully pour the sugar syrup down the side of the mixing bowl. Avoid hitting the whisk, as this could cause the hot syrup to splash or solidify on the whisk instead of mixing into the meringue.
- Keep mixing until the meringue forms stiff peaks and has cooled to just slightly warm. If the meringue is too hot when you add the butter, it will melt and ruin the texture.
5. Add the Butter
- Switch to the paddle attachment and begin adding the butter, one piece at a time. The butter should be soft but slightly cool. Squeeze each piece between your fingers to soften further before adding.
- Continue mixing until the butter is fully incorporated and the buttercream becomes smooth and creamy. If it looks lumpy or curdled, keep mixing—it will come together!
6. Whip Until Fluffy
- Once the butter is fully incorporated, switch back to the whisk attachment and whip the buttercream until it’s light and fluffy. This is also the time to add any desired flavorings (such as vanilla, almond extract, or fruit purées).
Notes
Control the Egg Whites: If your sugar syrup is taking longer than expected, reduce the mixer speed to low to keep the egg whites moving without overwhipping.
Pour Carefully: When adding the sugar syrup, pour it down the side of the bowl to prevent it from splashing or solidifying on the whisk.
Monitor the Temperature: Don’t start adding the butter until the meringue has cooled to just slightly warm.
Fixing Soupy Buttercream: If your buttercream turns soupy, switch back to the whisk and beat it on high until it firms up.
Fixing Broken Buttercream: If the buttercream looks curdled, keep mixing—it will come together as the butter continues to incorporate.
Refreshing Stored Buttercream: To refresh refrigerated buttercream, beat it with the paddle attachment until smooth, then switch to the whisk to fluff it up. For frozen buttercream, thaw it in the fridge overnight before refreshing.
- Prep Time: 15 mins
- Cook Time: 10 mins
- Category: Dessert, Frosting, Tips
- Method: Whisking
- Cuisine: Italian American







This came out PERFECTLY. Just PERFECT!! THANK YOU!
This buttercream was so light and fluffy. Much better than the overly sweet American version I’ve been using.
I made this buttercream for my daughter’s birthday cake, and it was amazing!
Added vanilla and it was so delicious. Will definitely make again.
Hey great detailed instructions! I already started my first batch with a dif recipe and had a question. That’s how I found you. Giving yours a shot next! I appreciate you. ?
I’ve had problems colouring my butter cream because of the yellow of the butter. I read that adding icing sugar will help. Do you have any suggestions?
I am so excited to try this, I had some on a wedding cake in NY last fall. My friend is turing 92 tomorrow, so I will make this tonight and put it on a lemon cake for her.
Wish me luck!!
Would high elevation require different temps or processes to make this buttercream that your aware of? I live at 6500 ft. and have attempted this Italian buttercream several times just as you have described (except I didn’t change to a paddle when I added the butter, didn’t know I needed to). It always turned out like scrambled eggs and very hard to spread. I’m not a quitter but I am getting discouraged. I do like the flavor so I’ll keep trying.
Just a home baker, horsewoman and retired high school teacher
Lee Ann Ott
Hi I wonder if you can help me. I am making a wedding cake with Italian Meringue. I have frozen a test case with Italian meringue on it, but now it has come out of the freezer, the meringue is all yellow and blotchy! Can I prevent this??
PLEASE advise as I am having a panic
tHANKS
Would this work well with dairy free butter? And would it work well under fondant? We’ve got allergies we’re dealing with this time around and I’m teying to find something that will still taste yummy.
When do you add the second cup of sugar to the eggs?
Italian meringue buttercream is my favorite buttercream too! However, I do have a couple questions and would greatly appreciate a reply. Is the paddle attachment strictly required to whip it, or can I just use the whisk instead? Would it be better if I whisked softened butter smooth before adding it in, or should I plop it in chunk by chunk? Lastly, to make a cream cheese buttercream, could I swap out some of the butter for cream cheese instead?
HI natalie, I made a YouTube tutorial on this recipe which will answer some of your questions about how to add the butter. https://www.youtube.com/watch?v=tTSV7fu6MJU&t=37s
The paddle is ideal for adding in the butter and getting it to come together, because you don’t want to add excess air to the buttercream or you won’t be able to get a perfect smooth coat on your cake or you’ll have lots of tiny air bubbles in your piped frosting. I only switch to the whisk again to whip it up at the end so it isn’t too heavy. There is no reason to paddle your butter first. Just plop it in and let the paddle do the work for you.
I have never tried to make a cream cheese IMB. If I want a cream cheese butter cream I use this recipe: http://americanheritagecooking.com/2015/04/carrot-cake-cupcakes-cream-cheese-frosting/
Happy baking!
hi! I am planning to use this buttercream to decorate cupcakes….if I decorate them and throw them in the fridge will they be ok the next day? Or would I be better off making the frosting and re-whipping and decorating the next day? I usually do an American buttercream so this is my first attempt at something different :)
Hi Kim,
You can do either and they will be delicious either way. You only need to rewhip from the fridge or freezer if you are going to frost something – that makes the buttercream workable. Buttercream tastes best at room temperature because of the quantity of butter in it – I would just bring the cupcakes out of the fridge several hours before you plan on serving them and this way they will be the perfect texture and taste!
I just don’t understand what I’m doing wrong. By the time I get to the point to switch paddles and add butter everything looks beautiful! I switch to the paddle, start adding butter (the bottom of the bowl is barely barely barely warm) and here I sit with frosting the consistency of a thick batter. I’ve tried switching back to the whisk and have spent the last 10 minutes praying over it and nothing. This is the second time today that this has happened and I was even more meticulous the second time. Super frustarted. :(
Hi Bre! I understand your frustration. Pop that bowl in the refrigerator for a little bit and then try whipping it with the whisk attachment. I promise it will come together. Even if you forget it in the fridge and its too hard – let it sit out at room temp for about 20 minutes, beat it with the paddle attachment and then switch to the whisk. You’ve totally got this!
If the bottom of your bowl is barely warm, then your butter is too warm when you added it and that’s why you got soup. If your bowl is room temperature (not warm) then you can add softened butter, but otherwise you butter needs to still be a little cool or it will melt when it hits the meringue and you will end up with soup! This is not the end of the world – just fix it like I suggest above :-) I hope that helped
Do you use Granulated sugar or powdered sugar???
Granulated!
How long does this stay fresh on the counter top? Do you have to store it in the refrigerator or freezer? Thanks.
Hi Jenn, it will be fine at room temperature for several hours, but after that you should store it in the refrigerator or freezer. It will keep for 2 weeks in the fridge and 3 months in the freezer. Just let the buttercream come to room temperature and then re-beat it with the paddle attachment until smooth again.
First time attempting and I aced this (and it couldn’t have been more delish)! Thank you for the guidance in this post!
Thank you!
I might be missing something here. The recipe calls for 2 cups of sugar but the instructions state to mix only half of the sugar with water. What is the other cup of sugar for?
Hi Mai! The second half goes into the meringue. Cook half with the water and then the second half is added to the whipping egg whites to stabilize them.
Lindsey,
You mentioned five types of buttercream. Could you go into the differences.
Thanks.
Superb…!!!!
Thank you, Cornelio!
Hi Lindsey,i love baking and always looking out for new ideas.Please forward me any good recipe or something that is to die for,(lol),,many thanks christopher
Hi Lindsey, I lived in Clarksburg, WV as a child. Clarksburg has a large Italian population. We used to buy the most delightful pastry horns filled with what was called marshmallow meringue creme. I’m wondering if this recipe might be used to fill pastry horns? I would love to experience that taste from childhood again. Unfortunately I discovered that the old bakery is closed so I have been looking for another source for this tasty treat.
Hi Ginny, I’ve never had a pastry horn so I’m not entirely sure what they taste like. This buttercream would be a fantastic filling (especially the chocolate variation). I do have a homemade marshmallow cream on my blog that would also work (http://americanheritagecooking.com/2014/11/homemade-marshmallow-frosting-smores-sticks/).