
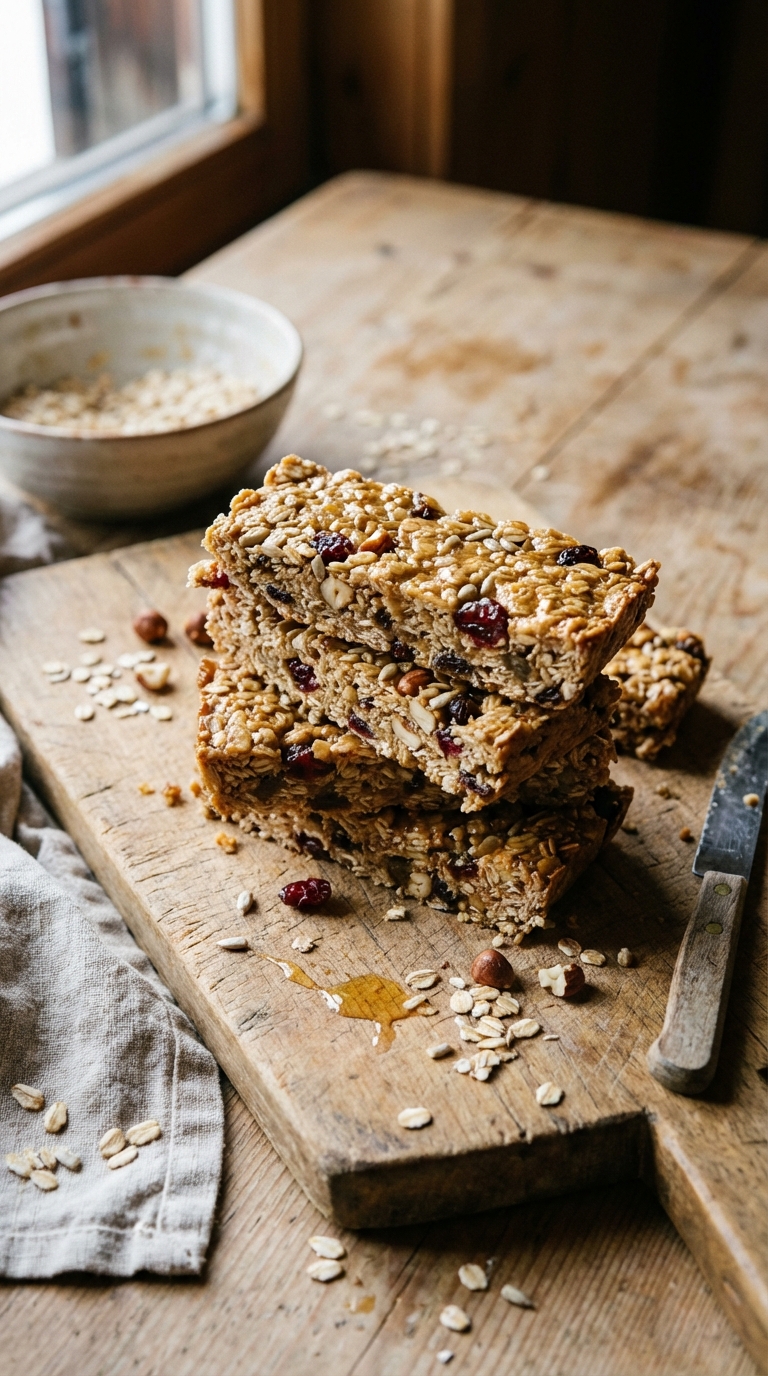
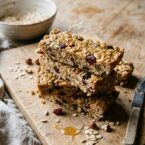
Consider this recipe your new secret weapon. Chewy granola bars are an incredibly easy recipe that can serve as a tasty, healthy breakfast, snack, or even a health-conscious dessert (depending on what sorts of delicious little bits you want to sneak inside).
Maybe you aren’t as excited by chewy granola bars as I am, but let’s just say I have to limit the circumstances in which I bake these because if I leave myself more than a few in the house I end up stuffing myself silly.
When I was about 7, I decided I needed to start training for adulthood. (If you know me, you’re not surprised about this.) I just wasn’t quite sure how I would magically acquire all the necessary skills unless I started training myself – so I started “drinking coffee” with my mom in the morning. I say “drinking coffee” because what this actually meant was drinking hot chocolate and eating a Quaker chewy granola bar, since it was many more years before I considered coffee a palatable liquid.
Those granola bars were a big part of my life for many years. Breakfast-time, lunch-time, snack-time. As far as I was concerned, they made it possible for me to eat chocolate chips, peanut butter chips, and even marshmallows at times of day I wouldn’t usually get to eat dessert, and thus they were extremely valuable.
Now I see chewy granola bars in a slightly different way – an easy-to-make, easy-to-eat (read: perfect for new parents and people who eat on the go), easy-to-ship (yes, I’ve sent them as gifts many times), incredibly tasty little bite to have around the house. Much healthier than those Quaker bars I used to eat to be a grown up – and much tastier, too.
How to Succeed with Homemade Granola Bars
- Binding the Bars: The ground oats act as a binder along with the wet ingredients. If the mixture is too crumbly before baking, add a tablespoon of extra honey or nut butter.
- Customize the Flavor: Experiment with flavors by adding different combinations of nuts, dried fruits, or even crushed pretzels for a salty twist.
- Firmness Check: The bars will feel soft when hot but firm as they cool. Don’t overbake!
- Chill for Clean Cuts: If you want perfectly clean-cut bars, chill them in the fridge for about 20 minutes before slicing.
How to Make Homemade Chewy Granola Bars
1. Preheat and Prepare the Pan
- Preheat the oven to 350°F (175°C).
- Line a baking dish (8×8, 9×9, or 9×13 depending on desired thickness) with parchment paper and lightly grease with oil or non-stick spray.
2. Process Oats
- In a blender or food processor, grind 1/3 cup (27 g) of the oats into a fine powder. This helps bind the bars.
3. Chop Add-ins
- If using larger dried fruits like apricots or apples, chop them into raisin-sized pieces.
4. Combine Dry Ingredients
- In a large mixing bowl, stir together the oats, ground oats, sugar, salt, cinnamon, and your chosen additions (dried fruits, nuts, seeds, etc.).
5. Mix Wet Ingredients
- In a separate bowl, whisk together the peanut butter, oil, honey (or syrup), and water until smooth.
6. Combine Wet and Dry Ingredients
- Pour the wet mixture into the dry ingredients and stir until fully combined.
7. Spread the Mixture into the Pan
- Transfer the mixture to the prepared baking dish. Use a spatula or your hands to press it firmly and evenly into the pan, paying attention to the corners.
8. Bake
- Bake for 25-30 minutes, or until the top is lightly golden. If using a thicker pan (8×8 or 9×9), you may need an extra 5 minutes.
9. Cool and Cut
- Let the granola cool in the pan for at least 20 minutes. Then, lift it out using the parchment paper and let it cool completely before cutting into bars.
Recipe Notes
- Storage: Keep bars in an airtight container at room temperature for up to 5 days or in the fridge for 1-2 weeks.
- Freezing: Freeze cut bars for up to 3 months. Wrap individually for easy grab-and-go snacks.
- Sticky Tip: If your hands or spatula stick to the mixture while pressing it into the pan, lightly grease them or use a sheet of parchment paper on top to press down.
Homemade Chewy Granola Bars
- Total Time: 45 minutes
- Yield: Makes 16
- Diet: Vegetarian, Omnivore
Description
Homemade granola bars are surprisingly easy to customize. This recipe lets you control the sweetness and add your favorite mix-ins.
Ingredients
- 2 cups (160 g) oats
- 1/2 cup (96 g) sugar
- 1/2 tsp salt
- 1/4 tsp cinnamon
- 2 1/2 cups (592 ml) additions
- 1/3 cup (60 g) peanut butter
- 6 Tbsp (89 ml) olive oil
- 1/4 cup (60 ml) honey
- 1 Tbsp (15 ml) water
Instructions
- Preheat the oven to 350°F (175°C). Line a baking dish (8×8, 9×9, or 9×13 depending on desired thickness) with parchment paper and lightly grease with oil or non-stick spray.
- In a blender or food processor, grind 1/3 cup (27 g) of the oats into a fine powder. This helps bind the bars.
- If using larger dried fruits like apricots or apples, chop them into raisin-sized pieces.
- In a large mixing bowl, stir together the oats, ground oats, sugar, salt, cinnamon, and your chosen additions (dried fruits, nuts, seeds, etc.).
- In a separate bowl, whisk together the peanut butter, oil, honey (or syrup), and water until smooth.
- Pour the wet mixture into the dry ingredients and stir until fully combined.
- Transfer the mixture to the prepared baking dish. Use a spatula or your hands to press it firmly and evenly into the pan, paying attention to the corners.
- Bake for 25-30 minutes, or until the top is lightly golden. If using a thicker pan (8×8 or 9×9), you may need an extra 5 minutes.
- Let the granola cool in the pan for at least 20 minutes. Then, lift it out using the parchment paper and let it cool completely before cutting into bars.
Notes
- For easier cutting, chill the bars in the refrigerator for at least 30 minutes before slicing.
- To reduce sugar, use maple syrup or another liquid sweetener in place of some or all of the honey.
- Customize your bars by adding chocolate chips, coconut flakes, or other mix-ins.
- Prep Time: 15 minutes
- Cook Time: 30 minutes
- Category: Baking
- Method: Baking
- Cuisine: American
Nutrition
- Serving Size: 1 bar
- Calories: 200
- Sugar: 15
- Sodium: 100
- Fat: 10
- Saturated Fat: 3
- Unsaturated Fat: 6
- Trans Fat: 0g
- Carbohydrates: 30
- Fiber: 4
- Protein: 4
- Cholesterol: 0g
Frequently Asked Questions
How do I get my granola bars to hold together without falling apart?
The ratio of binding ingredients, typically honey or syrup combined with nut butter, needs to be sufficient to coat all the dry ingredients. Press the mixture very firmly and evenly into the pan before chilling, and let them set fully before cutting.
Can I substitute different mix-ins like seeds or dried fruit?
Yes, as long as you keep the overall volume of dry mix-ins roughly the same so the wet-to-dry ratio stays balanced. Swap oats, nuts, seeds, and dried fruit based on what you have on hand.
Should I refrigerate the bars or can they be stored at room temperature?
Storing them in the fridge keeps them firmer and extends shelf life to about a week. At room temperature they can soften, especially in warm weather, but they’re fine for a couple of days in an airtight container.


These hold together so well with no crumbling at all, exactly the lunchbox bar I was after. Could I swap the honey for maple syrup, or will they not set up as nicely?
Made a double batch on a Sunday afternoon for the week’s lunchboxes and they held shape perfectly cut into squares the next morning!