Learn how to grind your own burger and take your backyard barbecue to the next level of epic. Your very own DIY designer burgers and bangin’ slaw will be sure to impress.
By Chris Cockren
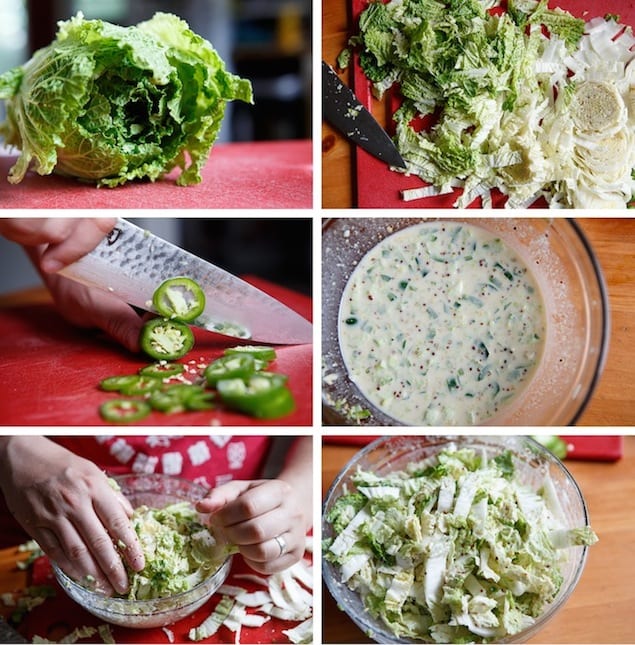
That’s the slaw. It’s tangy-mustardy-spicy crunchness in a bowl. It’s a bit in yo’ face by itself, but when slathered on a juicy, rich beef patty… hello flavor party in your mouth.
And now let’s talk about grinding your own designer burgers. Why? Because it’s cool. And right now, artisan/small-batch/DIY is all the rage. And we want to act cool and be a part of the rage.
You have 2 options for creating your own DIY burger. First, have the butcher grind the meat for you. That’ll probably work for you if you:
-have an awesome butcher
-have a good relationship with your butcher
-are a butcher
-know somebody that is a butcher
But your local dingy grocery store meat department probably isn’t going to do it for you. And if they do, that’s amazing and you live in a much nicer, caring part of the world then NYC. But NYC still rocks and I wouldn’t trade it for your super nice meat department butcher anyway.
The other option, and the more fun option, is to grind the meat at home with your KitchenAid Food Grinder Attachment. Just make sure you use the larger “coarse” dial.
And a word of warning… sometimes the grinder likes to splurt out some meat juice. Yea, kinda gross. We just held a disposable plastic cup close to the dial (with enough room for the meat to fall out into the bowl) and that caught all the juices. Make sure you plan accordingly. I’d hate for your kitchen to look like a scene from Dexter.
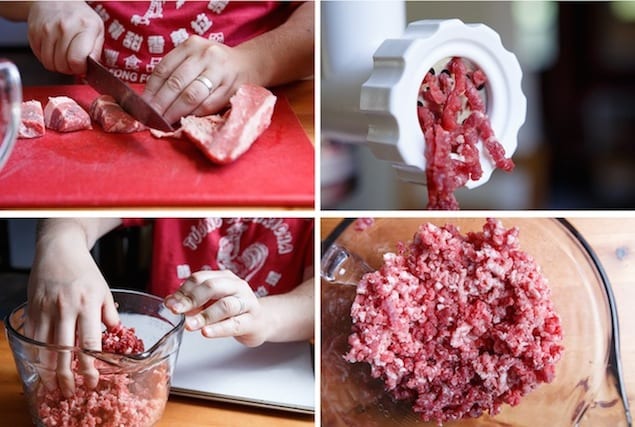
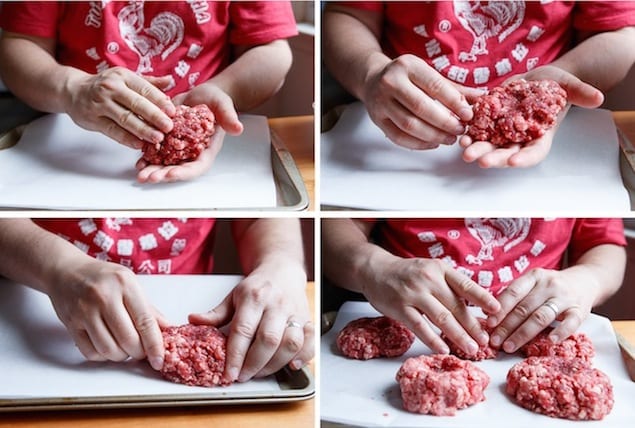
And remember, you don’t want to pack the meat tight. That’s one way to guarantee a compact, tough burger. Handle it with care. Treat it with some TLC. Talk sweet nothings into its ear (don’t do that).
And do yourself a favor and make a tiny depression in the middle of each patty with your thumb. Burgers tend to puff in the middle as they cook, so that indentation helps to make the patty stay flat.
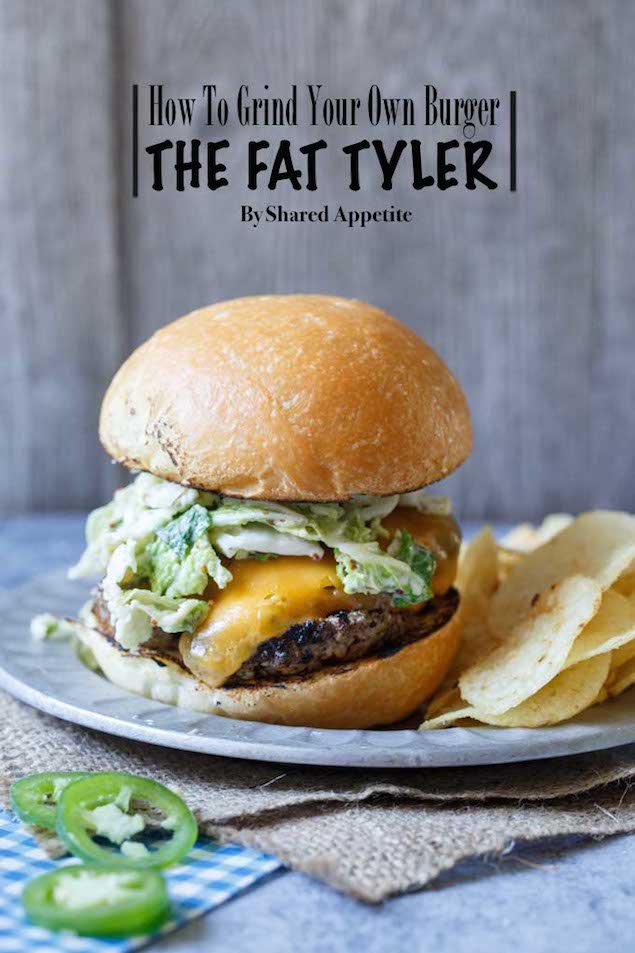
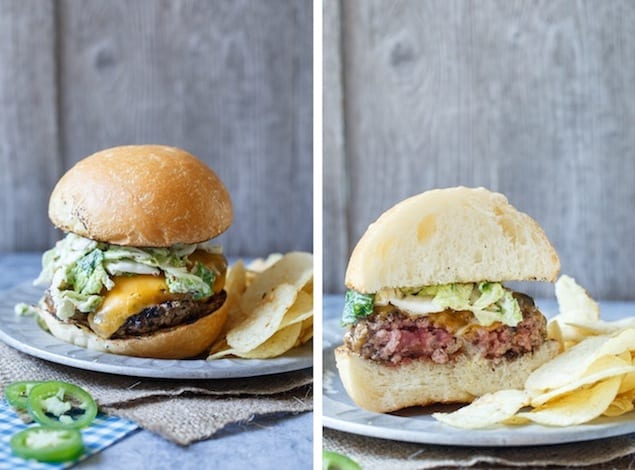
And then boom, cook up those burgers and you have yourself a Fat Tyler.
Now, for it to be a certified Fat Tyler burger, you need a couple things:
-a mix of sirloin, short rib, and brisket for your burger blend
-the spicy-tangy-mustardy slaw in the recipe below
-a brioche bun
-melted cheddar or american cheese
-cooked to a perfect medium-rare… medium maybe. Maybe.
Nothing more, nothing less. The man is particular about his burger.
And listen, for the record, no… it’s not called a Fat Tyler because he’s fat. That’s just a complete coincidence. This burger is actually Tyler’s riff on Michael Symon’s famed burger, the Fat Doug.
The Fat Tyler Burger
- Total Time: 40 mins
- Yield: 4 1x
Description
Learn how to grind your own burger and take your backyard barbecue to the next level of epic. Your very own DIY designer burgers will be sure to impress.
Ingredients
For the Burgers:
- ½ pound ground sirloin
- ½ pound ground brisket
- ½ pound ground boneless short rib
- Salt and freshly ground black pepper
- 4 slices Cheddar or American cheese, medium thick
- 1½ tablespoons unsalted butter, melted
- 4 brioche or egg buns, split
For the Coleslaw
- 1 head napa cabbage, shredded
- 1 clove garlic, minced
- ½ small red onion, thinly sliced
- 1 jalapeno pepper, sliced thin
- 3 tablespoons champagne vinegar
- 1 tablespoon dijon mustard
- 2 tablespoons mayonnaise
- 1 tablespoon sugar
- 1½ teaspoons salt
- 1 tablespoon Worcestershire sauce
Instructions
- Cut meat into approximate 2″ cubes. Using the food grinder on your Kitchen Aid Stand Mixer, grind your burgers on the larger “coarse” dial into a medium bowl. Sometimes the grinder likes to spit out a bit of meat juice, so it helps to put a cup close to the dial to catch any spurts.
- Using your hand(s), gently combine the meats, taking care not to compact the meat to much. Form burgers into 4 equal-sized patties and season liberally with Kosher salt.
- If using a grill: Grill the burgers over high heat until medium rare, 3 to 5 minutes per side. Add a slice of cheese to each burger during the last 1-2 minutes of cooking. Brush buns with butter and grill until lightly toasted.
- If using a cast iron skillet: preheat over high heat until very, very hot. Place butter in pan and cook burgers over high heat until medium rare, about 3-5 minutes per side. Add slice of cheese to each burger during the last 1-2 minutes of cooking. Remove burgers and add buns to toast slightly.
- Let bugers rest for a few minutes, then place onto each bun and top with a few spoonfuls of coleslaw.
For the Coleslaw
- In a small mixing bowl, whisk together the vinegar, mustard, mayonnaise, Worcestershire sauce, sugar, and salt until fully combine.
- In a medium mixing bowl, mix together the cabbage, garlic, onion, and jalapeno. Pour the dressing over the slaw and toss gently to combine. Cover and refrigerate 1 hour.
- Prep Time: 30 mins
- Cook Time: 10 mins




When you grind the meat you should have it as cold as possible – not frozen but not far off – it is not a bad idea to chill it again after cutting it into chunks – the meat will grind better and I don’t think you will get the squirty meat juice problem either. You can also chill the screw, blades and plate of the grinder itself. If the meat is really cold you will be able to grind it up more finely than the coarsest setting. After you have tried making your own burgers you could try making your own sausages!