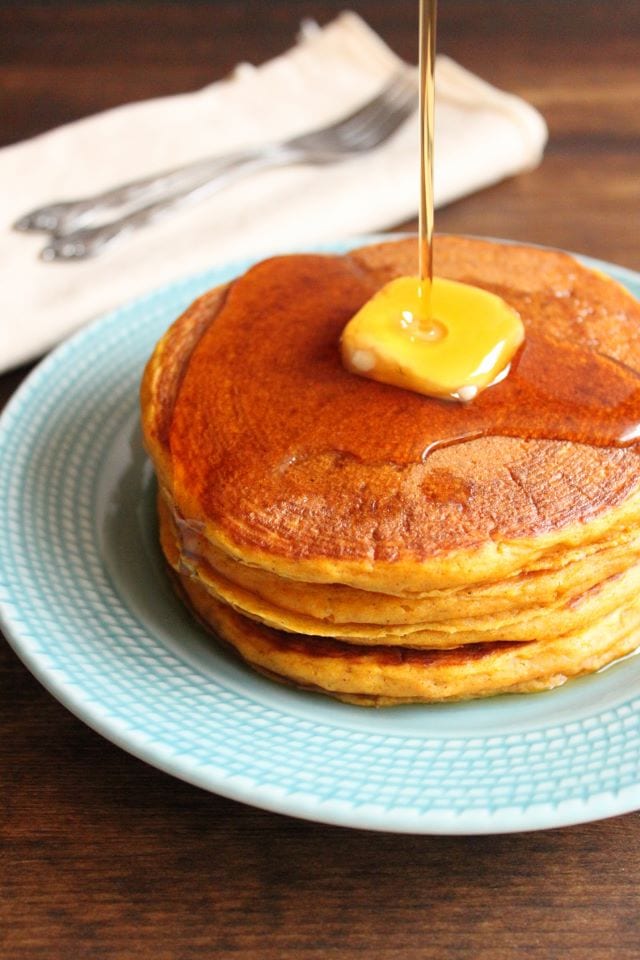
It is pumpkins galore on the internet these days. And I’m kind of a sucker for pumpkin so I’m whipping up a batch of pumpkin pancakes for breakfast, or dinner. It’s my favorite kind of dinner, soft, fluffy and sweet, drizzled with delicious pure maple syrup, and you don’t even need to have dessert! Or what the heck, have dessert anyways! Serve these with sausages and eggs or by themselves. Either way, they will be the star of your meal.
Print
Pumpkin Pancakes
- Total Time: 30 minutes
- Yield: 8-9 medium pancakes 1x
Description
These fluffy pumpkin spice pancakes are perfect for breakfast or dinner, offering a soft and sweet treat drizzled with pure maple syrup.
Ingredients
- 1 1/2 cups (360 ml) all-purpose flour
- 1/2 tsp kosher salt
- 1 tbsp baking powder
- 1/4 tsp baking soda
- 1/4 to 1/2 tsp pumpkin pie spice
- 3 tbsp brown sugar
- 1 cup (240 ml) pureed pumpkin (canned or homemade)
- 1 cup (240 ml) milk
- 2 large eggs
- 2 tbsp vegetable oil
- 1 tsp vanilla extract
- Butter or oil for cooking
- Pure maple syrup, for serving
Instructions
- Preheat the oven to 200°F. Place a baking sheet in the middle rack to keep pancakes warm as you cook them.
- In a large mixing bowl, whisk together the flour, salt, baking powder, baking soda, pumpkin pie spice, and brown sugar until well combined.
- In another bowl, mix the pureed pumpkin, milk, eggs, vegetable oil, and vanilla extract until smooth.
- Pour the wet ingredients into the dry ingredients and stir until just combined. Do not overmix; some lumps are okay.
- Heat a nonstick skillet or griddle over medium heat and lightly grease with butter or oil.
- Pour about 1/4 cup of batter onto the skillet for each pancake. Cook for 2-3 minutes until bubbles form on the surface and the edges look set, then flip and cook for another 2-3 minutes until golden brown.
- Transfer cooked pancakes to the warm oven while you cook the remaining batter.
- Serve warm with pure maple syrup.
Notes
- For a perfect first pancake, use a super nonstick skillet and skip the butter.
- Serve with sausages and eggs for a complete meal.
- Store leftovers in an airtight container in the refrigerator for up to 3 days.
- Reheat in the oven or toaster for best results.
- Prep Time: 10 minutes
- Cook Time: 20 minutes
- Category: Breakfast
- Cuisine: American
Nutrition
- Serving Size: 1 pancake
- Calories: 180
- Sugar: 8
- Sodium: 300
- Fat: 6
- Carbohydrates: 28
- Fiber: 2
- Protein: 4
- Cholesterol: 40
 
If You Liked This Recipe, You’ll Love These
- Fluffy Mashed Potato and Cheese Pancakes
- Fluffy Ricotta Pancakes
- Greek Yogurt Lemon Pancakes with Raspberry Preserves
- Mini Dutch Baby Pancakes
Frequently Asked Questions
Why does the recipe say not to overmix the batter?
Overmixing develops gluten in the 1 1/2 cups all-purpose flour, making the pancakes tough rather than soft and fluffy. The instructions say to stir until just combined and note that “some lumps are okay” — those lumps cook out and the pancakes will be lighter for it. 
How do I keep finished pancakes warm while cooking the rest of the batch?
The recipe has you preheat the oven to 200°F and place a baking sheet on the middle rack before you start. As each pancake comes off the griddle, transfer it to the baking sheet — it will stay warm and slightly crisp without drying out.
Why does the first pancake often turn out badly, and how do I fix it?
The notes offer a specific tip: “for a perfect first pancake, use a super nonstick skillet and skip the butter.” The first pancake is a test for pan temperature and grease level; once you dial that in with a bare nonstick surface, the rest of the batch cooks evenly.