Know why various ingredients and techniques and approaches are proselytized, and why someone might choose one ingredient over another or why all recipes say to take a certain step. Different methods will work better or worse for various people, and you’ll have to find what works best for you.
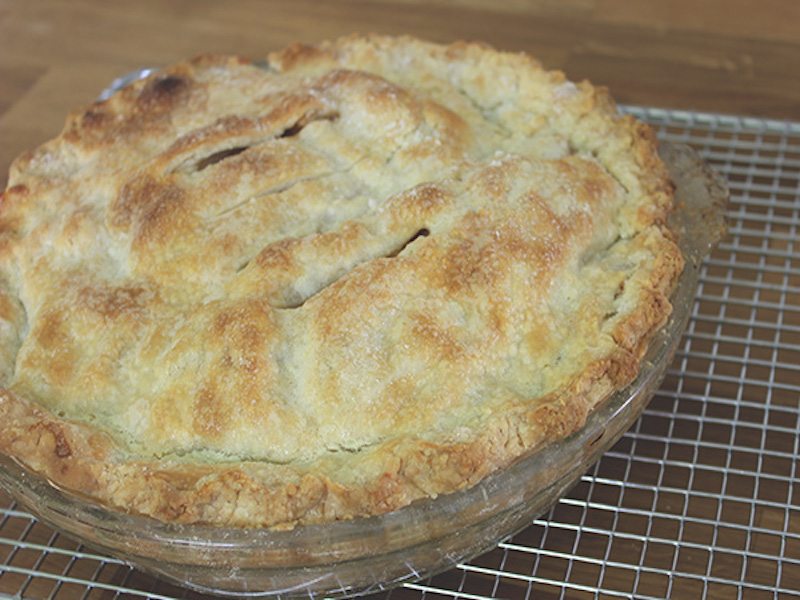
Homemade pie crust can be somewhat of a monumental thing for many home bakers. The process can be a bit finicky, and it seems everyone and their mother (literally) has what they say are the necessary tricks and tips to making your crust perfect, all of which can make the idea of making your own crust a little overwhelming. Yes, I realize that in writing this post I’m only adding to the mountain of information out there, but I’m hoping this guide actually clears things up instead of adding more information to the pile.
So first, the basic concept: Pie crust is a very different thing than most other flour doughs, like those for bread, cake, or pasta. With those doughs, water is used to fuse together flour particles, with the goal of creating a solid, integrated mass of gluten and starch.
When it comes down to it, all the tips and tricks in the world are trying to achieve the three following things:
- Ensuring your fat doesn’t get too warm during the mixing process. If your fat becomes too warm, it will absorb into the dry ingredients and there won’t be anything to steam and create flakes of dough.
- Working the dough as little as possible and using as little liquid as possible. The more the dough is worked and the more liquid you use, the more gluten will develop in your dough. Gluten development will not only make your dough more difficult to roll back (gluten makes dough elastic, difficult to retain in any certain shape) but will also make your finished crust chewy and tough rather than tender and delicate.
- Adding flavor Flour, fat, and water alone won’t have much flavor. Butter, lard, salt, sugar, egg, buttermilk, and other ingredients affect the dough in some technical ways, but also add important flavor.
Now that we have the basic concepts down, let’s get into the process. First, here’s my favorite basic pie crust recipe for both savory and sweet applications, pared down to its most basic parts:
Print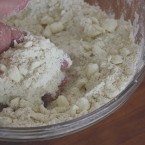
Ingredients
- Basic pie crust Makes two 9” crusts (enough for two single-crust pies or one double-crust pie. Can be halved.)
- 2 ½ cups 11 1/4 oz. all-purpose flour
- 1 Tbsp. sugar (1/3 oz. sugar)
- 1 tsp. salt (I use kosher)
- 1 cup 16 Tbsp. or 8 oz. butter, shortening, and/or lard (see notes about fat choices below; I commonly use a combination of 6 oz. butter and 2 oz. shortening)
- 1/4 to 1/2 cup ice cold liquid (usually water, water/vodka mix, or buttermilk, perhaps with 2 tsp. white or cider vinegar or lemon juice; see notes about liquid choice below – I usually use water or a water/vodka half-and-half mix)
Instructions
- – Collect and prepare ingredients. Measure and collect your dry ingredients, fat, and liquid. Cut fat into small pieces (around 1/2”) and chill both that and your liquid (in separate containers) while you combine dry ingredients in a large mixing bowl.
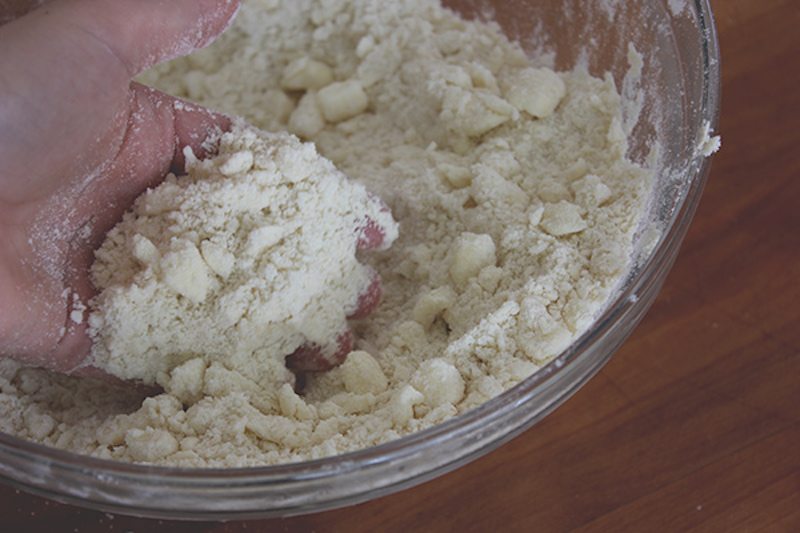
- – Incorporate fat Mix chilled fat into dry ingredients using preferred mixing method – I like to use my fingers, but a food processor, stand mixer, or handheld pastry blender are other common methods. Mix until much of the fat has been incorporated and the mixture resembles wet sand with butter pieces no bigger than a pea. (See images below.)
- – Incorporate liquid to hold dough together Drizzle in cold liquid of choice; just enough that the dough holds mostly together (it can still be quite shaggy).
- – Chill and rest dough If making a full batch of dough, separate into two pieces. Wrap each piece of dough in plastic wrap, shape roughly into a disc, and refrigerate at least 1 hour and up to 3 days or freeze up to 1 month.
- – Roll out, fit, fill, and bake dough as directed Roll out dough on a floured surface. Try to use heavy, even strokes, and check often that your dough isn’t sticking to your rolling surface (if it is, lift it up as well as you can and sprinkle flour beneath). If your dough is too firm to roll well, let sit at room temperature for a few minutes and try again. Fit dough into your pie plate, stretching it as little as possible. Fill and/or bake as directed by recipe.
- Making ahead/storage: There are a few options for chilling/freezing dough for later. Formed into discs, dough can be wrapped in plastic wrap and refrigerated for up to 3 days or frozen for up to 1 month. After being rolled out and fit into a pie dish, it can be covered in plastic wrap and refrigerated for up to 3 days or frozen for 1 month (if freezing, the rolled-out dough can be removed from the pie dish after firm, if you want the dish for something else). If frozen and fit into the dish, bake directly from frozen. If your recipe requires a fully-baked single crust, you can bake it as directed then cover in plastic wrap and refrigerate for up to 1 week or freeze for up to 4 months (this will likely work best if you keep the crust in the dish). Either unwrap the crust and let it stand at room temperature or heat it in a 350F oven for about 6 minutes.
- Category: Dessert
Now let’s go into detail with each step. If you’re just looking for a basic recipe, you can stop now. But if you have any questions about ingredients or what to do at the various steps, read on:
Step 1 – Collect and prepare ingredients
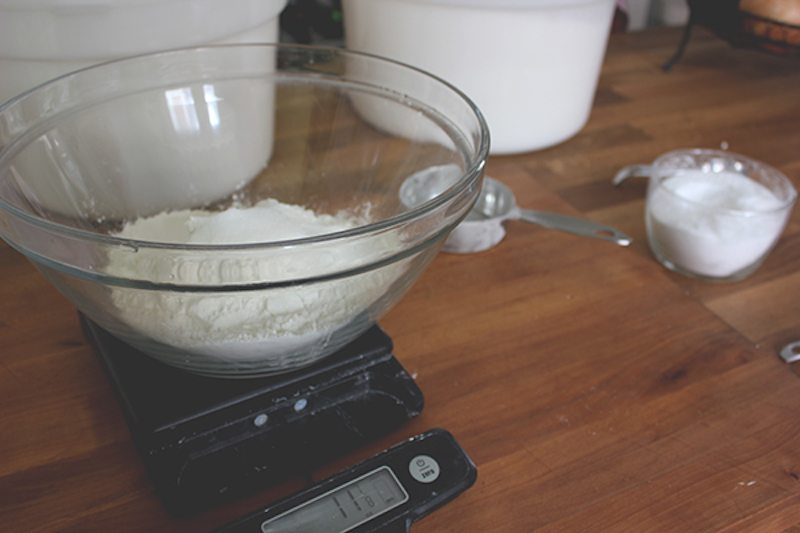
Measure and collect your dry ingredients, fat, and liquid. Cut fat into small pieces and chill both that and your liquid (in separate containers) while you combine dry ingredients in a large mixing bowl. Ingredient notes:
- Dry ingredients: Flour I prefer to use all-purpose flour, which has less gluten-developing proteins than bread flour but more than pastry flour. Whole wheat flour will tend to produce a tougher crust – if you want to use it, either 1) directly substitute whole wheat pastry flour, which is lower protein, or 2) increase the amount of fat approximately 10% (for the recipe above: 1 1/8 cups, 18 Tbsp., or 9 oz. butter), reduce the liquid accordingly since additional fat will bring additional moisture, and chill your dough at least 6 hours before rolling.
- Dry ingredients: Sugar Sugar adds important moisture and sweetness to pie crust, and in particular helps keep your crust from tasting too starchy. Make sure to use sugar even in savory applications, like quiche.
- Dry ingredients: Salt Salt also adds important flavor to your crust.
- Fat Butter, lard, and shortening are your basic options. (I’m not even going to acknowledge the existence of margarine, especially in this application.) Butter creates a softer, more tender flakiness and contributes quite a bit of flavor. European-style butters (like Plugra) are often recommended because they have a higher percentage of fat (vs. water). Lard (and by this I mean rendered leaf lard, which is usually the type used in baking) will create a crisper, more slate-like flakiness and will also contribute some flavor, though not as much as butter. Shortening (which was originally manufactured to mimic lard) will also create a crisper crust and can make your crust easier to work with because it remains soft at cold temperatures, but will not contribute any flavor. Fats can easily be mixed to reap multiple benefits. Note that lard and shortening may result in a slightly more moist dough, meaning you will use less liquid when you get to that step.
- Liquid Water, vodka, and milk or buttermilk are commonly-used liquids in pie crust, sometimes with a few teaspoons of white or cider vinegar or lemon juice. Water is the most traditional, but some people like to mix in up to 50% vodka because alcohol helps to tenderize the dough. In the oven, the vodka will completely evaporate, leaving no flavor or alcohol remnants behind. Some recipes specify milk or buttermilk, which add extra flavor and richness (but result in a less flaky dough). The acid of buttermilk or any vinegar or lemon juice you add will contribute to tenderness but will also add flavor (I personally like pie crust better without this flavor).
Technique notes:
- Keeping everything cold Pie recipes generally recommend chilling some extent of your ingredients and materials, some even asking that you chill your bowl, utensils, dry ingredients, and other elements before starting. If it’s particularly warm in your kitchen you may want to chill everything, but it’s generally not necessary. It’s most important that your fat and your liquid be cold (see pie crust basics note 1, above), so what I usually do is cut up my fat and put it in a small bowl, measure out my liquid and add an ice cube or two, and place both containers in the freezer before I collect and incorporate my dry ingredients.
Step 2 – Incorporate fat
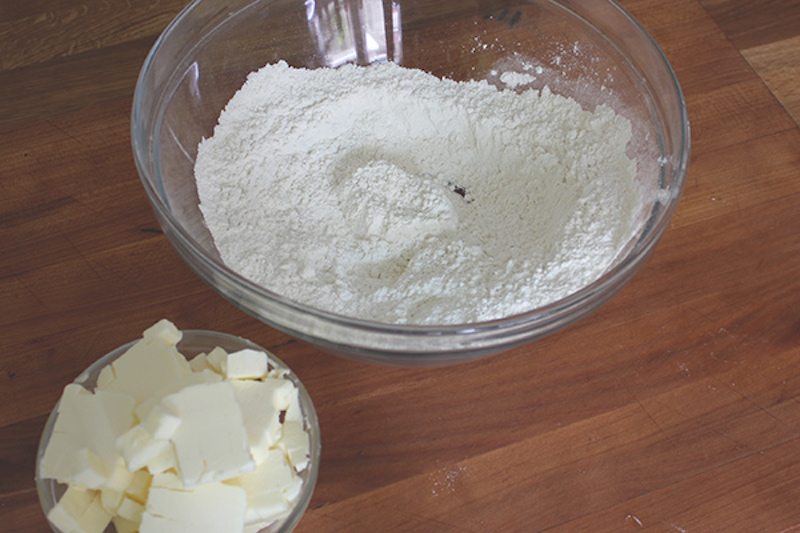
Mix chilled fat into dry ingredients using preferred mixing method – I like to use my fingers, but a food processor, stand mixer, or handheld pastry blender are other common methods. Mix until much of the fat has been incorporated and the mixture resembles wet sand with butter pieces no bigger than a pea. (See images below.)
Technique notes:
- Incorporating the fat There are many ways to incorporate fat into dry ingredients (often referred to as “cutting in the fat”). What method you use is mostly a matter of preference, but there are pros and cons to each. Option 1: Pulse dry ingredients and fat in a food processor. This is an easy method to use and makes it easy to stop quickly (to avoid overmixing), but it will cut the butter into small chunks instead of smearing it between pieces of dough, resulting in a less flaky crust. Option 2: Mix ingredients together in a stand mixer using the paddle attachment. This will smear the butter, but is difficult to stop and easy to overmix. Option 3:Cut ingredients together in a large mixing bowl using a handheld pastry blender .A handheld pastry blender can be a bit clumsy to use and will cut butter more than smearing, but makes it difficult to overmix. Option 4: Smear ingredients together in a large mixing bowl using your fingertips. Your fingers will smear dough perfectly and give you complete control (making overmixing less likely), but can heat your fat too much if working slowly and/or if your hands are warm. Some people also like to smear the ingredients together on a cold countertop (marble works best for this) using the heel of their hand, which is a traditional French method. I prefer using my fingertips and feel it gives the baker a much better understanding of the dough and the process, but if I’m in a rush, feeling lazy, or feeling under the weather, I’ll use a food processor.
- How much to incorporate the fat (or: “What the heck does pea-sized mean?!”)This is a tricky issue, and one that is usually answered with experience. The more pie crusts you make, the more familiar you’ll become with the right amount of fat incorporation. Most recipes will direct you to incorporate the fat until it looks like “coarse meal” or “wet sand” with “pea-sized lumps.” As you incorporate the fat, most of it will mix into the dry ingredients and your dough will begin to look like clumpy wet sand, but you still want a fair number of visible pieces of butter, somewhere around the size of … well, a pea. (See the picture to the right for a visual example.) If you scoop some of your mixture out of the bowl with a cupped hand, you should see 2-3 pea-sized chunks of butter. When you roll out the dough and see visible smears of butter, you’ll know you did it right.
Step 3 – Incorporate liquid to hold dough together
Drizzle in cold liquid of choice; just enough that the dough holds mostly together (it can still be quite shaggy).
Ingredient notes:
- Which liquid to use (See note about liquid ingredients under step 1)
- Adding an egg? Some recipes may instruct you to mix in an egg yolk or a whole egg just before adding the liquid. An egg will add flavor and fat but also create a more cookie-like texture (more like the crust on a fruit tart).
Technique notes:
- Adding the right amount of liquid This is a tricky issue as well, and one that is answered with experience just as with how much to incorporate the fat into the dry ingredients. Most recipes provide a range of liquid quantity, and this is because the moisture content of your dough will depend on what fat you use, the humidity and temperature of your kitchen, your mixing method, how much you incorporated your fat, and other variables. You want to add just enough liquid to bring your dough together when pressed with your hands (if it cracks into a few pieces when you let go, that’s okay, since it will come together a bit better during the chilling/resting step). The more liquid you and, the more gluten will develop (less than ideal) and the stickier and harder it will become to roll out your dough and place it into your pie dish. If you don’t use enough liquid, your dough will crumble and also be very difficult to roll out and place in your pie dish. To be honest, in the pictures to the right I should have added slightly more liquid to my crust – it crumbled a bit and was difficult to place into the pan.
- How to incorporate the liquid In the food processor, drizzle in your liquid through the top with the motor running and stop the moment the dough comes together. In a stand mixer, run the paddle attachment on low speed and drizzle in liquid just until the dough comes together. In a bowl, use your hands or a wooden spoon, drizzling in the liquid in parts and mixing it into the flour-butter mixture until the dough holds together when pressed into a ball.
- Working the dough as little as possible This is the time to be light with the dough, whether you’re using a machine, a spoon, or your hands. You want to mix the dough as little and as lightly as possible to limit gluten development.
Step 4 – Chill and rest dough
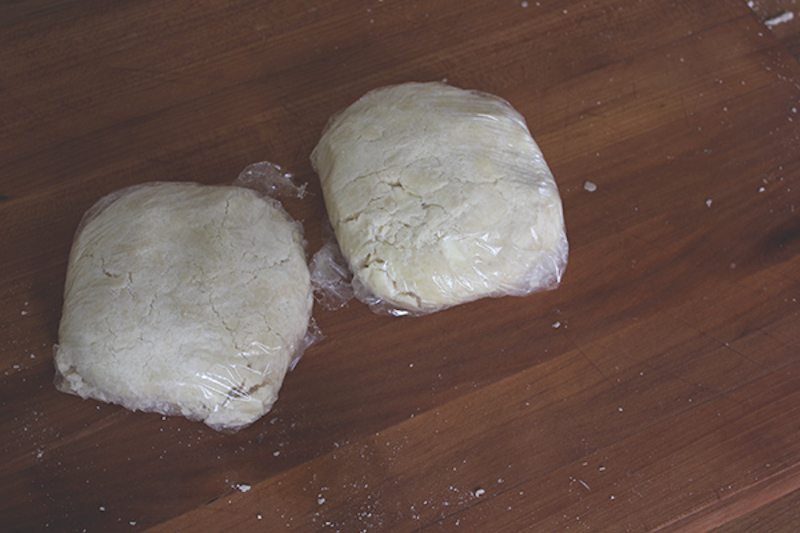
If making a full batch of dough, separate into two pieces. Wrap each piece of dough in plastic wrap, shape roughly into a disc, and refrigerate at least 1 hour and up to 3 days or freeze up to 1 month.
Technique notes:
- Is chilling really necessary? Yes and no. If you’re really pressed for time, you can skip this step. But know that chilling does make a difference in how easy the dough is to work with and with how tender the final crust is. As the dough chills, gluten relaxes and the dough will more completely absorb the liquid, meaning it will hold together better (this is why it’s okay if the dough cracks apart a bit when you wrap it).
- Making and storing dough Because you can freeze dough for up to 1 month, it may make sense for you to make a few batches of dough at a time and keep them on hand for later use. If I’m making a single-crust pie I always make a full batch of dough anyway, freezing 1 disc until I want it later.
Step 5 – Roll out, fit, fill, and bake dough as directed
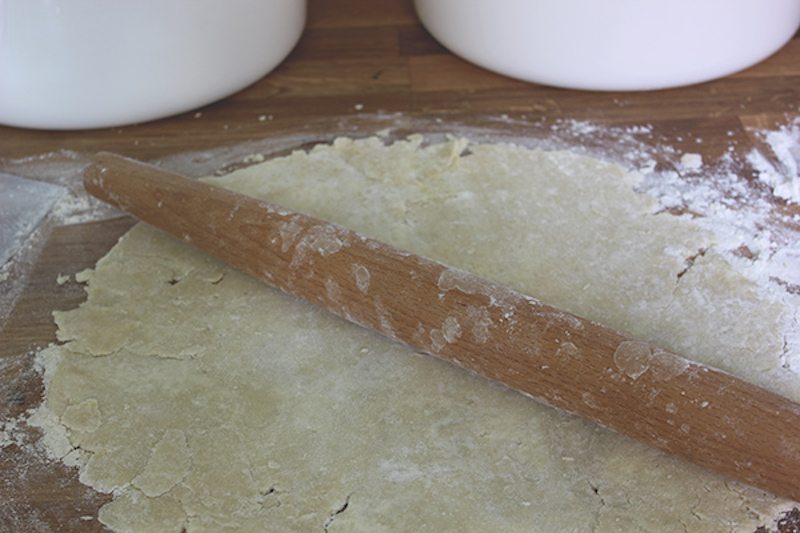
Roll out dough on a floured surface. Try to use heavy, even strokes, and check often that your dough isn’t sticking to your rolling surface (if it is, lift it up as well as you can and sprinkle flour beneath). If your dough is too firm to roll well, let sit at room temperature for a few minutes and try again. Fit dough into your pie plate, stretching it as little as possible. Fill and/or bake as directed by recipe.
Technique notes:
- Rolling quickly A well-made pie crust will usually be easy to roll out quickly and evenly. Rolling can be hard on your dough and helps those pesky gluten strands develop, and I’ve found that rolling too much causes elasticity and my dough shrinks in the oven. Try to use even strokes and enough flour to keep your dough from sticking as your rolling it out. I have a silicone rolling mat with measured circles, which makes it easy to roll to the size and shape needed for my pie dishes. I find that being generous with the flour also really helps. If you’re lucky enough to have a heavy stone or marble rolling pin, these work very well.
- Don’t roll twice Unfortunately you only get once chance with rolling out your dough. If you ball up your dough and try again, all those beautiful little smears of fat become too thin and absorb completely into the dough (not to mention you’ll be working your dough too much and developing too much gluten). If you experience rolling failure, it’s better to try to patchwork together pieces of rolled out dough into your pie plate than to ball it all up and roll it out again.
- Fitting the dough into the dish I’ve found that the easiest way to transfer my dough into the dish is to place my rolling pin across the dough, folding the dough circle over the pin, then using that to place the dough roughly on top of the dish (it’s usually pretty off-center, but close). I then gently place the dough into the corners of the dish and trim the edges with a scissors, using the extra pieces of dough to patch any holes or gaps. I’ve also seen people fold the dough into quarters, place the resulting triangle into the dish, then unfold it. However you place the dough, try not to stretch it too much. Stretching develop gluten strands and can cause shrinkage in the oven.
- Single-crust pies: Partially or fully baking before filling Sometimes a single-crust pie recipe will direct you to partially or fully bake the crust before filling. In both circumstances, you will start by blind baking the crust which means placing parchment paper or foil in the and spreading it with pie weights – ceramic or metal weights specifically made for this purpose, dry beans, coins, or other heavy, heat-safe items. This weight keeps the crust from bubbling up as it bakes. Follow the instructions in your recipe, or use these general guidelines: partially baked – blind bake 10 minutes with weights, then 10 minutes without, then fill and bake until filling is set; fully baked – blind bake 10 minutes with weights, then 30 minutes without or until crust is golden brown.
- Double-crust pies: Providing a steam exit strategy With a double-crust pie, you need to make sure there’s some way for hot steam to escape. A few quick slits cut into the top crust will do the job, or you can use decorative cookie cutters or a lattice top to provide an escape route.
- Double-crust pies: Getting that perfect, golden crust Adding an egg or cream wash and a sprinkle of sugar to the top crust before putting your piein the oven will give you a beautiful golden, caramelized outer crust. Various combinations of egg yolk, whole egg, cream, and salt will produce various results (see the table here for a detailed list of options). I prefer using heavy cream or a whole egg lightly beaten with a splash of water, either followed with a sprinkling of sugar.
- What type of pie dish to use Most pie dishes are ceramic, metal (aluminum or tin) or glass. Glass and ceramic pie dishes heat more evenly and result in more even browning, and glass dishes allow you to monitor the bottom of the crust. Metal pans are far more inexpensive, lighter, and less likely to break. Pie dishes come in a variety of sizes and depths, so make sure to take that into consideration when making your crust (more crust recipes are for 8-10”, regular-depth pies).
- Guarding against burnt edges Some people like to use pie crust shields or strips of tinfoil folded around the edges of their pies to protect against overly browned edges. I’ve never had this issue so don’t use either, but it’s a fairly common problem (and one that I’m guessing is associated with your particular oven).
Whew. That’s pretty much everything I know about pie crust. You absolutely do not need to know all of this information in order to make excellent crusts, but hopefully it can be handy if you have questions about the hows and whys of the process and the ingredients.
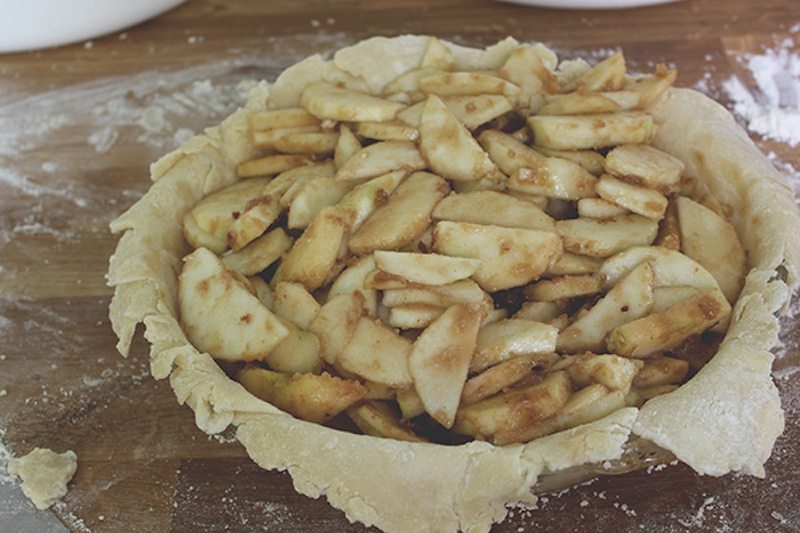
As a reward for getting all the way to the end of this guide, here is the basic fruit pie recipe I use. It’s nothing ground-breaking, but it works for almost any fruit and lets the fruit shine instead of covering it up with other flavors or spices.


