Cooking with cast iron is easy and efficient, but don’t let the pan’s care overwhelm you. The more you use it the longer it lasts!
By Annelise McAuliffe
 Shutterstock: Marie C Fields
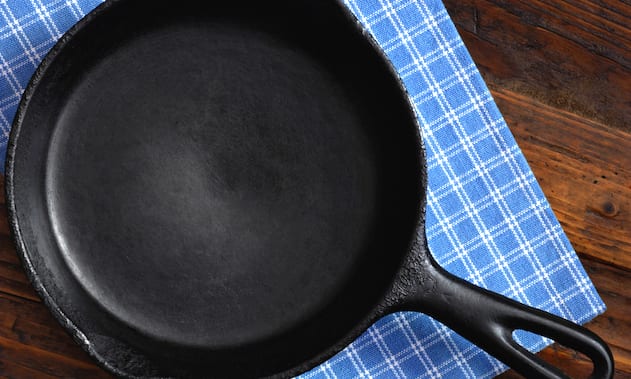
We love our cast iron skillets. They are ideal conductors of heat and energy on the stove, perfect to throw in the oven, they last forever and don’t contain any weird non-stick coatings. Plus, you can use just about any utensil to cook with in the pan— wood, metal, or rubber. While they may take some special care that not all cooks are used to, they are worth getting to know and bringing into your kitchen.
When you are choosing a skillet to purchase, don’t overlook you local antique store. Not only is it cool to have a pan that is older than you, but they are generally much cheaper and made to last with a smoother cooking surface, too. All you have to do is clean the pan well and re-season it. As long as the material itself is not pitted, it will be as good as new once you have cleaned it up and it can be passed on for generations to come.
Cast iron does take commitment to maintain. The pans should be wiped out with warm water and dried immediately after use. This is not a pan that should be soaked and dealt with after dinner is eaten.
REGULAR PAN CARE
Each time you use your pan it is important to clean it as soon as you are done cooking. Grab a towel to protect your hand from any heat it may have retained from the stove and wipe it out. If the cooking was minimal, it may only take a quick swipe with a dry paper towel to do the job. However, if a food was cooked that left residue or stuck to the pan, wipe it out under warm water with a sponge. While soaking the pan in soap will ruin the seasoning, using soap will not. Although, I find that I rarely need an abrasive soap or sponge to get the job done. Once clean of any residue or food pieces, hold the pan over the flame of your stovetop or dry it in a warm oven. Once dried, I like to give it another wipe with a towel just to be sure that it is indeed clean and crumb free.
Don’t worry about bacteria. Although it may only seem like a quick wipe, any food particles are removed and the lingering bacteria is killed when you dry the pan over the flame or in the oven before putting back in the cupboard and using it again.
RE-SEASONING
If you are buying a pan that is used it is best to season it when you get it home, even if it is in good condition. Give it a good scrub or electrocution, don’t worry about taking off any seasoning that may be chipped as you will be adding a new layer on anyway. See the link in the last sentence for tough cleaners and techniques that will help you remove any build up and start from scratch. For an easy cleaner that can be used everyday without re-seasoning, check out Le Creuset’s Cast Iron Cleaner.
Using your cast iron often and properly is the best way to avoid the longer re-seasoning process. However, if you notice build up or rust on your pans it is time to build up a fresh new layer over the metal. You may follow the tips in the link above to remove any rust or charred food or simply use kosher salt to help in the scrubbing process.
Each chef has their own preference for oils to use when re-seasoning and each with a good reason. Find the one that works best for you, just be sure that the oil that you are using is safe to consume. Scientifically, it seems that flax seed oil may be the best option, however it is expensive. I generally use lard or bacon fat as I usually have it as a by-product of something else. If you do choose to use one of these, be sure it is clean fat! Shortening and vegetable oils work well, too. Using an oil with a higher smoke point is ideal and means that you can eat the pan to a higher temperature and season it better without reaching the coating’s smoke temperature.
Once your pan is scrubbed or stripped clean, dried, and you have chosen your oil, grab a towel and rub the pan thoroughly with the oil. After the pan is coated, wipe it with a dry towel to remove any excess. Place it in the oven at 450F or just below your oil’s smoke point. I like to turn the pan upside-down so that any excess that was missed will not stay in the pan. This step can be done on the stovetop, but it is more difficult to monitor the temperature. Leave in the heated oven for an hour. Then, turn off the oven and allow the pan to cool completely before removing.
The steps of oiling, baking, and cooling may be repeated several times until you have the proper even, dark black coating again.


