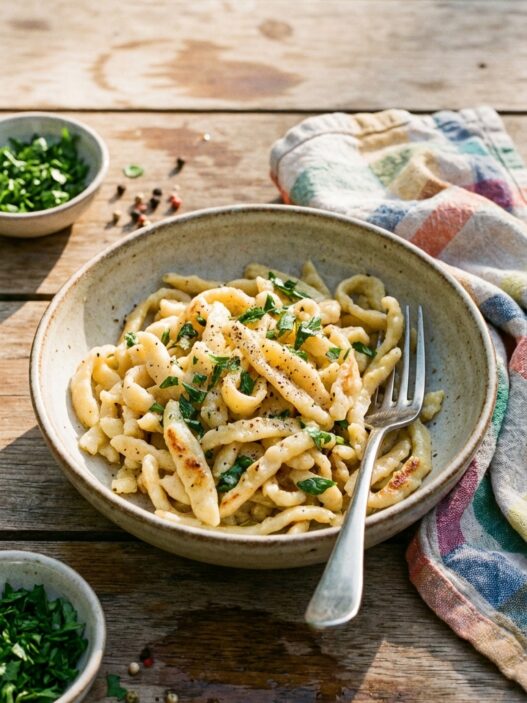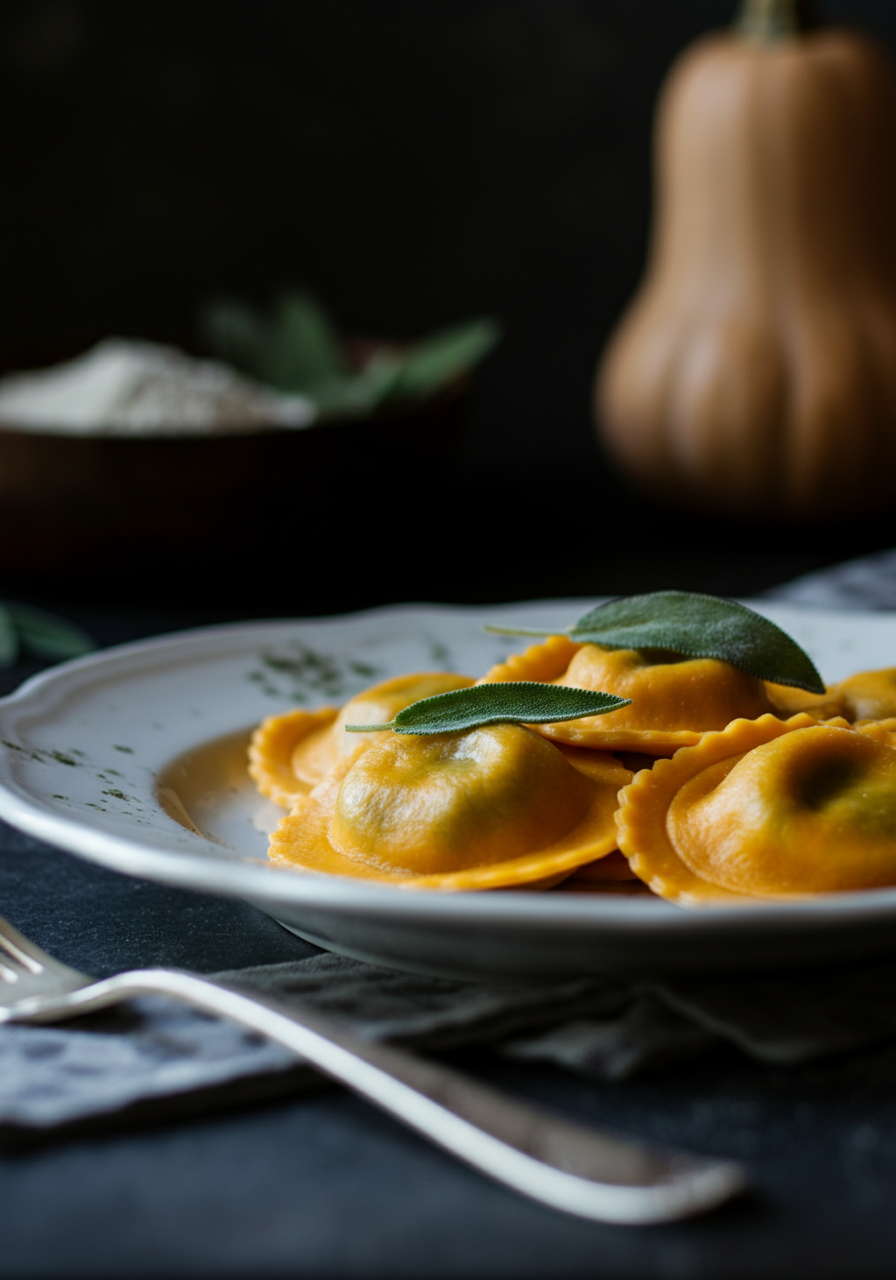
Cappellacci di Zucca is a ravioli like fresh pasta stuffed with pumpkin filling and served with a classic butter and sage sauce.
Ferrara? Said my girlfriends when I had suggested it. We were looking for a place to meet up in Italy after a bike tour in the Veneto area. They’d never heard of it. As I am constantly discovering, there is so much more in Italy than the main tourist spots of Tuscany, Rome, and Florence. Wonderful cities and town where you can explore without the crowds of tourists, eat well, and enjoy amazing new wines you’ve never seen on shelves in the US.
Ferrara is the capital of the province of Ferrara, in the region of Emilia-Romagna, about 50 km northeast of Bologna. The center of town is dominated by the Castello Estense, a brick castle complete with moat, and home to the rulers of Ferrara, the Este family. The Este family ruled Ferrara for close to 400 hundred years, and during their reign, Ferrara became a center for art and culture, and was one of the first examples of Renaissance city planning, earning today it’s status as a UNESCO World Heritage sites. The notorious Lucretia Borgia was married to the Duke of Ferrara, Alfonso I, and spent most of her life here in Ferrara, she is buried here as well.
Ferrara is surrounded by some of the best preserved ancient city walls in Italy, dating from the 15th and 16th century. Today, 9 km of cycling and walking paths follow these walls, where you will often find the residents of this “Citta di Biclette” enjoying the outdoors along these quiet tree-lined paths.
After a nice late afternoon bike ride, we headed out for dinner to discover some of the favorite local dishes. The undisputed ‘signature’ first pasta course in Ferrara is cappellacci di zucca, a stuffed pasta with a filling of winter squash or pumpkin, Parmigiano-Reggiano and nutmeg. It is served two ways, either with a butter and sage sauce, or, interestingly enough, a meat ragu. Cappellacci di Zucca Ferraresi are mentioned in recipe books from the Renaissance, when these were prepared for the Este family.
The name cappellacci – known as caplaz in the local dialect – comes from the pasta’s resemblance to the straw hats worn by local peasants. The pumpkin usually used is a favorite local variety, a violin shaped winter squash. In the Renaissance, the cooked squash would be flavored with ginger or pepper, as well as nutmeg, but today these aren’t as popular. This dish is currently awaiting IGP certification (Identificazione Geografica Protetta).
When we were home, my girlfriends and I relived our Italy vacation one evening with a cooking class. I recreated several of our favorite dishes, and this was high on all of our lists. We had a fun night making our out cappellacci, it’s a great recipe to make with a group – the exaggerated size of these stuffed pastas make producing enough for a first course quick work.
Print
Cappellacci di Zucca – Italian Pumpkin Ravioli
- Total Time: 125 minutes
- Yield: Serves 4
- Diet: Omnivore
Description
Delicate pumpkin ravioli, homemade from scratch, tossed in a nutty brown butter sage sauce. Comfort food perfection!
Ingredients
- 5 eggs
- 3 1/2 cups (350 g) all purpose or pasta flour
- 1 tbsp vegetable oil
- 2 1/4 lbs (1 kg) butternut or other flavorful winter squash or pumpkin
- 1 cup (180 g) freshly grated parmigiano-reggiano cheese
- Freshly grated nutmeg
- Kosher salt and freshly ground black pepper
- 6 tbsp (85 g) unsalted butter
- 1 bunch fresh sage leaves
- 3/4 cups (130 g) freshly grated Parmigiano-Reggiano cheese
- Kosher salt and freshly ground pepper
Instructions
For the Pasta Dough
- Weigh the flour, or spoon it into a measuring cup and level with a knife. Do not tamp or tap.
- Mound the flour on the counter, make a well, and add the eggs. Beat with a fork until well mixed.
- Gradually incorporate the flour into the eggs, using a pastry scraper to prevent spillage.
- Knead the dough for 3 minutes, adding more flour if necessary. Continue kneading for 10 minutes, or until satiny, smooth, and elastic.
- Wrap the dough in plastic wrap and let it rest at room temperature for 30 minutes to 3 hours.
- Work with one-fifth of the dough at a time, keeping the rest wrapped.
- Lightly flour the machine rollers and work surface. Set the rollers at the widest setting.
- Flatten the dough into a thick patty and guide it through the rollers five to six times, folding it in thirds each time.
- Repeat at successively narrower settings, passing the dough through three times at each setting and folding it in half each time.
- If the dough tears or is lumpy, lightly flour it and continue rolling.
For the Squash Filling
- Preheat oven to 375°F (190°C). Lightly oil a baking sheet.
- Cut squash in half, scoop out seeds, and place cut-side down on the baking sheet.
- Bake for 1 hour, or until easily pierced with a knife. Let cool.
- Scoop out the squash flesh, mash it, and stir in cheese and a little nutmeg.
For the Cappellacci
- Roll out the pasta dough thinly. Cut 3 1/2 to 4-inch squares.
- Place a spoonful of filling in the center of each square. Fold in half to form a triangle, and seal the edges.
- Form an oversize tortellino by bringing the two ends together and sealing. Place on a floured baking sheet.
- Melt butter with sage leaves in a saucepan. Brown the butter for a nutty flavor (optional).
- Bring a large pot of salted water to a boil.
- Cook cappellacci in batches for about 3 minutes, until tender but firm.
- Remove with a spider or slotted spoon, allowing water to drain.
- Place in warm serving bowls, sprinkle with cheese, and top with melted butter.
- Season with salt and pepper and garnish with fresh sage leaves.
Notes
- For a richer flavor, roast the pumpkin with a drizzle of olive oil and some herbs before making the filling.
- To prevent sticking, dust your work surface and pasta dough generously with semolina flour instead of all-purpose flour during the rolling and shaping process.
- Leftover ravioli can be frozen uncooked on a baking sheet, then transferred to a freezer bag for up to 3 months. Cook from frozen by adding a few minutes to the cooking time.
- Prep Time: 60 minutes
- Cook Time: 65 minutes
- Category: Main Course
- Method: Boiling
- Cuisine: Italian
Nutrition
- Serving Size: 1 cup
- Calories: 450
- Sugar: 5
- Sodium: 400
- Fat: 25
- Saturated Fat: 15
- Unsaturated Fat: 8
- Carbohydrates: 50
- Fiber: 5
- Protein: 15
- Cholesterol: 150
Frequently Asked Questions
What type of pumpkin is best for making the filling for Cappellacci di Zucca?
For the filling, a sweet variety of pumpkin like butternut or sugar pumpkin works best, as they provide a smooth texture and rich flavor.
How do I properly seal the ravioli to prevent the filling from leaking during cooking?
To seal the ravioli, ensure that the edges of the pasta are dampened with water before folding and pressing firmly to remove any air pockets, ensuring a tight seal.
What should I do if my pasta dough is too dry or crumbly?
If your pasta dough is too dry, gradually add a small amount of water or an extra egg until the dough reaches a smooth and pliable consistency.