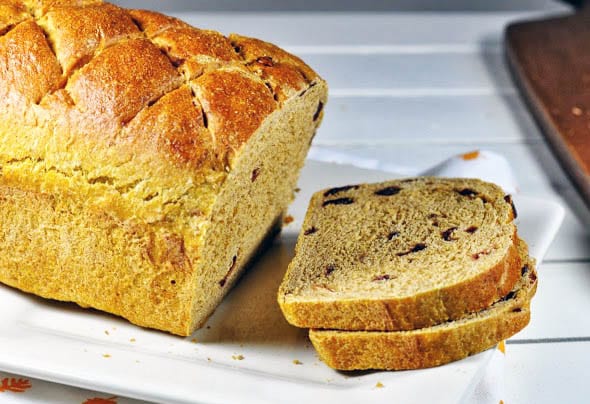
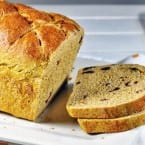
Multigrain Pumpkin Cranberry Bread
- Total Time: 4 hours 15 mins
- Yield: 1 loaf (about 12 slices)
Description
This yeast bread isn’t overwhelmingly pumpkiny or sweet, but the seasonal ingredient does keep the loaf moist and tender.
Ingredients
- 1 cup/ 160g bread flour
- 1/2 cup/79g rye flour
- 2 cup/300g white whole wheat flour
- 1 1/4 tsp/6g instant yeast
- 1/2 tsp cinnamon
- 1/4teaspoon ground ginger
- 1 1/2 tsp /10g salt
- 1 cup (240 ml) Canned pumpkin puree
- 1 tbsp/15g brown sugar
- 2tablespoon/17g olive oil
- 1/2cup/77g sweetened cranberries
- 1/2 cup (120 ml) butter milk ( you can make your own by adding 1/2 tbsp vinegar in 1/2 cup milk and stand for 5 minutes)
- 2tablespoon (30 ml) water
Instructions
- In the bowl of kitchen aid stand mixer attached with paddle attachment add yeast, rye, bread and white whole wheat flour mixture, buttermilk, pumpkin, sugar, salt and rest of ingredients and mix everything for 3 minutes. Then add cranberries and mix very well to incorporate into the dough. Then change to dough hook and knead the dough for about 8 minutes or until the dough starts leaves from the sides and form a ball. Then transfer the dough to well floured area and knead for another 5 minutes or until they become shiny, supple, non sticky dough. The dough should pass the window pane test and register 77 to 81 F. If you are kneading by hand it takes about 15 minutes of kneading.
- Place the dough in a lightly greased bowl, cover the bowl, and allow it to rise till it’s expanded and looks somewhat puffy, about 90 minutes.
- Lightly grease a 9x4x3, 1 1/2 lb. commercial loaf pan Transfer the dough into a board and gently shape the dough into a smooth log, and settle it into the pan, smooth side up.
- Cover the pan with lightly greased plastic wrap, and allow the loaf to rise till it’s crowned over the rim of the pan by about 3/4?, about 90 minutes. Don’t let it rise too high; it’ll continue to rise as it bakes. Towards the end of the rising time, preheat the oven to 350°F. When you are ready for baking the score the bread and lightly apply the egg wash on the loaf so that you get shiny color after baking.
- Bake the bread for 60 minutes. Lightly tent it with aluminum foil, and bake for an additional15 minutes, or until the center registers 200F on an instant-read thermometer. Remove it from the oven, and turn it out of the pan onto a rack.
- Slice and serve when the bread cools down to room temperature.
- Prep Time: 15 mins
- Cook Time: 4 hours
- Category: Baking
- Cuisine: American
Nutrition
- Serving Size: 1 slice
- Calories: 190
If You Liked This Recipe, You’ll Love These
- Rosemary Garlic Challah Bread
- Kalács – Traditional Hungarian Sweet Braided Bread
- An Italian Classic: How to Make Ciabatta Bread
- Soft and Fluffy Sourdough Sandwich Loaf
Frequently Asked Questions
Can I make this dough by hand instead of using a stand mixer?
Yes. If kneading by hand, plan on about 15 minutes of active kneading compared to the 8 minutes with a dough hook. The dough is ready when it passes the windowpane test and registers 77–81°F.
Why does the recipe call for both a 60-minute bake plus an additional 15 minutes tented with foil?
The initial 60 minutes builds crust color; the tented foil phase prevents over-browning while the interior finishes cooking. Pull the loaf when a thermometer reads 200°F in the center.
How do I make a quick buttermilk substitute if I don’t have any on hand?
The recipe notes it directly: add 1/2 tablespoon of vinegar to 1/2 cup of regular milk and let it stand for 5 minutes before using.
What is the windowpane test and how do I do it?
Stretch a small piece of dough gently between your fingers. If it forms a thin, translucent membrane without tearing, the gluten is developed enough. The recipe requires this test to confirm the dough is properly kneaded before the first rise.