Load up in nutritious probiotics by making delicious kimchi that is perfect with fried rice, ramen, noodles, to top burgers and so much more. It is easier to create than you think.
Kimchi, a true legend in Korean cuisine, the traditional side dish of salted and fermented vegetables, such as napa cabbage and Korean radish, mixed with a variety of seasonings including chili powder, scallions, garlic, ginger, and jeotgal (salted seafood). Its origins date all the way back to ancient times, with the earliest references to its preparation appearing around the period of the Three Kingdoms (37 BC to 7 AD). We are talking ancient food at its very best and most delicious.
The art of kimchi-making began as a way to preserve vegetables for the winter months. Techniques and recipes were passed down through generations, becoming more refined and varied across different regions of Korea. The introduction of chili peppers to Korea in the early 17th century marked a significant evolution in kimchi, leading to the creation of the spicy version that is most common today.
Kimchi is deeply rooted in Korean culture, not just as a food but also as a part of Korea’s heritage. It is celebrated annually during “Kimjang,” a traditional kimchi-making season in late autumn.
Beyond its cultural significance, kimchi is recognized for its health benefits. It is rich in vitamins, low in calories, and packed with beneficial probiotics that are known to aid digestion. Oh, and it tastes absolutely amazing too!
I make this kimchi several times a year. As a foodie who loves fermentations and pickled vegetables, kimchi is one of my top choices along with common Szechuan style pickled vegetables.
How to Make Homemade Kimchi
-
Prepare the Cabbage:
- Clean the cabbage and discard any damaged leaves.
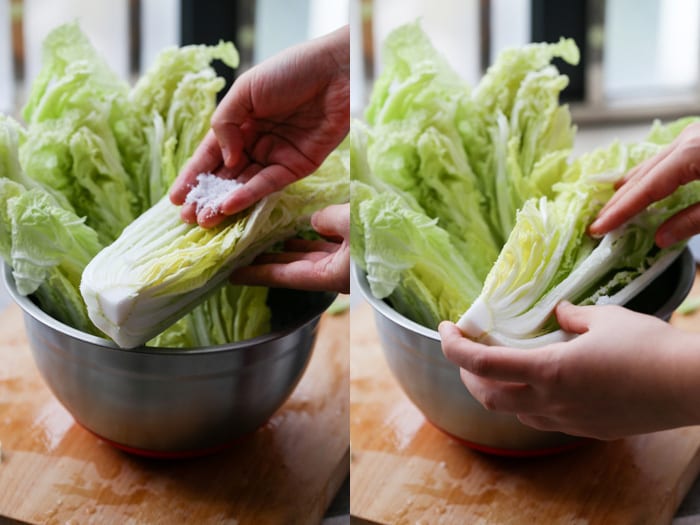
- Cut the cabbage into quarters and sprinkle the kosher salt between the leaves. Massage gently to ensure even coverage.
- Leave the salted cabbage to sit for 6-8 hours or overnight, allowing it to soften and wilt.
-
Rinse the Cabbage:
- Thoroughly rinse the cabbage under running water to remove excess salt.
- Squeeze out the water and set the cabbage aside to drain.
-
Make the Rice Glue:
- Combine the water and glutinous rice powder in a small pot. Heat over medium-low, stirring continuously until the mixture becomes clear.
- Add the sugar while the mixture is hot and stir until dissolved. Allow cooling to room temperature.
-
Prepare the Fermentation Sauce:
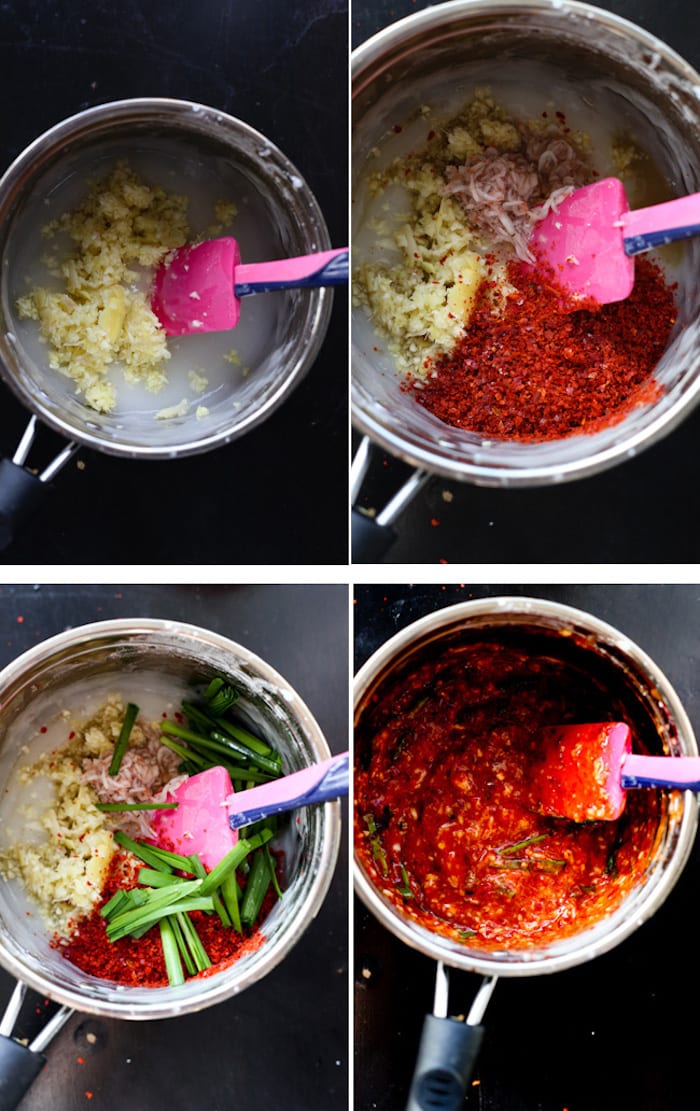
- In a food processor, blend the garlic, ginger, apple, and pear into a puree.
- Transfer the puree to a mixing bowl and add the cooled rice glue.
- Stir in the Korean chili powder, salted shrimp, and fish sauce.
- Add the chives and radish strips to the sauce and mix thoroughly.
-
Assemble the Kimchi:
- Carefully apply the fermentation sauce to each layer of the cabbage leaves, ensuring even coverage.
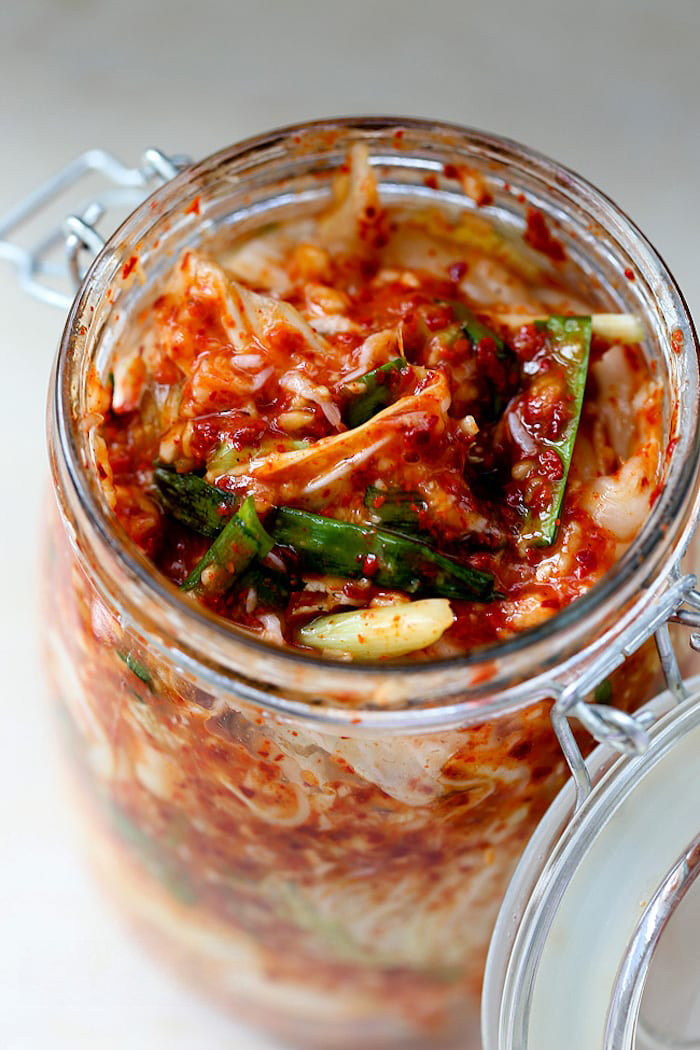
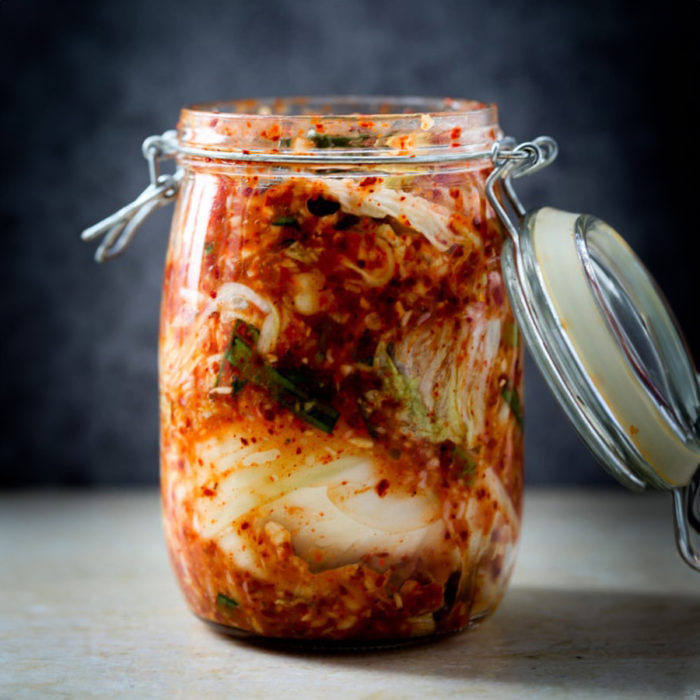
- Pack the coated cabbage into a clean, airtight jar.
-
Fermentation:
- Let the kimchi sit at room temperature for 24-48 hours, slightly opening the lid to allow gases to escape.
- After the initial fermentation, seal the jar tightly and refrigerate.
- The kimchi will be ready to eat after 7 days and will continue to ferment, developing flavor.
Recipe Notes:
- If you find the kimchi too salty, additional rinsing can help balance the flavor.
- For a vegetarian version, omit fish sauce and salted shrimp, substituting with soy sauce or additional salt.
- The kimchi can be used as a side dish or incorporated into recipes like stews and pancakes.
- How to choose a cabbage for kimchi: Usually a fresh and denser napa cabbage is great for kimchi. I usually use one around 1000g (2lbs). Thoroughly clean the cabbage and remove any bad leaves.
Yield: This recipe makes one large jar of kimchi.
How to Make Homemade Kimchi
- Total Time: 8 hours
- Yield: 1 jar 1x
Ingredients
- 1 Napa cabbage (about 2 lbs or 1000g)
- 1/3 cup (80 ml) kosher salt
- 4 tablespoons (60 ml) Korean chili powder
- 1 small bunch of Asian chives or green onions, roots removed
- 1/4 medium-sized radish, cut into small strips
- 4 cloves garlic, peeled
- 1 thumb-sized piece of ginger, peeled
- 1/4 medium apple, peeled
- 1/4 medium pear, peeled
- 1 tablespoon (15 ml) fish sauce
- 1 tablespoon (15 ml) Korean salted shrimp
- 3 tablespoons (45 ml) glutinous rice powder
- 1 cup (240 ml) water
- 1–1.5 tablespoons (15–22.5 ml) sugar
Instructions
- Prepare the Cabbage:
- Clean the cabbage and discard any damaged leaves.
- Cut the cabbage into quarters and sprinkle the kosher salt between the leaves. Massage gently to ensure even coverage.
- Leave the salted cabbage to sit for 6-8 hours or overnight, allowing it to soften and wilt.
- Rinse the Cabbage:
- Thoroughly rinse the cabbage under running water to remove excess salt.
- Squeeze out the water and set the cabbage aside to drain.
- Make the Rice Glue:
- Combine the water and glutinous rice powder in a small pot. Heat over medium-low, stirring continuously until the mixture becomes clear.
- Add the sugar while the mixture is hot and stir until dissolved. Allow cooling to room temperature.
- Prepare the Fermentation Sauce:
- In a food processor, blend the garlic, ginger, apple, and pear into a puree.
- Transfer the puree to a mixing bowl and add the cooled rice glue.
- Stir in the Korean chili powder, salted shrimp, and fish sauce.
- Add the chives and radish strips to the sauce and mix thoroughly.
- Assemble the Kimchi:
- Carefully apply the fermentation sauce to each layer of the cabbage leaves, ensuring even coverage.
- Pack the coated cabbage into a clean, airtight jar.
- Fermentation:
- Let the kimchi sit at room temperature for 24-48 hours, slightly opening the lid to allow gases to escape.
- After the initial fermentation, seal the jar tightly and refrigerate.
- The kimchi will be ready to eat after 7 days and will continue to ferment, developing flavor.
Notes
- If you find the kimchi too salty, additional rinsing can help balance the flavor.
- For a vegetarian version, omit fish sauce and salted shrimp, substituting with soy sauce or additional salt.
- The kimchi can be used as a side dish or incorporated into recipes like stews and pancakes.
- Prep Time: 8 hours
- Category: Side
- Method: Fermentation
- Cuisine: Korean













Awesome, worked perfectly! Has anyone tried adding other types of vegetables? I’m curious about experimenting with carrots or cucumbers.
It will definitely work Timothy, you should absolutely go for it!
Perfect balance of flavors! I’ve tried a few different kimchi recipes, and this one has the best instructions and results. Thank you!
The best kimchi recipe I have found!
That’s awesome, thank you!
I appreciate the step-by-step guide. It made my first kimchi-making experience less intimidating. I swapped the shrimp for more fish sauce because of an allergy, and it’s still fermenting beautifully.
Glad to hear that RJ, I’m sure it will be super-delicious!
This was my first time making kimchi, and your recipe was easy to follow. I didn’t have salted shrimp, so I used a little extra fish sauce, and it worked out well.
Thank you for this recipe! It was easier than I thought it would be. I didn’t have any apple so I left it out, and the kimchi still turned out delicious. It’s already a hit in my household!
That’s what’s so great about fermentation – you can use basically almost anything you have.
I made a batch with and without the rice powder to compare, and both turned out great. This recipe is a keeper for anyone looking to dive into homemade kimchi.
This turned out perfect!!!
Can we make it without glutinous rice powder? Please reply
Sure! If you choose to omit it, your kimchi might be slightly less thick but will still ferment and develop flavors effectively. As an alternative to glutinous rice powder, you could use a small amount of regular rice flour, or simply skip this ingredient altogether.