Uncover the secrets of creating an authentic Roman-style pan pizza at home and master the art of crafting its signature thick, airy crust.
Roman-style pan pizza, or ‘pizza al taglio’ as it’s known in Italy, is a quintessential part of Roman food culture that traces its roots back to the bustling pizzerias of post-World War II Rome. During a time when resources were scarce and convenience was key, innovative bakers created a pizza that could be baked in large rectangular trays, cut into easily manageable squares, and sold by weight. The result was a thick yet airy crust, crispy on the outside and fluffy within, providing a satisfying bite with each piece.
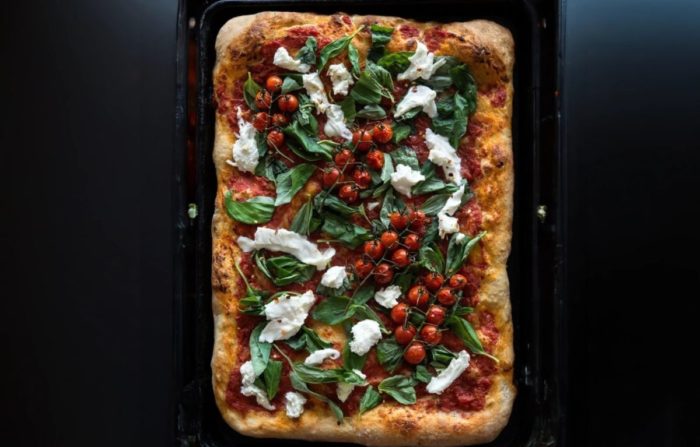
As time passed, this style of pizza evolved from being a symbol of a city recovering from the ravages of war to a culinary masterpiece representative of the laid-back and inclusive dining culture of the Eternal City. From simple cheese and tomato to gourmet combinations like ham and truffle oil, the variety of toppings mirrors the diversity and vibrancy of Roman life itself.
Roman-style pan pizza is more than just a meal. It’s a communal experience shared between friends, family, and strangers, an edible emblem of Rome’s enduring spirit. Unlike its thin-crust sibling, which is often eaten on the go, this heartier version invites you to sit down, slow down, and savor the moment. It’s a testament to Rome’s resilient past, its dynamic present, and its promising future, all wrapped up in one delightfully flavorful package.
Baking a Roman-style pan pizza at home is an adventure in culinary artistry that rewards your patience with incredibly tasty bites of pizza. Here are some tips to ensure success:
Choose Quality Ingredients:
Start with top-tier tipo 00 flour, like Mulino Marino from Eataly, and use high-quality dried or instant yeast. The Pelati tomatoes, with their vibrant taste, bring a unique touch of Italy to your dish. Extra virgin olive oil and sea salt are key for flavor.
Mixing and Kneading:
Your dough mixture will be wet, but don’t fret. The hydration leads to a perfectly crispy yet airy crust. When folding on your floured work surface, treat the dough delicately to preserve air bubbles which contribute to the desirable texture.
Rest and Fold:
The dough needs time to rest and develop gluten strength, so remember to give it those 15-minute breaks between folds. It’s a gentle process of tending to your dough which will become less sticky and more springy with each pass.
Fridge Time:
Allow your dough to rest in the refrigerator for 24 hours. This slow fermentation develops a deeper flavor, creating a more complex and tasty pizza.
Preparation:
Let the dough come to room temperature before working with it. This will make it easier to shape. Preheat your oven to a blazing 500°F to mimic the powerful ovens found in Roman pizzerias.
Shaping the Dough:
Gently press down the dough, starting from the edges moving to the center. This method helps to maintain the air bubbles within. Then, flipping and massaging the dough further helps distribute it evenly.
Pan Time:
The dough’s final home is your oiled baking sheet. Stretch it gently toward the edges of the pan, being careful not to deflate the dough. Add your crushed, seasoned tomatoes evenly across the top, drizzling with olive oil for an extra flavor boost.
Bake:
For the first 5 minutes, place your pan on the bottom floor of the oven. This blast of heat kickstarts the crust’s crunch. Then move it to the bottom-middle rack for an additional 15 minutes to ensure even cooking.
Topping and Serving:
Once removed from the oven, top your pizza with mozzarella and fresh basil. A final drizzle of olive oil gives a glossy, flavorful finish. Cut into squares, and savor each bite of your homemade Roman-style pan pizza, a slice of Italian history right in your kitchen.
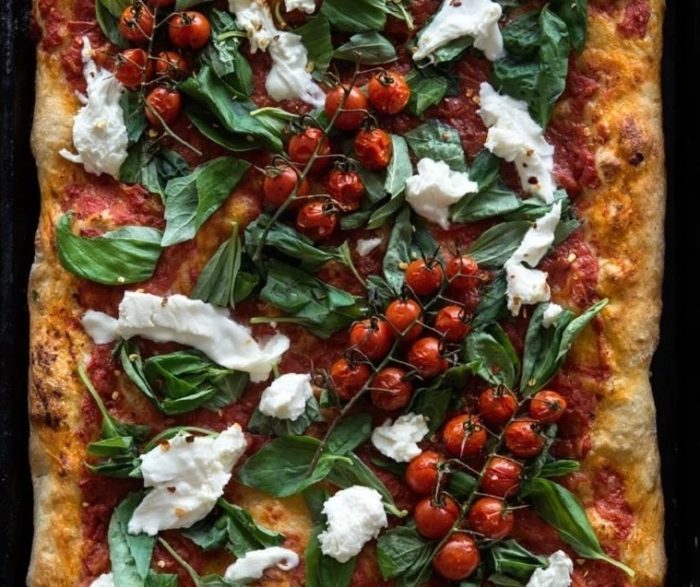

How to Make Roman Style Pan Pizza
- Total Time: 0 hours
- Yield: 1 large pizza 1x
Description
Uncover the secrets of creating an authentic Roman-style pan pizza at home, mastering the art of crafting its signature thick, airy crust and vibrant toppings.
Ingredients
- 1 pound tipo 00 flour (used Mulino Marino flour purchased from Eataly, NYC)
- 1 1/4 teaspoons dried or instant yeast (I like this brand)
- 1 1/2 cups to 2 cups water (used closer to 2 cups)
- 1 1/2 tablespoons extra virgin olive oil
- 1/2 tablespoon sea salt
- 1 14– ounce can Pelati (peeled, whole tomatoes, crushed and seasoned with sea salt)
Instructions
- Mix the flour, yeast, and water in a large bowl with a spoon. When most of the lumps are gone, add the olive oil and salt. It will be wet. The wetter the better.
- Flip onto a floured work surface and gently fold the dough in half, over itself, toward you. Grab the dough by the corners facing you, pick it up like an envelope and turn 90 degrees and place back on the floured surface. Gently fold and turn. Repeat a few more times.
- Place the dough in a lightly oiled bowl, cover, and let rest 15 minutes. Then repeat the folding and turning action as above. By the third pass, the dough will be springy and less sticky.
- Place the dough in a lightly oiled bowl, cover tightly with plastic wrap, and place in the refrigerator for 24 hours.
- The next day, take the dough out of the refrigerator and let it come to room temperature, about 1 hour. While the dough is coming to room temperature, preheat the oven to 500°F.
- Lightly oil a 9″x 13″ baking sheet.
- Lightly flour your work surface. Place the dough on the work surface. Start with the edges of the dough and press down gently and then go to the center and press down. After the first pass, flip the far end over, so the top becomes the bottom. Make sure your flour is evenly distributed under the dough and continue to gently massage the dough, so the balls of air remain intact. Flip again and repeat until the dough is evenly distributed.
- Pull the dough over your arm and then pull the other side over your other arm (as pictured above) with your palms facing down. Transfer the dough to the baking pan and distribute the dough toward the edges of the pan. Press down, distributing the dough evenly, but gently.
- Add the pelati tomatoes. Distribute evenly over the dough. Drizzle with extra virgin olive oil.
- Place the pan on the bottom floor of your oven for the first 5 minutes. Then transfer to the bottom-middle rack of your oven and cook another 15 minutes. Remove the pizza from the oven.
- Add mozzarella cheese and basil. I like to finish with a drizzle of extra virgin olive oil.
- Prep Time: 1.5 hour
- Resting Time: 24 hours
- Cook Time: 10 minutes
- Category: Primi
- Method: Baking
- Cuisine: Italian








Holy crap, this was insanely delicious. Thank you thank you!!
Yes, that’s great to hear. Thank you!
Do I need to roll out the dough between folds – you mention each ‘pass’ is that through rollers?
Sandra, you only roll the dough in step 7, where you turn the dough (not flip) after every pass, to get an even surface. Hope that makes sense!
Superb….all the best.
Cornelio