Description
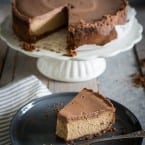
This cheesecake is heavy, but delicious. Dive in if you love the classic peanut and chocolate combo in a rich cake.
Ingredients
Scale
For the crust
- 200 gr biscuits
- 50 gr salted peanuts
- 100 gr dark chocolate
- 50 gr soft unsalted butter
For the filling
- 500 gr cream cheese
- 3 large eggs
- 3 large egg yolks
- 200 gr caster sugar
- 125 ml sour cream
- 250 gr smooth peanut butter
For the topping
- 250 ml sour cream
- 100 gr milk chocolate
- 30 gr light soft brown sugar
Instructions
- Preheat the oven to 170 C.
- Place the biscuits, peanuts, butter and dark chocolate into a foodprocessor and whizz until it starts to resemble a clump. Turn out onto a springform tin (base covered with baking paper) and press into the bottom with a spoon and up to the sides to make the crust.
- Put in the fridge while you’re making the filling
- Clean out the foodprocessor bowl and put the creamcheese, eggs, egg-yolks, sugar, sour cream and peanutbutter in. Whizz until you have a smooth mixture.
- Turn this out onto the chilled springform and smooth the top. Put into the oven for an hour but check after about 50 minutes. The top should be set and feel dry but underneath you can still have it wobble a little.
- Take the cheesecake out of the oven while you make the topping.
- Warm the sour cream together with the sugar and the milk chocolate on a low heat until it is melted and merged together. Take of the heat.
- Spread this on top of your cheesecake and put back into the oven for ten minutes. If you take it out, the top will not have set. That will happen in the fridge.
- Leave to cool completely before you cover it and put into the fridge to set overnight.
- When ready to eat, make sure you take it out a bit beforehand so it can get a little warmer. The flavors are best when not too cold.
- Category: Baking
