
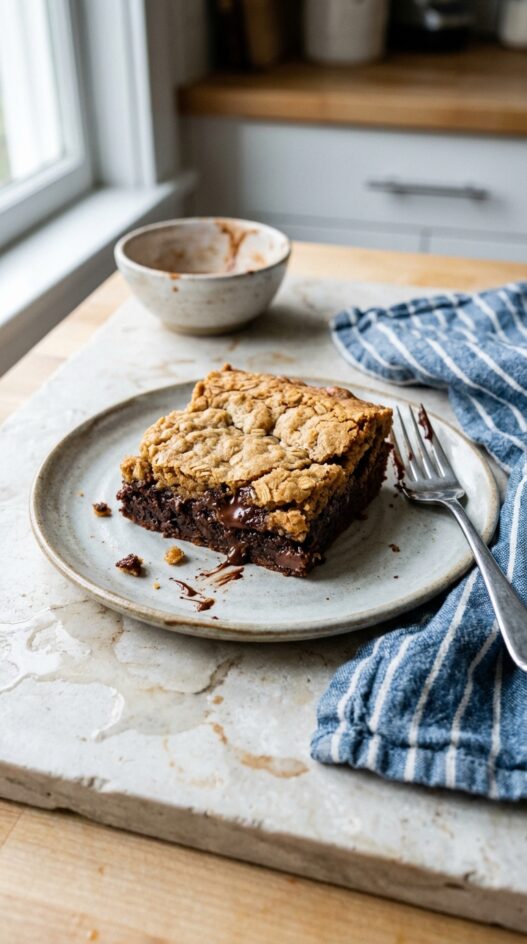
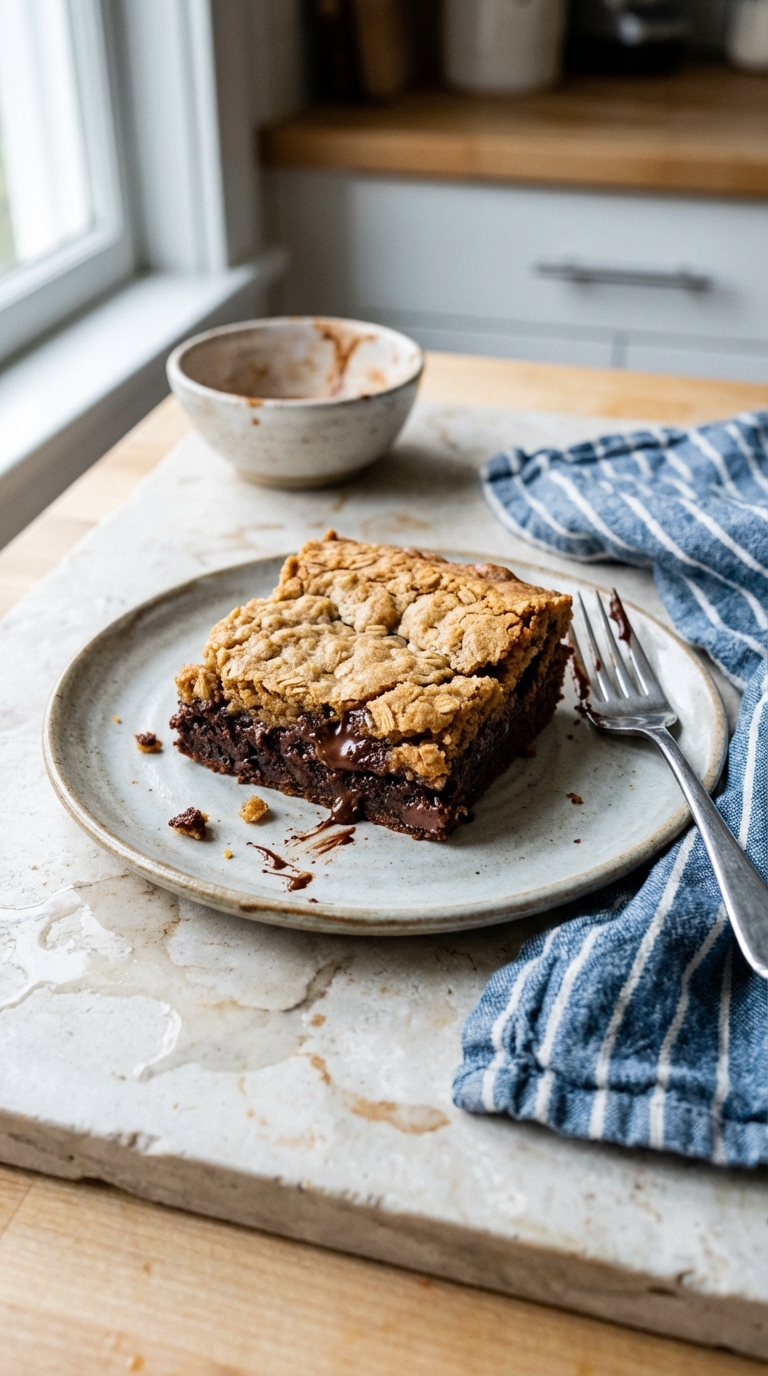
Half brownie, half cookie — all trouble in the best way. The bottom is a dense, dark chocolate brownie; the top is a soft, chewy peanut butter oatmeal cookie layer that barely holds itself together. Once chilled and cut, it’s the kind of bake that earns you repeat requests from everyone who tries it.
The trick to getting this brookie right is balance; not just between brownie and cookie, but between texture and timing. The brownie batter needs to chill before layering so it sets up slightly; otherwise, it’ll bake into the cookie dough and lose that clean line between dark and light. When you spread the two layers, don’t worry about perfection. The uneven swirls bake into a marbled look that’s better than anything you could plan.
Pull it from the oven before you think it’s done. The center should look soft and a little underbaked; that’s how you get the chewy edge and gooey middle. Cooling is non-negotiable — let it rest, then chill or freeze before cutting. That’s when it firms up and gets that dense, candy-bar texture you want. And if you’re tempted to eat it warm from the pan, just know it won’t slice — but it will still taste pretty great.
How to Make Brookies at Home
Step 1 – Prepare the brownie batter
In a heavy saucepan, melt the chocolate and butter together over low heat, stirring until smooth. Remove from heat and let cool slightly.
In a large bowl, whisk together eggs, sugars, vanilla, baking powder, and salt until thick and creamy.
Slowly add the melted chocolate mixture, stirring until fully combined.
Fold in the flour and cocoa powder just until no streaks remain. Cover the batter and chill while you make the cookie dough.
Step 2 – Make the oatmeal peanut butter cookie dough
In a bowl, mix the cookie dough ingredients together — the chunky peanut butter, brown sugar, egg, baking soda, quick-cooking oats and dried cherries — until evenly combined.
There is no flour and no butter in this layer. The peanut butter is what binds it, so expect a soft, sticky dough rather than a firm one you could roll.
Step 3 – Assemble
Preheat oven to 350°F (175°C). Line an 8×8-inch (20×20 cm) baking pan with parchment paper, leaving some overhang for easy removal.
Spread the brownie batter evenly over the bottom of the pan. Drop spoonfuls of cookie dough on top, then use an offset spatula or damp fingers to smooth the surface.
Step 4 – Bake
Bake for 10–15 minutes, or until a fork comes out mostly clean. The center will still look wet — that is what you want. These firm up in the freezer, not in the oven, so don’t be tempted to leave them in until they look done.
Step 5 – Cool and serve
Let the pan cool completely at room temperature, then transfer to the freezer for at least 1 hour before cutting.
Slice into squares with a sharp knife. Store in an airtight container in the refrigerator for up to 5 days.
Recipe Notes
Texture tip: For a softer center, pull from the oven while slightly underbaked. For a firmer, cookie-like texture, bake an extra 5 minutes.
Mix-ins: Try swapping the dried cherries for chopped peanuts, pretzels, or white chocolate chunks.
Freezing: Freezes beautifully — wrap slices individually and store for up to 3 months.
Pan size: For thicker bars, use an 8×8-inch pan; for thinner, go 9×9-inch and reduce baking time slightly.
FAQ
Can I make these without peanut butter?
Swap it for almond butter or another nut butter. Don’t simply leave it out — with no flour and no butter in this layer, the peanut butter is the only thing holding the cookie top together.
Can I use rolled oats instead of quick-cooking oats?
The recipe calls for quick-cooking oats, which soften into the dough. Rolled oats work too and give a chewier, more textured top.
Why freeze before slicing?
It firms up both layers, giving you cleaner edges and better definition between brownie and cookie.
Can I double the recipe?
Yes — double all ingredients and bake in a 9×13-inch pan. The layers end up about the same depth, so start checking at the time above rather than doubling it.
Can I make them gluten-free?
The only flour is in the brownie layer — use a 1:1 gluten-free blend there, plus certified gluten-free oats for the cookie layer.
Oatmeal Peanut Butter Brookie
- Total Time: 35 minutes
- Yield: Serves 9
- Diet: Omnivore
Description
Brownie meets oatmeal peanut butter cookie in this decadent brookie bar. A perfect blend of chewy and fudgy.
Ingredients
For the Brownie Half
- 12 oz (340 g) bittersweet chocolate chips
- 0.5 cups (118 ml) butter
- 3 large eggs
- 1 cups (237 ml) granulated sugar
- 0.25 cups (59 ml) brown sugar
- 1 tablespoon vanilla extract
- 0.5 teaspoon baking powder
- 0.75 cups (178 ml) all-purpose flour
- 0.25 cups (59 ml) unsweetened cocoa powder
For the Cookie Half
- 1/2 cup (118 ml) chunky peanut butter
- 1/2 cup (118 ml) packed brown sugar
- 1 large egg
- 1 1/4 cups (296 ml) quick-cooking oats
- 1/2 teaspoon baking soda
- 1/4 cup (59 ml) dried cherries
Instructions
- Melt chocolate and butter in a heavy saucepan over low heat, stirring constantly until melted and well-combined. Remove from heat and set aside.
- In a bowl, beat the eggs, sugars, vanilla, baking powder, and salt until the batter is thick and creamy. Reduce the speed to low and mix in the melted chocolate until well-combined.
- Stir in flour and cocoa powder just until combined. Cover the batter and chill while you prepare the cookie dough.
- In a bowl, mix all the cookie dough ingredients together.
- Preheat oven to 350°F (177°C). Line an 8×8 pan with parchment paper.
- Add the brownie batter, then layer the cookie dough batter over the top. Smooth it out.
- Bake for 10-15 minutes or until a fork comes out mostly clean. The batter will still seem wet; this is okay.
- Let cool, then freeze before cutting. Keep chilled.
Notes
- For a richer brownie base, use dark chocolate instead of bittersweet.
- To prevent the brookies from sticking to the parchment paper, lightly grease the parchment paper before adding the batter.
- These brookies are best served cold. Store them in the refrigerator for up to 5 days.
- Prep Time: 20 minutes
- Cook Time: 15 minutes
- Category: Dessert
- Method: Baking
- Cuisine: American
Nutrition
- Serving Size: 1 slice
- Calories: 350
- Sugar: 30
- Sodium: 100
- Fat: 20
- Saturated Fat: 12
- Unsaturated Fat: 6
- Trans Fat: 0g
- Carbohydrates: 40
- Fiber: 2
- Protein: 5
- Cholesterol: 70
Find it online: https://honestcooking.com/oatmeal-peanut-butter-brookie/
If you liked this, you are going to love these favorite cookie recipes:
Strawberry Basil Window Cookies
Chocolate Dipped Chili and Lime Shortbread Cookies
Sea Salt Peanut Butter Cookies
Lavender and Lemon-Poppy Seed Cookies
Frequently Asked Questions
Why is it important to chill the brownie batter before layering it with the cookie dough?
Chilling the brownie batter helps it set up slightly, preventing it from baking into the cookie dough and losing the distinct layers between the dense brownie and soft cookie.
What should I do if the center of my brookie bars looks too underbaked when I take them out of the oven?
You should pull them from the oven when the center looks soft and slightly underbaked, as this texture is key to achieving the chewy edges and gooey middle characteristic of brookies.
How long should I let the brookie bars cool before cutting them?
It’s essential to let the brookie bars rest and then chill or freeze them before cutting, as this will firm up the texture and help achieve that dense, candy-bar-like consistency.
If You Liked This Recipe, You’ll Love These
- Peanut Butter and Jam Thumbprint Cookies
- Amaretti Cookies – Italy’s Answer to Macarons
- Red Velvet Sugar Cookies with Cream Cheese Frosting




These are dangerously chewy brookies!
Half brownie half cookie, OBSESSED!!
Link for second part broken.
Thank you for bringing to our attention, the recipe has been updated with new instructions, all the right ingredients and re-tested!
Spectactular recipe!
I have been making these for years, they are just awesome. the textures are fantastic, and the flavor is insanely good.