Print
clock clock iconcutlery cutlery iconflag flag iconfolder folder iconinstagram instagram iconpinterest pinterest iconfacebook facebook iconprint print iconsquares squares iconheart heart iconheart solid heart solid icon
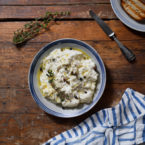
Home Made Goats Milk Ricotta Cheese

Homemade goat’s milk ricotta


5 Stars 4 Stars 3 Stars 2 Stars 1 Star

4.8 from 25 reviews

  • Author: Alexia Kannas
  • Total Time: 1 hour 25 minutes
  • Yield: 1-2 cups 1x

Description

This recipe will make between one to two cups of gorgeously creamy, fresh-tasting goat’s milk ricotta cheese.


Ingredients

Units Scale
  • 1 liter (34 fl oz) fresh goat’s milk (unpasteurized is preferable, but pasteurized can also work)
  • 1/2 teaspoon sea salt
  • 3 tablespoons freshly squeezed lemon juice

Instructions

  1. Prepare Your Equipment: Before you begin, ensure that all your equipment is clean and ready to use. This helps prevent any unwanted bacteria from influencing the cheese-making process.
  2. Mix Milk and Salt: In a nonreactive saucepan, combine the goat’s milk and sea salt. Mix gently to dissolve the salt completely.
  3. Heat the Milk: Slowly heat the milk over low to medium heat. Stir occasionally to prevent the milk from scorching on the bottom of the pan. Use a cooking thermometer to monitor the temperature. The goal is to heat the milk to just before boiling, around 185°F – 200°F (85°C – 93°C). Do not let it boil as this can affect the formation of curds.
  4. Add Lemon Juice: Once the correct temperature is reached, remove the pan from heat. Gently stir in the lemon juice, then allow the mixture to sit undisturbed for 5 minutes. This will help the curds to form. If you do not see curds forming, let it sit for a few more minutes. The acidity and the temperature are crucial for curdling; if your milk is ultra-pasteurized, curdling might be difficult.
  5. Strain the Curds: Line a colander with a double layer of muslin or cheesecloth and place it over a large bowl. Gently pour the milk mixture into the colander, letting the whey drain away while the curds collect in the cloth.
  6. Let It Drain: Allow the curds to strain for at least an hour, or until the ricotta reaches your desired consistency. For a firmer ricotta, let it strain longer.
  7. Refrigerate and Store: Once strained, transfer the ricotta to a container. It can be refrigerated and used within 2-3 days. Pressing the ricotta under a weight in the fridge can further improve its texture, making it denser and more suitable for recipes requiring a firmer cheese.

Notes

  • Milk Quality: Fresh, unpasteurized milk works best, but if you only have access to pasteurized milk,  try to avoid ultra-pasteurized varieties as they often do not curdle well. See notes further down on how to change the recipe if you need to use ultra-pasteurized milk.
  • Acid Source: Lemon juice is preferred for its fresh flavor, but white vinegar can be used as an alternative. The amount might need adjustment based on the milk’s freshness and pasteurization.
  • Temperature Control: Keeping the milk at the right temperature is crucial for successful curdling. If curds do not form, the milk may not have been warm enough, or the acid could have been added too early.
  • Stirring: Minimal stirring after adding lemon juice is crucial as over-stirring can break the curds.

Notes on using Ultra-Pasteurized Goat’s Milk:


We definitely suggest that you use fresh, unpasteurized milk. However, we realize that not everyone has access to that. If you need to use ultra-pasteurized goat’s milk to make ricotta cheese, you often face the challenge of getting the milk to curdle due to the high-heat processing it undergoes, which changes the protein structure. However, there are a few adjustments and additional ingredients you can try to encourage curdling and improve your chances of making successful ricotta with ultra-pasteurized milk. Note that these are not guarantees for success, but they will help:


Adjustments for Ultra-Pasteurized Goat’s Milk:

  1. Increase Acidity: Since ultra-pasteurized milk has a harder time curdling, increasing the amount of acid might help. If you’re using lemon juice, you may want to increase it by an additional tablespoon or two. Alternatively, white vinegar is a stronger acid and might be more effective. Start with 4 tablespoons of white vinegar instead of 3 tablespoons of lemon juice.
  2. Add Calcium Chloride: Calcium chloride can help restore the milk’s ability to form curds. It’s commonly used in cheesemaking with pasteurized and homogenized milks. Add about 1/4 teaspoon of calcium chloride dissolved in 1 tablespoon of water to the milk before you heat it. This can help the proteins in the ultra-pasteurized milk bond and form curds.
  3. Modify Heat Treatment: Heat the milk slowly and try not to exceed 185°F (85°C). Overheating can further denature the proteins, making curdling even more difficult. Use a thermometer to closely monitor the temperature.
  4. Extended Resting Time: After adding your acid, let the mixture sit undisturbed for up to 20 minutes instead of just 5 minutes. This extended resting period can give more time for slow-forming curds to develop.
  5. Use a Combination of Acids: Sometimes using both lemon juice and vinegar can help. The different properties of each acid can work together to better coagulate the proteins in ultra-pasteurized milk.

Final Notes on Using Ultra-Pasteurized Goat’s Milk:

If you end up using ultra-pasteurized goat’s milk, be prepared for varying results and consider the above adjustments. While these can improve your chances of making ricotta, the success rate might still be lower than with fresh or regular pasteurized milk. Always ensure that your acids are added only after the milk has reached the right temperature and that the milk is removed from heat immediately to prevent overheating.

  • Prep Time: 15 mins
  • Straining Time: 60 mins
  • Cook Time: 10 mins
  • Category: Side Dish
  • Method: Curdling
  • Cuisine: Greek