Description
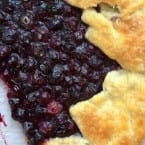
The beauty of a galette is its simplicity and flexibility. It’s fast and it’s not fussy like a pie and honestly, it is perfect for summer fruit.
Ingredients
Scale
- 12 Tbsp Flour
- 12 Tbsp butter, unsalted (cold)
- 1/4 tsp kosher salt
- ice water
- 3 cup fruit (washed and dried)
- 4 Tbsp Sugar (or more, depending on the fruit)
- 1 Tbsp Flour
- 1/4 tsp lemon zest (optional)
- parchment paper for baking
Instructions
- First, pick your flour. (In case you are wondering, 12 tablespoons is 1.5 cups. For some reason, my blog would not let me enter the measurement in the normal way!) I made my blueberry galette with all purpose white flour. The gooseberry galette was a mix of all purpose white and white whole wheat (about 2/3rds white whole wheat). The cherry galette was made entirely with white whole wheat flour. I liked them all. (If you are not familiar with white whole wheat flour, look for the King Arthur brand and give it a try. It makes excellent whole wheat versions of many baked goods.)
- Add a couple ice cubes to a dish of water.
- Mix flour with salt in a large bowl.
- Using a cheese grater, grate your COLD butter onto a plate or cutting board. Put the grated butter in the bowl with the flour mixture and mix quickly with your hands. This is the trickiest part of making the pate brisee, but once you get the feel for it, it won’t seem hard. You want the butter more or less evenly distributed in little lumps, but you don’t want it to melt from the warmth of your hands. (It is better to err on the side of lumps than to obsess about evenly mixing the butter into the flour.)
- Measure 1/3 cup of ice water (minus the cubes). Add to the flour and butter mixture and work quickly to form the dough into a ball with your hands. Do not overwork the dough. You want it to just come together and retain little lumps of butter throughout.
- Flour your work surface lightly with a tablespoon or so of all purpose flour. Roll out the dough into a rough circle or oval about the thickness of a pie crust (1/8th inch, approximately). Don’t worry about even edges. Rough edges are part of the charm of a galette.
- Place the dough on a baking sheet lined with parchment paper. (I recommend a jelly roll pan with raised edges if you have one since it will contain any excess juice from your galette. If you don’t have one, consider lining the oven rack below the one you will use with some aluminum foil, just in case.) Chill the dough in the fridge for 5-10 minutes. Preheat the oven to 400F.
- While the dough rests, prep your filling. Mix your cleaned and dried fruit with the sugar and remaining flour. Adjust the sugar to your liking. Add more flour as needed. (You want the fruit lightly coated in flour and sugar with no excess juice visible in the mixing bowl.) Add lemon zest or other seasonings (grated nutmeg, cinnamon, vanilla paste, etc.).
- Place the fruit mixture in the center of the galette dough and spread out, leaving about 2 inches of dough around the fruit on all sides. If the dough is too cold and not pliable, wait a few minutes for it to warm up. Once it is easy to bend, gently fold the outer two inches of the dough over the fruit mixture. For best effect, start in one spot and move in one direction around the outer circumference of the galette, pleating the dough as you go along. It doesn’t have to look perfect. Rustic is what you are going for, so don’t stress!
- Brush your dough with a mixture of milk and cream or either one or a beaten egg. (The blueberry galette was brushed with egg, the others with milk and cream. Sprinkle with more sugar.)
- Bake about 35-45 minutes, but start keeping an eye on the galette after about 30. Remove from oven when the crust is golden and the fruit looks cooked. Cool and enjoy at room temperature. Ice cream is a nice way to gild the lily, but by no means necessary.
- Category: Baking
