Frosting a cake to smooth perfection can seem like a daunting task, but follow these steps for no stress.
The Setup
When frosting a cake, a good setup is the key to success. Here’s what you need.
Be sure to have a cake board to build your cake on.
Grab a turntable and spatula that is long enough to stretch the width of the top of your cake.
Have your bowl of frosting accessible as well as an empty bowl. The empty bowl is where your will discard any crumbs and any frosting that becomes loaded with crumbs.
You may also want a dab of corn syrup or frosting to keep your cake board from sliding around on the turntable.
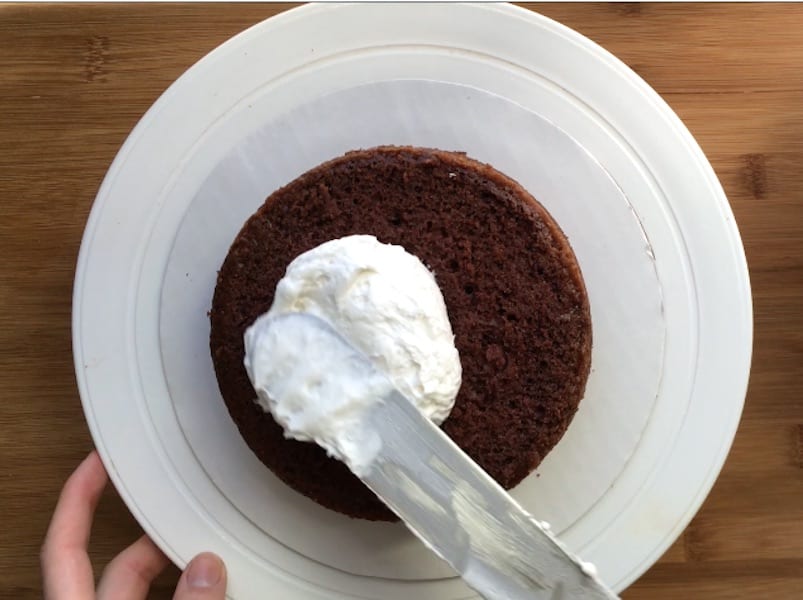
Filling a Cake
Once your cake layers are trimmed, perfectly flat, and of the same height, you may begin filling. For a 6 inch cake we recommend filling with a half cup of filling or frosting. For an 8 inch cake, sandwich the layers with 3/4 cup frosting. Remember to smooth this filling out at flat as possible, if this part is crooked, the whole cake could come out looking lopsided.
The Crumb Coat
Once the cake is filled and stacked, you want to cover it in a thin layer of frosting. After it is frosted, you will refrigerate the cake until that coating is set. This step is crucial and really helps to seal in those cake crumbs so they don’t show through your final layer of frosting. You will use your crumb bowl a lot during this step and may feel like you are wasting frosting, but it’s worth it to ditch the frosting that is filled with crumbs!
The Final Coat
Once the crumb coat is chilled, complete the cake by icing in its final layer of frosting. For a six inch cake, place 1/2-1 cup of frosting on the top. Spin the turntable under your perfectly flat spatula and allow the excess frosting to spill over to the sides, this will be used to frost the sides. Once the top is smooth and flat, turn your spatula to frost around the sides, adding more frosting to any spots that may need it. Continue frosting the sides until a bit of frosting pokes up at the top around the edges.
Once the sides are completely covered, set your spatula at the top edge of the cake (See the video above for reference.) and while keeping it completely level with the top of the cake, pull towards you and slightly lift up the spatula when you are about to reach the edge closest to you. This will create a perfectly flat top and bring together the smooth sides and top of the cake. Continue pulling the spatuala across by turning the turntable slightly to reach new areas of the cake.
Note: If you are having trouble getting a very smooth look, fill a large container or cup with hot water. Dip your spatula into the hot water and repeat the steps above. The hot spatula will slightly melt the butter to create a smooth appearance.