Looking for the secret to buttercream or perfectly shaped cookies? Check out these easy tips.
By Leili Ansari and Wei Chang Chen
I’ve been baking on my own for almost a decade, and I’ve messed up enough to have learned a few things along the way. Then I started working at a bakery and learned a few more things, and now I know at least seven things! So here they are, for all you crazy baking-fiends out there that are just like me.
1. Mise en Place
Meaning “to set everything in place”, this is the golden rule for both baking and cooking. Any time you’re working in the kitchen, it’s always best to have all your ingredients prepped and measured out so that not only do you know that you have everything you’ll need, but so that the actual act of cooking or baking will be as easy as it looks on your favorite cooking show. It’s not only about the ingredients though – a big part of mise en place is reading over the recipe so you know what to expect in terms of time, space, and equipment. Basically, prepare yo’self. It’s what makes daunting baking tasks manageable, and it’s a rule to live by.
2. Weigh it!
If you want to bake like a pro, invest in a scale. You don’t even have to invest that much – a cheap scale from Target or Bed Bath and Beyond will work just fine for home-baking projects. Because really, baking is a science, and the difference between 3 and 3 1/4 cups of flour can actually be disastrous. Weigh it, win it.
3. How to measure flour
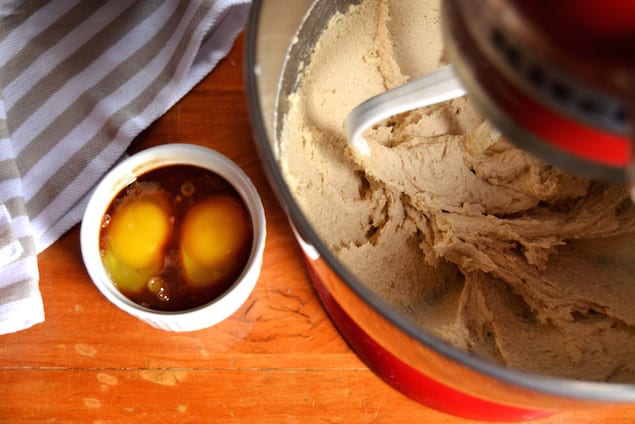
Like I said, flour can’t just be measured willy-nilly. First, let’s talk wet vs. dry ingredients. Wet ingredients (any liquid, fat, eggs, even sugar – see number 5 below) should be measured in a liquid measuring cup when possible – the kind with the milliliter markings up the sides. Dry ingredients (flours, salt, cornmeal, baking soda, etc.) should be measured using those measuring cup sets, with each measurement having its own cup. If you think about it, it makes sense: it’s tricky to measure a 1/4 cup of milk in a 1/4 cup measuring cup because you might end up spilling it everywhere since it has to come right to the top (still doable in a pinch, though). Dry ingredients, on the other hand, need to be exactly level to be measured accurately, and you can’t level off flour in a liquid measuring cup.
The biggest mistake that can be made when it comes to measuring flour is the ol’ scoop-and-dump. If you take a one cup measuring scoop and dive it straight into the bag to grab your flour, you’re going to be compacting the flour as you scoop – meaning more flour in the cup, and less air. Not ideal.
(And then there’s my mother, who not only uses a liquid measuring cup to scoop flour, she then taps it against the counter to have it settle and adds more until it reaches the right measuring line. Love you Ma, but that’s painful to watch. Your cookies are still the best though!)
So, how does one measure flour, you ask? Well, one cup of flour is about 4.2 ounces, or 120 grams. But if you ignored my second tip and don’t have a scale, it’s easy: use a spoon to fluff your flour, then loosely spoon flour into your dry measuring cup until it’s heaping. Then, use the back of a knife or other straight-edged tool to level it off. Boom. Perfect cup, every time.
Be careful, though: if a recipe calls for “flour, sifted” that means you should measure it first, then sift. If it says, “sifted flour”, you should sift the flour first, then measure it as explained above.
4. How to shape cookies
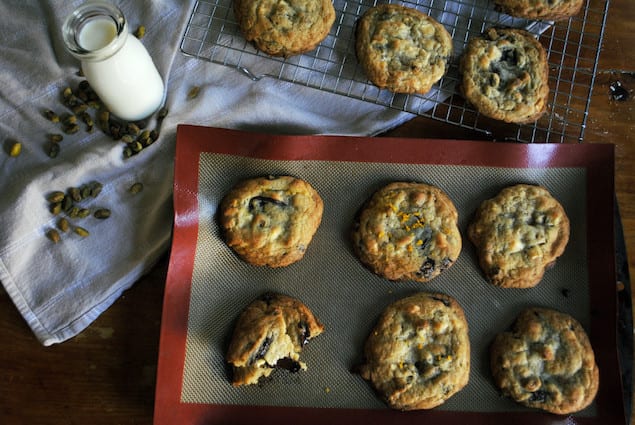
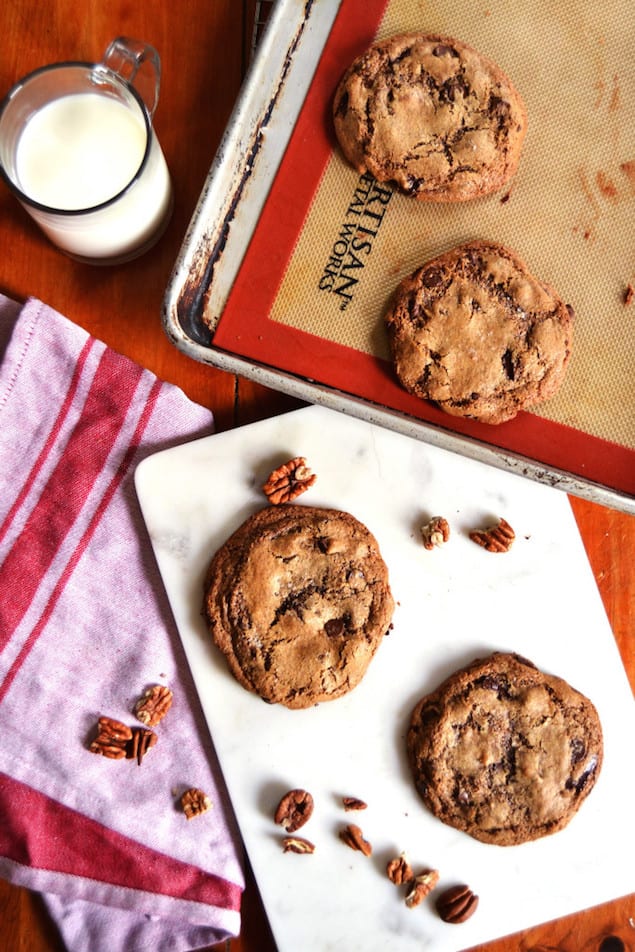
This one I learned from America’s Test Kitchen, and it’s a nifty one. When shaping chocolate chip cookies before popping them into the oven, you actually get a more attractive and delicious cookie if you don’t roll it into a perfect ball. ATK discovered that you should roll it into a ball, then roughly tear the ball in half with your hands, and smoosh the smooth sides against each other so the craggy sides are facing out. A smooth ball of dough will bake too uniformly in the oven, and will lack the textural and flavor complexity that makes a good cookie recipe yield exceptional cookies. (My mom’s cookies are always super craggy-looking before baking, so I guess she does know some things.)
5. Know your ingredients!
This is pretty general, but before jumping into a recipe, it’s good to have an idea about how ingredients react with one another. For example, if you’re baking bread and want to mix up ingredients, it might be good to know that salt is a murderer of yeast. Like, if you put salt directly on yeast, it will be dead. So so dead. That’s why salt is usually dumped in with the flour, or after some other ingredients have already been added. Sugar, however, is yeast’s favorite thing in the world. Adding a bit of sugar when you’re activating your yeast is always a nice little snack to get the yeast going. Yeast also enjoys an acidic environment, in case you wanted to swap out some of the water for juice. (I could really talk about yeast all day, but I’ll save it for another post).
So if you’re looking to experiment, it’s good to keep ingredients in mind. Sugar, for example, is actually considered a wet ingredient, because it melts when it’s heated (try heating plain flour and see what happens. Actually please don’t do that, nothing good can come of it). If you’re making a cake and you want it to be a little more moist, sugar will help you out. A high amount of granulated sugar in chocolate chip cookies will make them spread, while more brown sugar will keep them together. (Check out this Serious Eats article for thoroughly researched chocolate chip cookie tips and a break-down of what each ingredient does in a recipe. It’s my cookie bible.)
6. Check your oven temperature
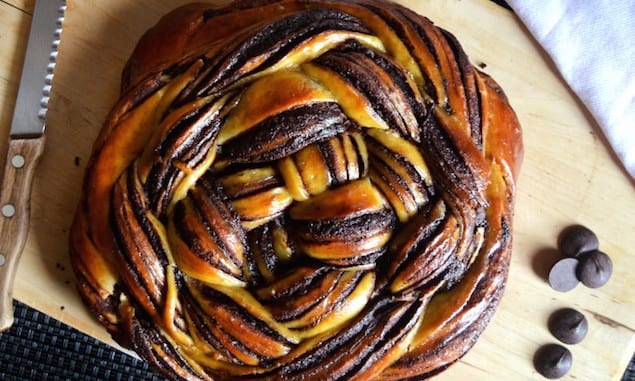
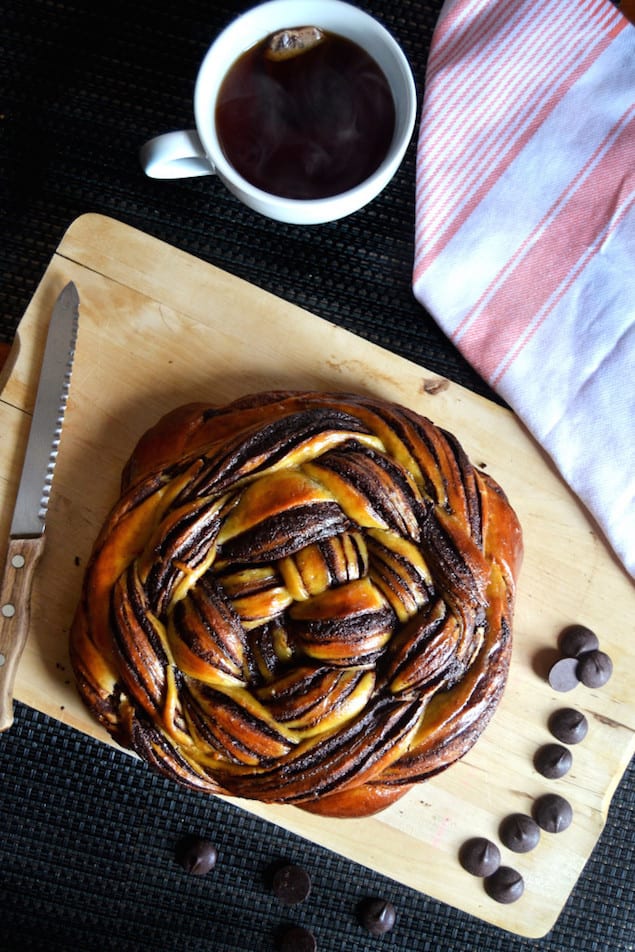
Maybe I’m just an idiot, but I was baking for years before I realized that my oven actually gets 80-100 degrees hotter than what I set it to. That’s really hot. This resulted in cookies that were always darker on the bottoms and edges than I wanted them to be, while also being a little raw inside (the raw part was fine with me, though. I’m a sucker for all things cookie dough.) When I finally got an oven thermometer, I was thrilled to have an explanation. Turns out I was just too trusting of my hundred-year-old gas oven, and since then my baked goods are always perfect. (Okay that’s a lie, but when they’re not perfect it’s no longer my oven’s fault). Even if you have a fancy new convection oven, it could be lying to you. Get an oven thermometer and bake things at the right temperature. It’s kind of really important, especially if you want to make pretty breads like this:
7. How to fix a broken buttercream
Finally, this is something I struggled with in my teen years. It was a rough period in my life, guys.
Whenever I would make buttercream, usually for a friend’s or family member’s birthday cake, I would either under whip it, over whip it, or whip it at the wrong temperature. And it would break, almost every time. It would separate into little globules of fat as though it was curdled, and while it tasted fine, it looked nasty. First warning: do not try to frost anything with a separated buttercream, it will look horrible and will slide right off. That may seem like common sense, but teenage-me was naive and thought everything would always be okay in the end.
It wasn’t.
Ever time my buttercream separated, I would frantically search for a solution. But Asking Jeeves was fruitless and Google could never give me a straight answer. (Well I just checked, and now it has the answers apparently. Kids today are so damn lucky). After years of experimenting and then working in a bakery where these tricks were actually used, I’ve got your solution. Ready?
Buttercream separates, or breaks into fat and liquid, because of temperature. Temperature, guys! That’s it. If you’ve ever stored buttercream in the fridge overnight, then taken it out to frost a cake, you know it’s too stiff and you need to re-whip it. If you don’t let it sit at room temperature long enough, though, it will be too cold – the butter will be hard and will separate into little globules when it’s whipped.
Solution?
Well, if you have time, just keep whipping until it comes to room temperature and comes together. Otherwise, add heat. The trick is to be gentle – don’t go microwaving your buttercream. If you have a metal mixer bowl, I’ve found that a steaming hot dish towel wrapped around the outside slowly brings the buttercream’s temperature up. If you’re too impatient, use a hair dryer on the bowl. And if that’s still too tame for you, bust out the blow torch. Oh yeah.
If your buttercream doesn’t look curdled, but instead looks soupy, you have the opposite problem – it’s too hot. This doesn’t happen to me much, because I live in the North and here winter is always coming. But if you’ve got a soupy buttercream, just cool it down while whipping it. The towel trick works here too: just chill a damp dish towel and then wrap it around the mixing bowl. If you have a hand mixer, dunk the mixing bowl into an ice bath while you whip, just be careful not to leave it too long or you’ll be faced with the original problem of separation.
As a last resort, when I’m in a rush and I need to use the buttercream right away, I’ve found that adding chocolate that’s been melted and cooled brings a separated buttercream together in a pinch. Of course, if you don’t want a chocolate flavored buttercream, adding fat works too. Yes, I mean more butter. Even fatty peanut butter works. I’ve also used Nutella, and believe it or not, nobody complained.


Thank-you for the wonderful tips!
Many thanks Leili and Wei for these useful tips. Though I am baking for few years, but I also make mistakes sometime. These tips gonna help who loves baking. Thanks for the tips and lovely pics. Happy Thanksgiving :)