
Natas caseiras are perfectly sized, sweet, salty creamy and crispy Portuguese pastries.
By Carolyng Gomes
On my latest trip to Portugal I visited the famed-for-good-reason bakery Pasteis de Belém. Natas have always been one of my favorite desserts. They are the perfect size, three nice sized bites is all the savoring you need, and they are sweet, a little salty, creamy and crispy with a smoothness that is unmatched. They practically melt in your mouth!
When I passed other pasteleiras I watched through the windows as master bakers whipped the custard, rolled the dough, formed the cups and filled them delightfully with that smooth eggy goodness. What I am trying to say is that I saw it done. There was no magic (although I am sure there must be some at Pasteis de Belém), just bakers mixing up ingredients that somehow made this delectable and addictive pastry. I vowed that when I returned I would try my hand at making homemade natas – Casa Gomes Natas if you will.
For this feat I turned to a staple in my kitchen, A Portuguese Table by David Leite. In this book he has a recipe for Natas and talks a little bit about his own experience with Pasteis de Belém, which was his inspiration into the kitchen to get a taste of Belém at home. He called it recreating, although I must say that there is no chance anyone could recreate these morsels. I wasn’t even going to try. What I attempted to do was make a pastry that enveloped my favorite aspects of the famous pasteis that was easy to make and even easier to eat. I must say, “Mission Accomplished.”
There were a few (ok many) steps to follow, so here are some pictures to help out with the process.
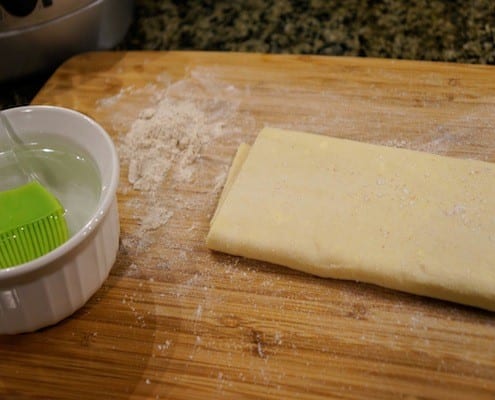
Here is what you start out with – the dough, some water and a brush with a sprinkling of flour.
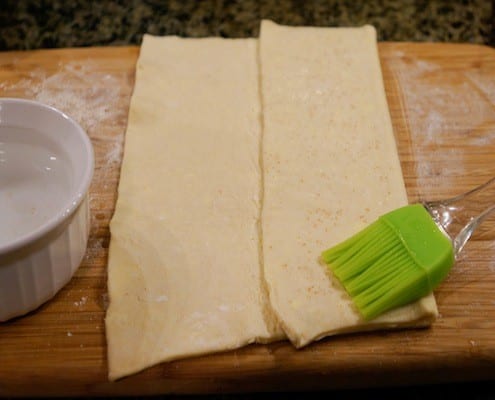
Fold and brush, fold and brush…
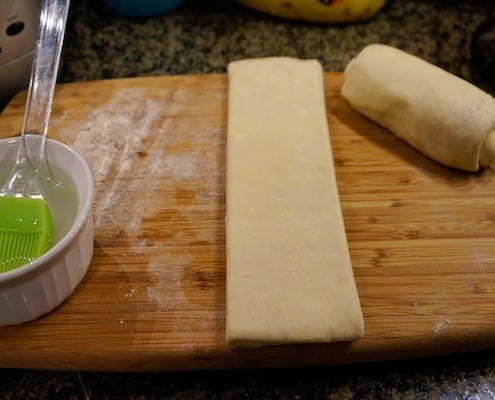
Fold, brush with water… then roll it tight like a jelly roll and repeat!
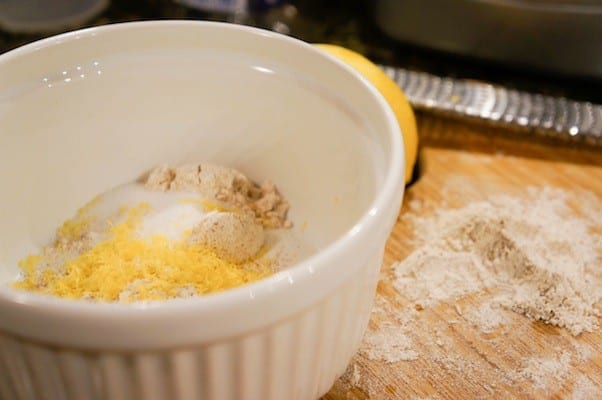
Mix up the sugar, lemon and a bit of flour…
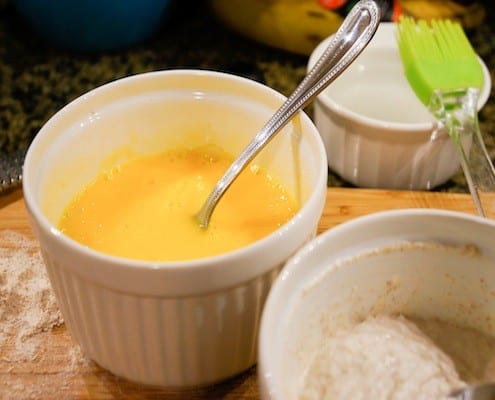
And whip up some eggs and cream.
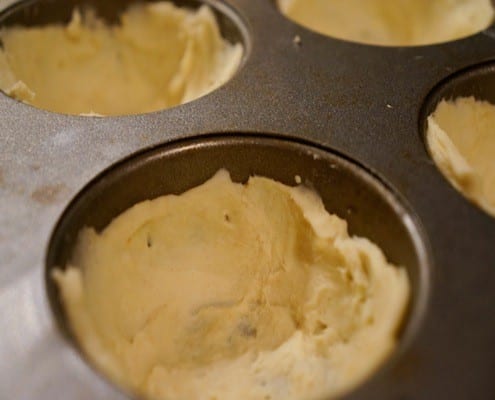
And once you have all of those mixtures mixed up good, it is time for making those cute tart shells. Make sure your dough goes a bit past the lip of the pan (I was a bit under – couldn’t fit enough of the custard in it)
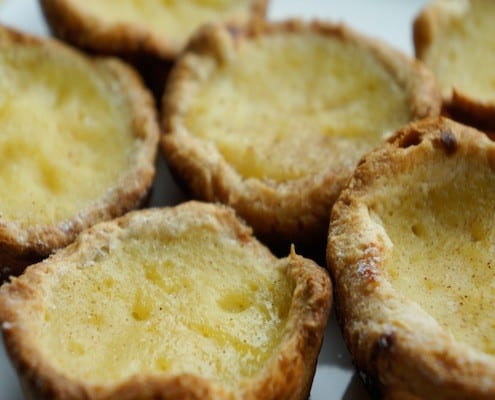
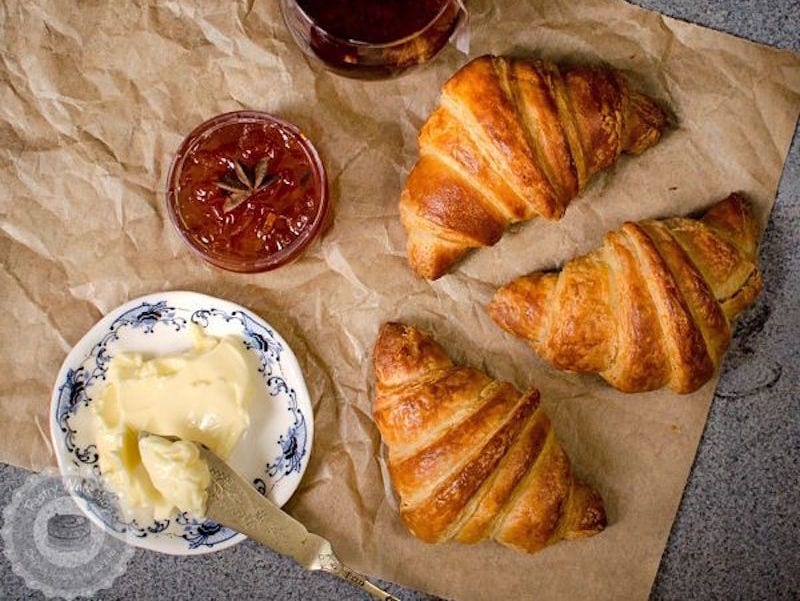
After baking your tart shells, filling them with custard and baking again – let them cool and you will be greeted to these beauties. Yeah, they were as good as they look – incredible!
Enjoy this adapted recipe (and almost exact guide from the Master, David Leite) and bring a little taste of Belém home.
PrintNatas Caseiras
- Total Time: 1 hour 30 minutes
- Yield: 12 1x
Description
Want a taste of Belém at home? Try this recipe for Natas Caseiras. They won’t be the same, none are, but they will be deliciously worth it until your trip back to Belém.
Ingredients
- 1 17 ¼ ounce Package of Frozen Puff Pastry (Pepperidge Farm Brand- Thawed)
- 2 Tablespoons Whole Wheat Flour, plus more for dusting
- 1 teaspoon of Salt
- Grated Zest of ½ a Lemon
- 1 ¾ cups of Heavy Cream
- 1 Large Egg
- 8 Large Egg Yolks
- 1/2 cup Brown Sugar
- 1/2 cup of Granulated Sugar
- ½ teaspoon Pure Vanilla Extract
- Confectioner’s Sugar (for dusting)
- Ground Cinnamon (for sprinkling)
Instructions
- Flour your work surface and lay down thawed puff pastry. Place it so that the short end is facing you and the thicker fold is on your left. Open the two panels of dough, lightly brush the right panel on both sides with water, and fold it back into position. Cover with the left panel and press down to seal. Lightly brush the top of the pastry with water, then curl up the short edge and roll up the pastry away from you and create a tight spiral (think jelly roll). You should have a 3-inch wide log. Roll it back and forth on the work surface until it is 3 ½ – inches wide. Repeat with the second sheet of pastry. Wrap in plastic and refrigerate the logs.
- Whisk flour, salt, zest, and ½ cup of the cream in a medium bowl until all the lumps are dissolved. Set aside.
- Beat egg and yolks together, in a separate bowl, and set aside.
- Bring the sugar and 2/3 cups water to boil in a small saucepan over high heat without stirring. Let it bubble until you dip a spoon into the liquid and it runs thinly, creating a spider-web pattern in the syrup in saucepan- registers 230F on candy thermometer.
- Meanwhile, heat remaining 1 ¼ cups of cream in a medium saucepan over medium0high heat until wisps of steam and bubble appear around the edges, about 5 minutes.
- Whisk hot cream into the flour mixture until smooth, then pour in the hot sugar syrup. Slowly add egg mixture, whisking constantly, then pour the custard back into the medium saucepan and cook over low heat, lightly whisking, until the mixture coasts the back of a spoon and registers 170F on a candy thermometer -4 minutes. Pour into bowl, add vanilla and let cool completely.
- Get the dough logs, and using a serrated knife (it is easier with one) trim off the uneven ends of one dough log. Do not discard. Cut twelve ¼ inch slices from the log. Working with one slice at a time, with your fingers stretch it until it is about 3 ½ inches wide and fit into muffin tin. Press up the bottom and sides, creating about 1/8 inch excess above pan. (Use excess dough on tart shells with thin spots. You want the bottom of the shell to be a bit thicker than the sides) Repeat with other slices, and then second log. Prick fitted shells well with a fork and return to refrigerator for 20 minutes.
- Position rack in the middle of the oven – temperature at 400 F.
- Fill tart shells to the top with dried beans or pie weights. Slip tins into oven and bake until dough is puffed and golden (about 15 minutes). Allow pastry cups to cool completely, but leave the oven on.
- Empty tart shells. Fill each shell 2/3 of the way full with completely cooled custard. Bake until custard barely jiggles in the middle, about 12 minutes (don’t worry it will continue cooking a bit once you take them out).
- Allow tins to cool a few minutes before removing natas to cool. When warm dust with confectioners sugar and cinnamon.
Notes
This recipe makes about 24 natas – so two for each person. That is a conservative number since most people will eat about 3! This is due to their bite sized deliciousness.
Make the recipe according to how many guests you will have enjoying these sweet Portuguese treats.
- Prep Time: 1 hour
- Cook Time: 30 mins

These look so good! i can’t wait to try the recipe!