An icon of French celebration, this sweet structure is made of pastry puffs held together by smooth caramel. It may look intimidating to make, but it just takes time and patience in order to create this wow-ing dessert.
By Oana Olguta
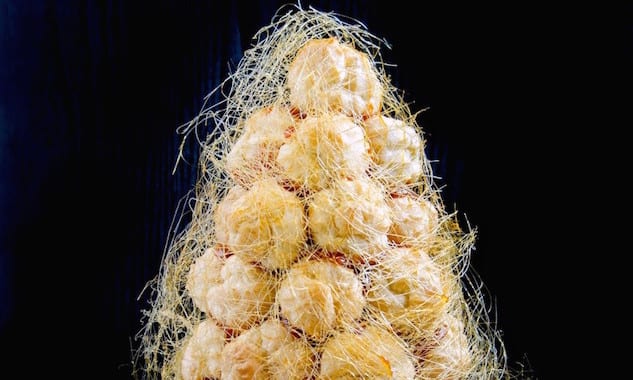
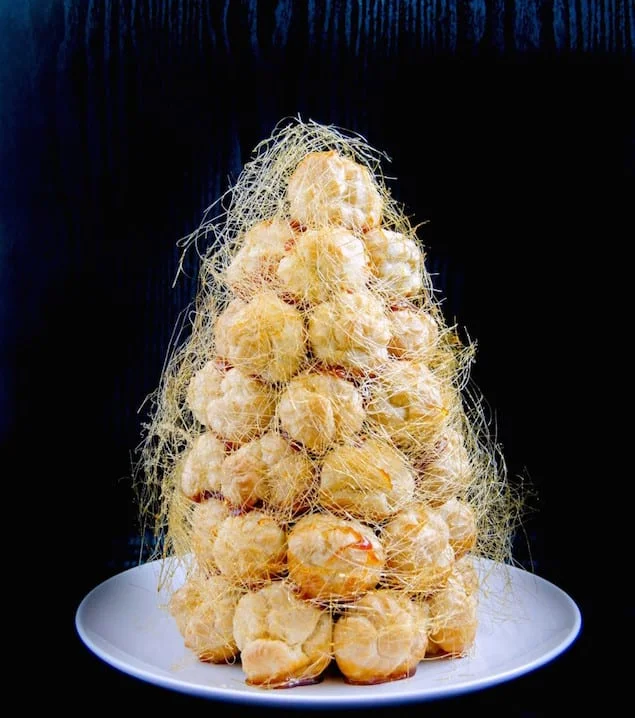
Croquembouche is a French dessert made by stacking choux pastry puffs in a conical shape and glueing them together with caramel. Once the dessert is cemented and properly shaped, it is decorated usually with spun sugar, but other decorations can be used as well and this includes: sugar coated almonds, fondant flowers, chocolate decorations etc. The croquembouche is usually displayed as the centerpiece of a table, many times for weddings or big celebrations.
The croquembouche (meaning bite in mouth, suggesting its crunchiness) has a long history and it seems to have been created for the first time by the French pastry chef Antoine Careme in the 1700s. Its taste and imposing shape and hight turned the croquembouche into a very popular dessert.
Making a croquembouche takes several steps, but it’s not as difficult as it looks like. To be honest, I found making the choux pastry puffs to be the most difficult part, the rest was incredibly fun! The choux puffs are usually filled with vanilla pastry cream, but other flavors can be used. I went with the traditional filling this time, but I’m looking forward to making a chocolate filling next time or maybe a pistachio flavored pastry cream. The filling allows you to play with spices, flavors or liqueurs and I love that! Once the choux pastry puffs are made and filled, they are stacked together with a caramel sauce. The caramel acts as a glue and allows you to build layers and layers of puffs. I made the croquembouche free hand, but I’ve seen plenty of videos advising to start with a paper or cardboard cone just to offer more support to the final piece and I think that is fine for large centerpieces, but smaller ones survive without it.
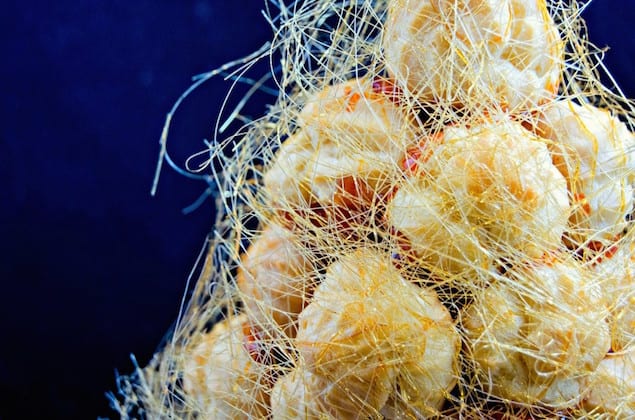
The tricky part is to keep the caramel at a steady temperature. If it’s too runny, it will run off the puffs, if it’s too thick, it will coat the puffs too much. You want a thin, crisp layer of caramel that allows you to easily bite into it whilst still being crisp and crunchy, offering enough texture and creating a nice contrast with the creamy, rich filling of the puffs.
PrintHow to Make an Elegant Croquembouche
Description
An icon of French celebration, this sweet structure is made of pastry puffs held together by smooth caramel.
Ingredients
Pastry Puffs
- 150ml (5 ounces, in volume) vegetable oil
- 300ml (10.1 ounces, in volume) water
- 300g (10 ounces, in weight) all-purpose flour, sifted
- 1 pinch salt
- 6–7 eggs
Vanilla pastry cream:
- 500ml (16.9 ounces, in volume) milk
- 4 egg yolks
- 100g (3.5 ounces, in weight) sugar
- 50g (1.7 ounces, in weight) cornstarch
- 1 pinch salt
- 1 vanilla bean, split in half lengthwise
Caramel glaze (and spun sugar):
- 300g (10 ounces, in weight) white sugar
- 120ml ( 4 ounces, in volume) water
- 20g (0.7 ounces, in weight) liquid glucose
- 1/2 teaspoon lemon juice
Instructions
Pastry Puffs
- Combine the water, oil and salt in a heavy saucepan.
- Bring the mixture to a boil and just when it starts boiling, add the flour, all at once.
- Get a wooden spoon and mix until the flour is well incorporated and the mixture is thick. Keep the saucepan over medium heat and mix all the time for 5 additional minutes. The idea is to cook the dough so most of the liquid evaporates. This ensures your puffs bake and rise well and keep crisp after baking.
- Remove the dough from heat and let it cool down for 30 minutes. It should be still slightly warm when you begin incorporating the eggs.
- Start adding the eggs, one by one, mixing well with a spoon, spatula or with an electric mixer fitted with the dough hook.
- The final dough should be thick, but it should run off the spatula when lifted. This is the reason why you are adding eggs one by one – it allows you to control the consistency better. For the same reason, you may need the 7th egg or not. Just check the consistency once you added 6 eggs.
- Preheat your oven to 400F (200C) and line a few baking sheets with baking paper.
- Spoon the dough in a pastry bag fitted with a round nozzle and pipe small balls of dough on a baking tray lined with baking paper.
- Bake the puffs in the oven at 200C for 10 minutes then reduce the heat slightly and bake until they are golden brown and crisp. Do not open the oven’s door during the first 10 minutes of baking as the temperature difference will make them deflate!
- When done, remove the puffs from the oven and let them cool completely.
Vanilla pastry cream:
- Mix the milk, vanilla bean and half of the sugar in a heavy saucepan.
- Combine the egg yolks with the sugar and mix until creamy and light. Stir in the cornstarch.
- When the milk reaches the boiling point, remove from heat and gradually pour it over the egg yolk mixture, stirring all the time.
- Pour the mixture back into the saucepan and cook it over low heat until it begins to thicken, stirring all the time to prevent it from sticking to the bottom of the pan.
- Remove from heat and cover the cream with plastic wrap on the surface. Let it cool completely before use.
- Once the pastry cream is chilled, mix it until smooth then spoon it into a pastry bag fitted with a small round nozzle. Make a hole into each puff (I used a plastic straw for this, but you can also use a pastry nozzle. Just keep in mind to make the whole at the bottom of the puff pastry and keep is as small and subtle as possible) then fill each puff pastry with pastry cream. The cream was enough to fill all the puffs I made with the recipe above, but keep in mind that I “sacrificed” a few puffs the night before by dipping them into chocolate for a quick snack :P For this reason I recommend making 1 1/2 batches of vanilla pastry cream – that would be enough for every single puff!
- Place the filled choux pastry puffs on a platter and place aside until the caramel is ready.
Caramel glaze and spun sugar:
- Mix the sugar with water, glucose and lemon juice in a heavy saucepan.
- Place the saucepan over medium flame and bring to a boil.
- As the mixture boils and turns into a syrup, wash the sides of the saucepan with a brush dipped into cold water. This prevents the sugar crystal from forming.
- Cook the sugar syrup until it’s thick and it becomes golden.
- Remove from heat and let it cool a few minutes then begin assembling your croquembouche.
- Start by forming a base of choux puff pastries and keep adding layers of puffs dipped into caramel, shaping the entire construction into a cone as you keep adding more and more puffs. My croquembouche started with a base of 10 puffs and I kept adding puffs like this: 9-8-7-6-5-4-3-2-1 onto the next layers. Having a plan like this makes is much easier and it allows you to count how many puffs you will eventually need. Also, I recommend pairing the puffs by size and using the bigger puffs at the bottom, reserving the smaller ones for the top.
- Ideally, you will move fast enough before the caramel hardens but even if this happens, just place the saucepan back over heat and melt it back. Keep the heat on low to prevent the sugar from burning!
- Once your croquembouche is built it’s time to decorate it. I used the leftover caramel to make these caramel strands. To make these you will need a baking paper sheet and a large surface – it’s a messy job and quite dangerous as you will be working with hot melted sugar.
- Reheat the caramel leftover then take a fork and dip it into the caramel. Quickly move the fork over the baking paper sheet to form thin strands. Repeat this until you have a thick layer of strands. Work quickly and handle the strands with care. Transfer them over your croquembouche and repeat until you’ve covered it all.
- At this point you can either leave it like this, as simple as possible, or keep decorating with chocolate, almonds or even fondant flowers.
- The croquembouche is better made just before the event and served fresh because the spun sugar and caramel absorb moisture and they begin to melt quickly.
- Category: Dessert, Baking
- Cuisine: French