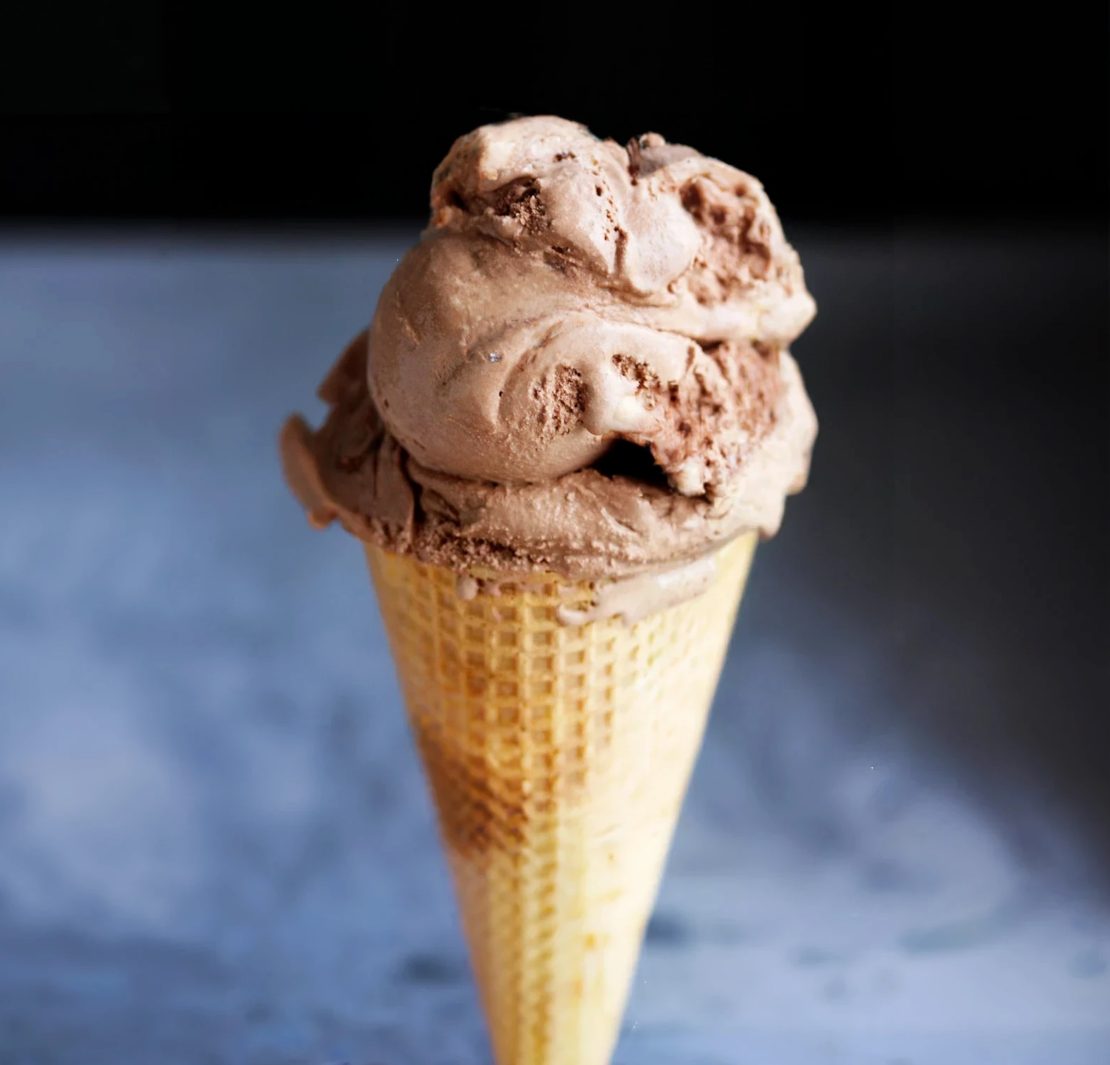
Chocolate ice cream doesn’t get any better than when it’s perfected at home. This recipe eliminates the risk for gritty, frozen ice cream.
I recently got an ice cream maker, and according to the directions, I just add half and half and cream and process. Twenty-five minutes later– Chocolate Ice Cream.
Well, yeah, it was chocolate ice cream. But gritty.
Definitely not Ben and Jerry’s New York Super Fudge Chunk. So with that initial disappointment as my guide, I researched how to make chocolate ice cream and avoid the horrid grittiness. Recipes included ingredients that varied from heavy cream to half and half to whole milk to cream cheese. Sugar was always in the mix with eggs or cornstarch offered as thickeners.
But what explained the “gritty” texture?
According to various experts, the heart of the problem lies with water. There’s water in the milk or half and half. The more water, the grittier the ice cream. Some use sweetened condensed milk or cream cheese to avoid the use of liquid milk products and their dreaded water. With every substitution, there is usually a downside. So, what’s the downside of using cream cheese or sweetened condensed milk? Some reviews criticized these recipes as not really “feeling” like ice cream in their mouths. Or not really melting. Say what now? Ice cream pretty much has to melt.
Then, I ran across David Lebovitz’s recipe for chocolate ice cream and he pretty much followed the standard 5 egg yolk recipe, but added admonitions to keep the water to a minimum. In other words, simmer the milk base and let the water evaporate. Cover the ice cream base after it’s cooled off, then watch for condensation and wipe it off so that it doesn’t end up back in the ice cream. Little steps that add up to some completely wonderful ice cream. I then made a few minor additional alterations. This recipe produces a very rich and intensely chocolate ice cream. Truly amazing.
Making your own ice cream might not be the cheapest alternative out there, but the great thing (in addition to the accomplishment and taste) is that you control the ingredients. You can make it GMO-free or organic. You can use pastured dairy products, which taste amazing.
Additionally, you can omit ingredients that may not be particularly good for you, like emulsifiers. Emulsifiers are added to make commercial mouthfeel “creamier”. You’ve seen them in the best of ice creams: polysorbate 80, soy lecithin, guar gum, and carrageenan are but a few. Recent studies have indicated that these emulsifiers may play a part in metabolic syndrome and increase inflammation by interacting with gut flora.
Lovely, I know. Who doesn’t love a good “gut flora” discussion while making ice cream? The emulsifiers are needed to keep the ice cream smooth during its trip from the factory to the store and your house when temperatures are so variable and melting and refreezing occurs.
When you make your own ice cream, there is no travel time, so no need for emulsifiers.
Get out your ice cream maker and give this a go. I promise you won’t be disappointed and you’ll finally be making ice cream on your terms.
How to Make Homemade Chocolate Ice Cream Without Grittiness
1. Chocolate Cream Preparation:
- In a medium saucepan, warm 1 cup of the heavy cream over moderate heat.
- Gradually whisk in the Dutch-process cocoa powder, ensuring there are no lumps and the cocoa blends seamlessly with the cream.
- Allow the mixture to come to a boil. Then, reduce the heat and let it simmer for about 30 seconds, continuing to whisk to avoid burning.
- Remove the saucepan from heat. Add the finely chopped bittersweet chocolate to the cocoa-cream mixture, stirring consistently until the chocolate is melted and the mixture is smooth.
- Add the remaining 1 cup of heavy cream, mixing well.
- Pour the entire chocolate cream mixture into a large bowl, ensuring you scrape the saucepan to get every drop. Place a mesh strainer over this bowl.
2. Custard Base Creation:
- Without cleaning the saucepan, pour in the whole milk, granulated sugar, and a pinch of salt. Warm over medium-low heat, stirring occasionally until the sugar dissolves.
- In a separate medium bowl, whisk the 5 large egg yolks until smooth.
- To temper the egg yolks, slowly pour the warm milk mixture into the yolks, whisking constantly. This gradual addition prevents the yolks from cooking and turning into scrambled eggs.
- Once the yolks are warmed and thoroughly combined with the milk, pour the mixture back into the saucepan.
3. Custard Cooking and Combination:
- Over medium heat, stir the custard mixture constantly with a heatproof spatula. Make sure to scrape the bottom of the saucepan as you stir.
- Continue stirring until the mixture thickens enough to coat the spatula, which should register around 170°F on an instant-read thermometer.
- Carefully pour the custard mixture through the mesh strainer placed over the bowl with the chocolate cream mixture. Use your spatula to push the custard through the strainer and ensure all elements are combined.
- Stir the custard into the chocolate cream mixture until smooth.
- As the combined mixture starts to cool, stir in the vanilla and chocolate extracts.
- Cover the mixture and place it in the refrigerator. Occasionally check for any condensation and wipe it off from the lid and sides of the container.
4. Chilling and Churning:
- Allow the ice cream mixture to chill thoroughly, which can take up to 8 hours. This ensures the mixture churns perfectly in the ice cream maker.
- Before pouring into the ice cream maker, if the mixture seems too thick, whisk it vigorously to achieve a pourable consistency.
- Finally, churn the ice cream mixture in your ice cream maker following the manufacturer’s instructions.
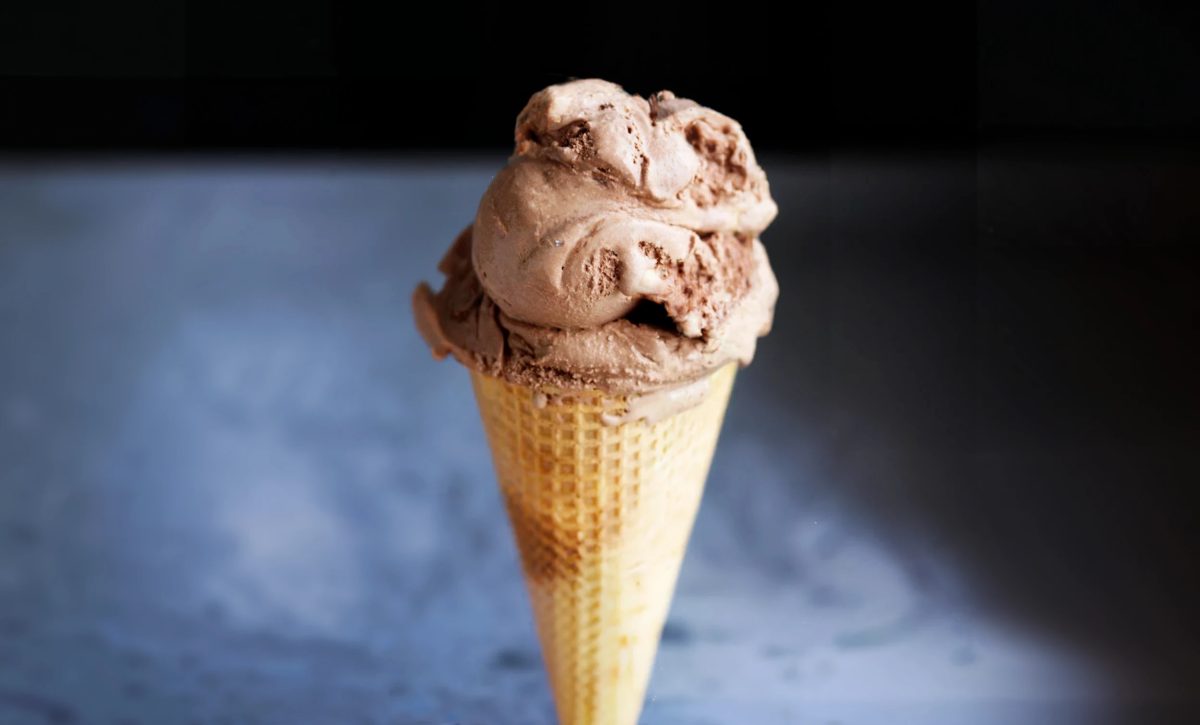
How to Make the Perfect Homemade Chocolate Ice Cream
- Total Time: 0 hours
- Yield: 1 quart 1x
Description
Chocolate ice cream doesn’t get any better than when it’s perfected at home. This recipe eliminates the risk for gritty, frozen ice cream.
Ingredients
- 2 cups heavy cream
- 3 tablespoons unsweetened Dutch-process cocoa powder (I used regular cocoa powder)
- 5 ounces bittersweet chocolate (chopped (I used Ghiradelli <g class=”gr_ gr_127 gr-alert gr_spell gr_disable_anim_appear ContextualSpelling ins-del multiReplace” id=”127″ data-gr-id=”127″>bitterwseet</g>))
- 1 cup whole milk
- 3/4 cup granulated sugar
- Pinch of salt
- 5 large egg yolks
- 1/2 teaspoon vanilla extract
- 1/2 teaspoon chocolate extract
Instructions
1. Chocolate Cream Preparation:
- In a medium saucepan, warm 1 cup of the heavy cream over moderate heat.
- Gradually whisk in the Dutch-process cocoa powder, ensuring there are no lumps and the cocoa blends seamlessly with the cream.
- Allow the mixture to come to a boil. Then, reduce the heat and let it simmer for about 30 seconds, continuing to whisk to avoid burning.
- Remove the saucepan from heat. Add the finely chopped bittersweet chocolate to the cocoa-cream mixture, stirring consistently until the chocolate is melted and the mixture is smooth.
- Add the remaining 1 cup of heavy cream, mixing well.
- Pour the entire chocolate cream mixture into a large bowl, ensuring you scrape the saucepan to get every drop. Place a mesh strainer over this bowl.
2. Custard Base Creation:
- Without cleaning the saucepan, pour in the whole milk, granulated sugar, and a pinch of salt. Warm over medium-low heat, stirring occasionally until the sugar dissolves.
- In a separate medium bowl, whisk the 5 large egg yolks until smooth.
- To temper the egg yolks, slowly pour the warm milk mixture into the yolks, whisking constantly. This gradual addition prevents the yolks from cooking and turning into scrambled eggs.
- Once the yolks are warmed and thoroughly combined with the milk, pour the mixture back into the saucepan.
3. Custard Cooking and Combination:
- Over medium heat, stir the custard mixture constantly with a heatproof spatula. Make sure to scrape the bottom of the saucepan as you stir.
- Continue stirring until the mixture thickens enough to coat the spatula, which should register around 170°F on an instant-read thermometer.
- Carefully pour the custard mixture through the mesh strainer placed over the bowl with the chocolate cream mixture. Use your spatula to push the custard through the strainer and ensure all elements are combined.
- Stir the custard into the chocolate cream mixture until smooth.
- As the combined mixture starts to cool, stir in the vanilla and chocolate extracts.
- Cover the mixture and place it in the refrigerator. Occasionally check for any condensation and wipe it off from the lid and sides of the container.
4. Chilling and Churning:
- Allow the ice cream mixture to chill thoroughly, which can take up to 8 hours. This ensures the flavors meld and the mixture churns perfectly in the ice cream maker.
- Before pouring into the ice cream maker, if the mixture seems too thick, whisk it vigorously to achieve a pourable consistency.
- Finally, churn the ice cream mixture in your ice cream maker following the manufacturer’s instructions.
- Prep Time: 30 mins
- Chilling Time: 8 hrs
- Cook Time: 30 mins
- Category: Dessert
- Method: Freezing
- Cuisine: American

holy C O W
the blueberry/lemon squirt/ginger sorbet that is to die for in the summer or winter now ranks A-
compared to Honest Cooking’s challenger Homemade Chocolate Ice Cream.
In the batch I made three times however, choosing a combination 70% Ghiradelli bar (2 squares)
and a handful Nestles bittersweet morsels to make 5 oz. of solid chocolate added to the cream
and sugar makes a distinguishable flavor. Nice recipe and lovely color too!
Drew thedrewpot1@gmail