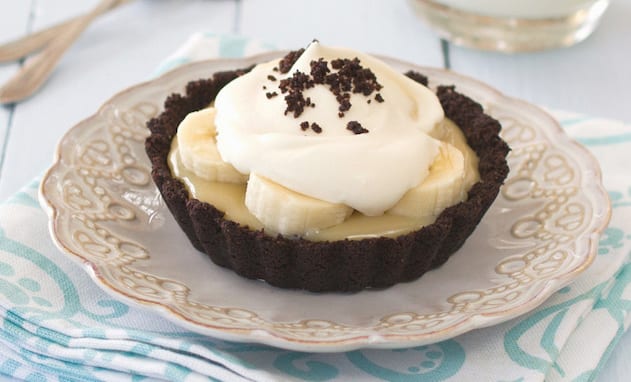
This little number is undeniably rich and sweet, but man is it worth it. The filling is even touched with a hint of rum, if desired.
By Susan Knaap
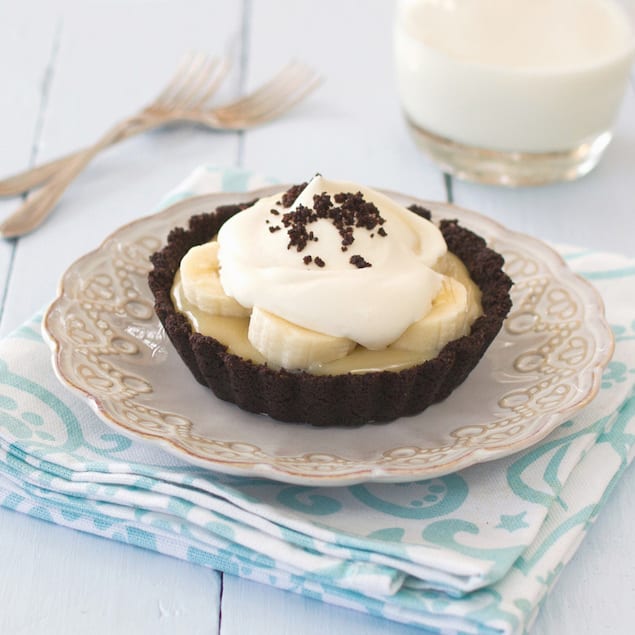
Who doesn’t love banoffee? Bananas and caramel are a well-deserved match made in heaven. Add to that softly whipped cream and a dark chocolate biscuit crumb and you have the stuff of dreams. And hey, a dash of rum naughtily thrown in at the last minute – even better.
Thanks to Taste.com.au for this recipe. I adapted it somewhat, adding rum to the caramel mixture, using gluten-free dark chocolate biscuits instead of plain ones, and baking the base instead of chilling it, which is just personal preference. I do suggest that you use a bit of intuition around how much biscuit and melted butter to use – personally I found I only needed around 200g of biscuits and about 90g melted butter, but it will depend on what type of biscuit you use. My recommendation is that when you process the biscuits, add the butter gradually – you’ve added enough when the crumbs starts to clump a little as you process it, and when you pinch some of it between your fingers it holds together.
The main thing, with the caramel, is to take it slow and easy – neither under-cooking it so that it doesn’t set, nor over-cooking it till it becomes like boot leather. When it’s cooked, you should be easily able to pour it into the tart bases, after which it will start to set fairly quickly (just to note – adding rum will make the mixture a little looser than normal, however it will still set). After at least one to two hours, you’ll find that the surface is no longer tacky when touched, yet when you come to eat it, the caramel will slowly ooze over the tines of your fork – perfection!
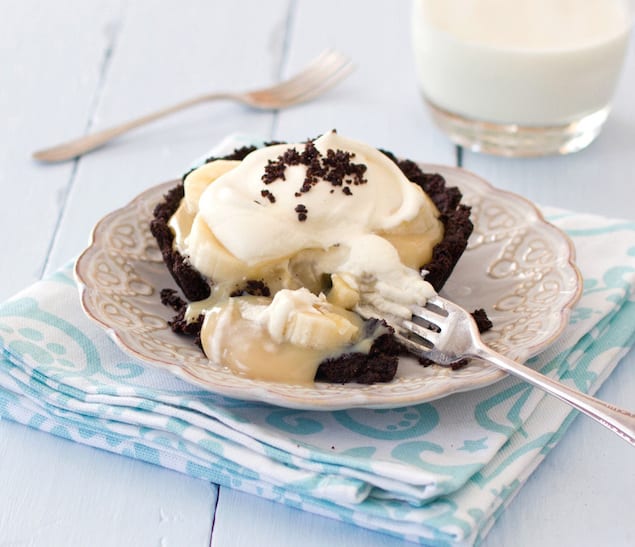
Banoffee Chocolate Tarts
Description
This little number is undeniably rich and sweet, but man is it worth it. The filling is even touched with a hint of rum, if desired.
Ingredients
- 1 x 250g pkt (8.8 ounces) dark chocolate or ginger biscuits (I used home-made gluten-free chocolate biscuits and halved the recipe)
- Approx. 125g (4.4 ounces) butter, melted (I used about 90g)
- 395g can (14 ounces) sweetened condensed milk
- 70g (2.5 ounces) (1/3 cup, firmly packed) brown sugar
- 50g (1.7 ounce) butter
- Optional: 1 tablespoon rum
- About 2 bananas
- 300ml (10 fluid ounces) double cream, softly whipped
Instructions
- Place the biscuits in the bowl of a food processor and process until finely crushed. Add the butter gradually to the processor until the mixture starts clumping together, but isn’t too wet.
- Divide the biscuit mixture among six round 8cm (base measurement) fluted tart tins with removable bases. Use the back of a metal spoon to firmly press the biscuit mixture over the base and side of each tin. Place in the fridge until required. Alternative: Place on a baking tray and bake for 8-10 minutes in preheated oven set to 190°C (375°F).
- To make caramel filling, place condensed milk, sugar, butter (and rum if using) in a medium saucepan over low heat. Cook, stirring constantly with a wooden spoon, for 10-12 minutes or until caramel thickens (do not boil). NB: The trick to this is a low heat and patience – right towards the end it will suddenly get thicker like custard.
- Pour the hot caramel evenly among biscuit bases. Cover lightly with plastic wrap or foil (not directly over the caramel surface) and place in the fridge for at least 2-3 hours to chill.
- Peel and slice bananas and arrange over the caramel filling. Top tarts with a dollop of cream and serve immediately. I sprinkled extra biscuit crumbs over top.
- Category: Dessert, Baking